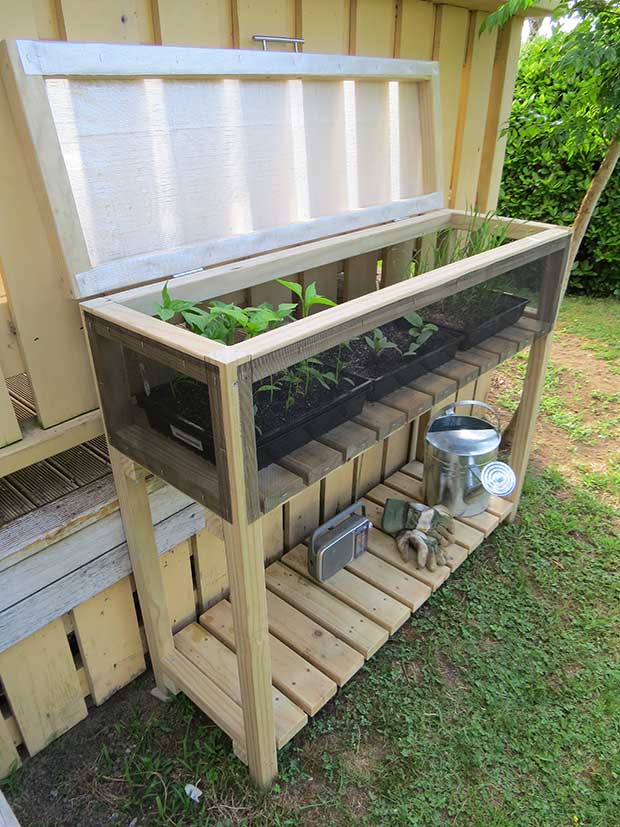
DIY: Make a weather-resistant propagation station

A cost-effective way to repurpose old timber that is part potting table and part mini-greenhouse.
Words and photos: Julie Legg
This propagation station is built to be waist height for ease of use, and has weather-resistant UV plastic and mesh sides for ventilation.
It’s possible to adapt these plans by upcycling an old barbecue frame and repurposing a disused outdoor table as the stand. An old rabbit hutch, a crate or wooden pallet can be converted into the propagation box.
MATERIALS
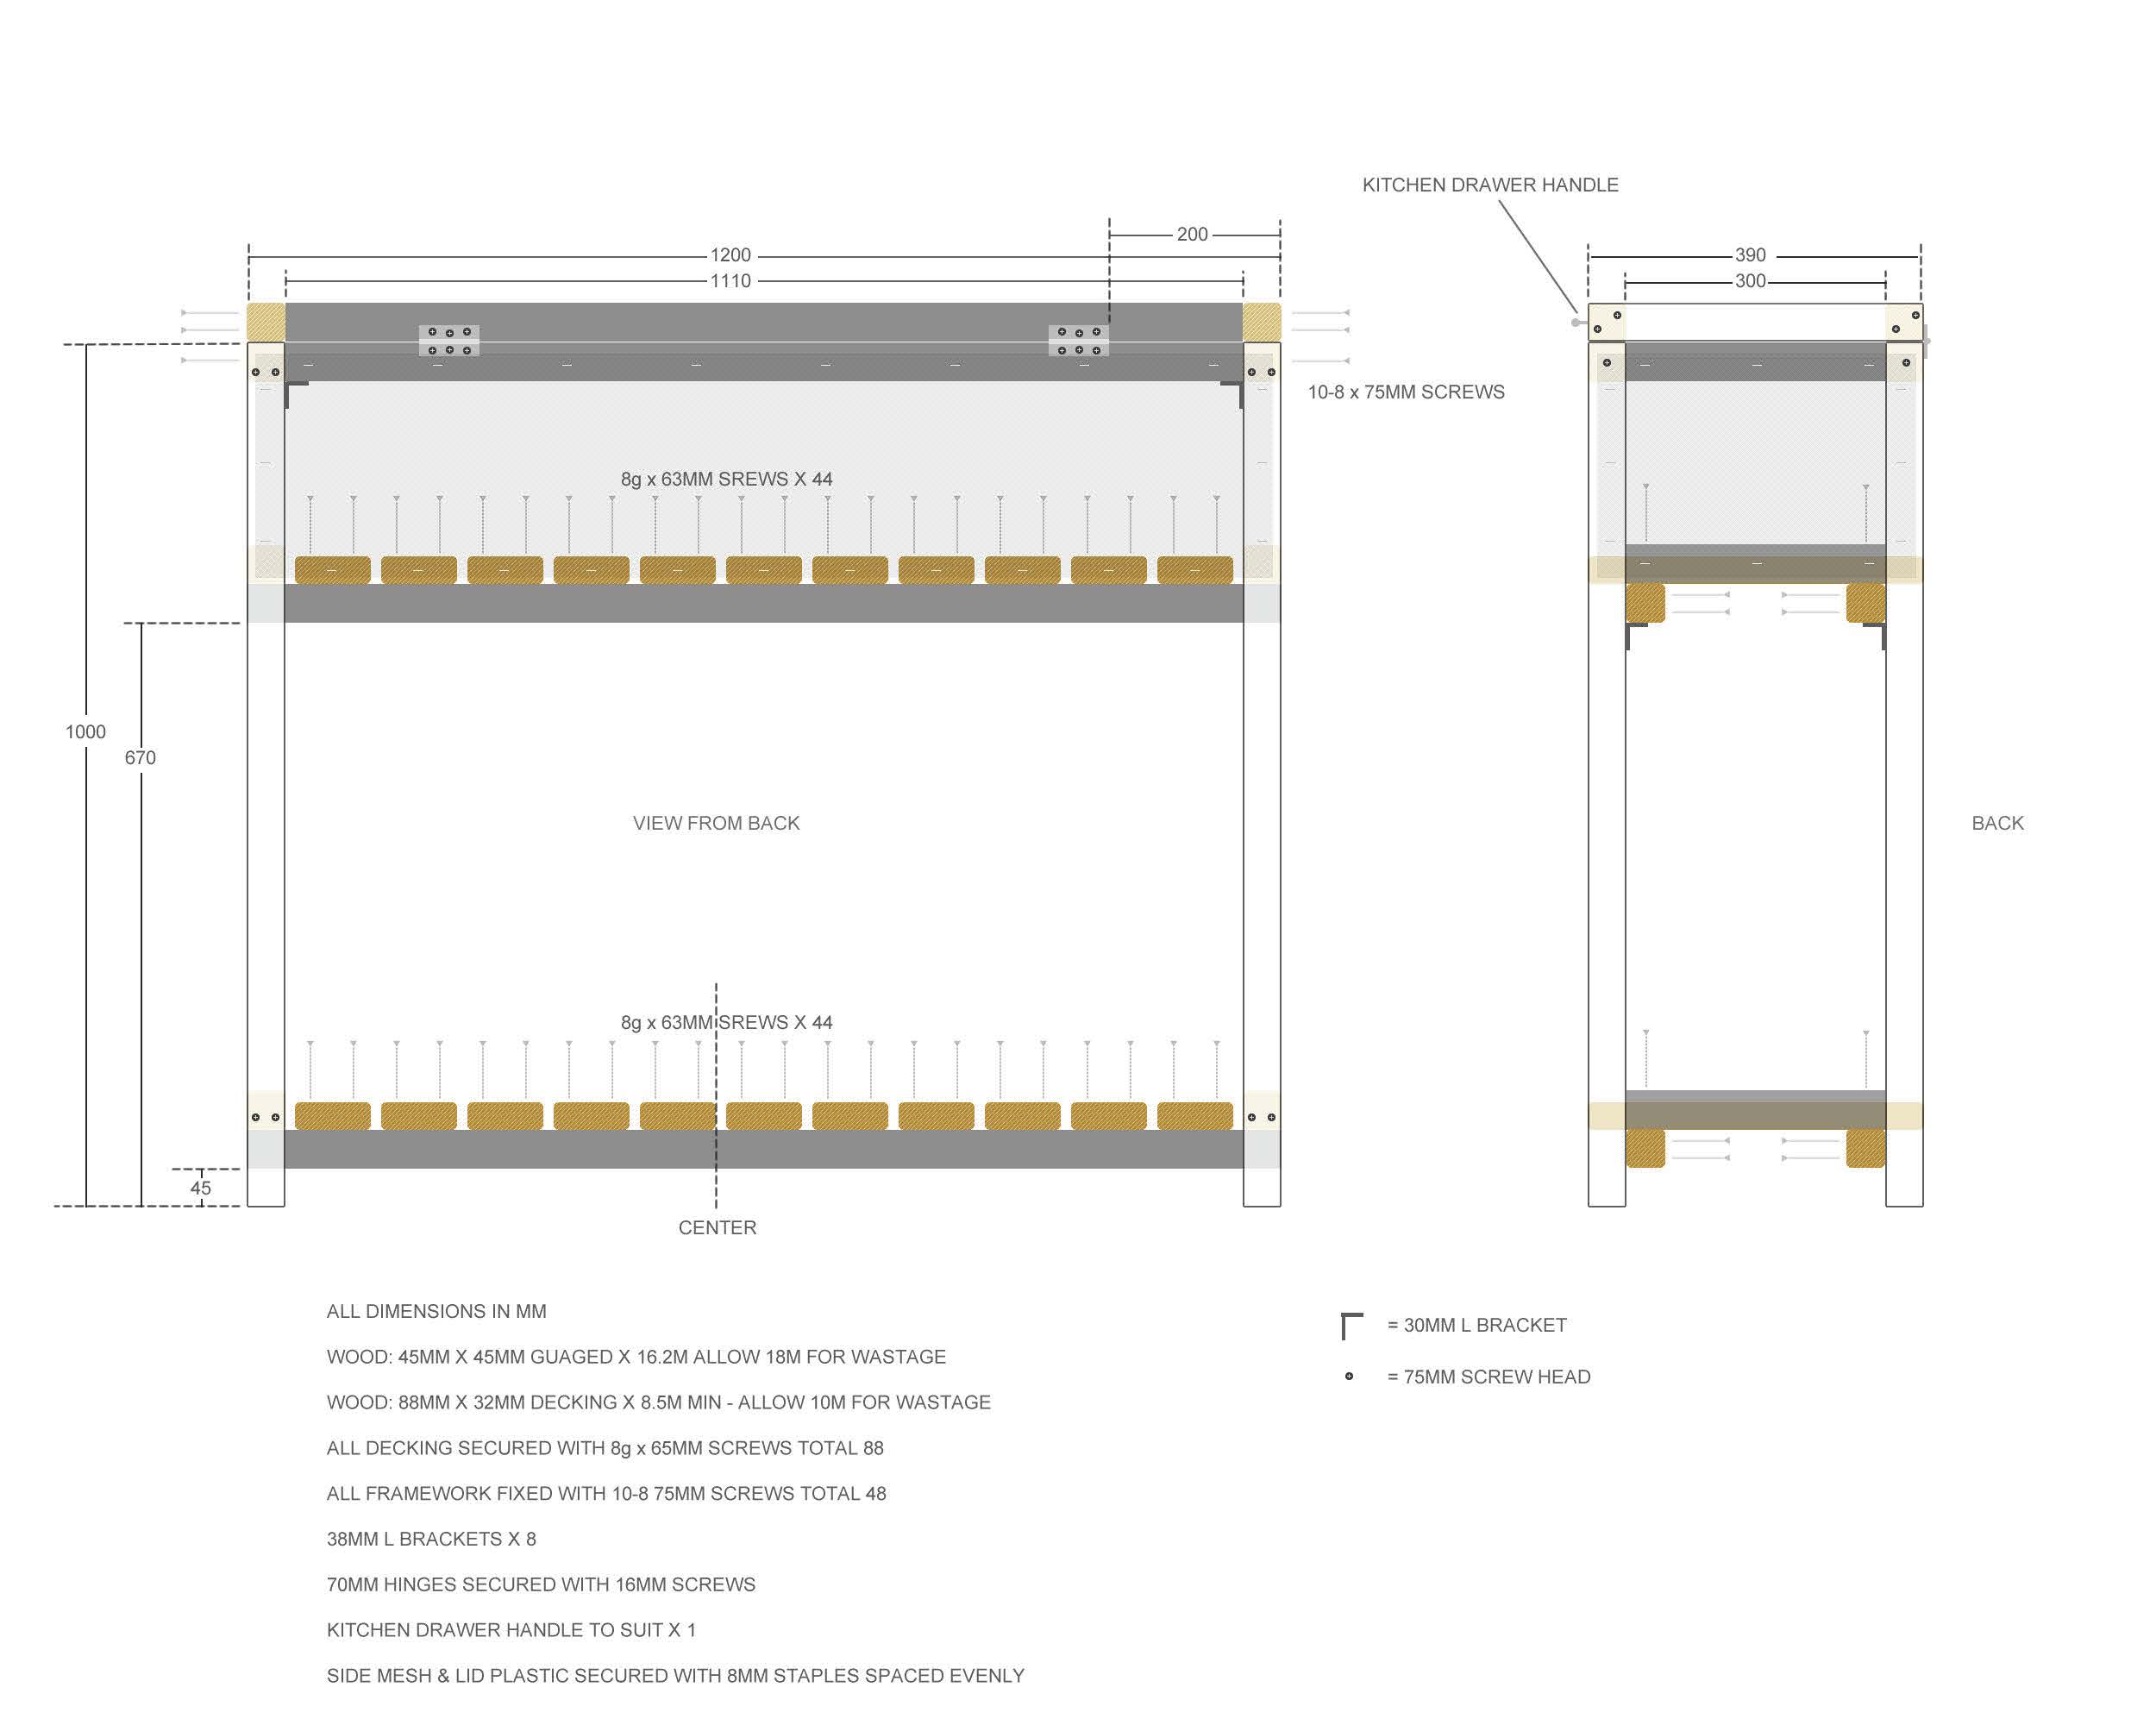
18m of 45x45mm gauged wood, cut into lengths of 4 x 1m,
4 x 1.2m, 6 x 300mm, 4 x 1110mm and 2 x 390mm
48 x 75mm galvanised countersunk timber screws for 45 x 45mm framing
10m of 35 x 88mm standard decking timber
88 x 63mm screws for decking timber
8 x 38mm L-brackets
Roll of 910mm x 2050mm aluminium insect screen or wire mesh
1.2m x .5m plastic polythene or glasshouse woven plastic
2 x 70mm hinges
12 x 8g x 16mm timber screws for hinges
Kitchen cupboard handle
Equipment Saw, drill, chocks, clamp, staple gun and staples, Stanley knife, scissors
INSTRUCTIONS
Stand
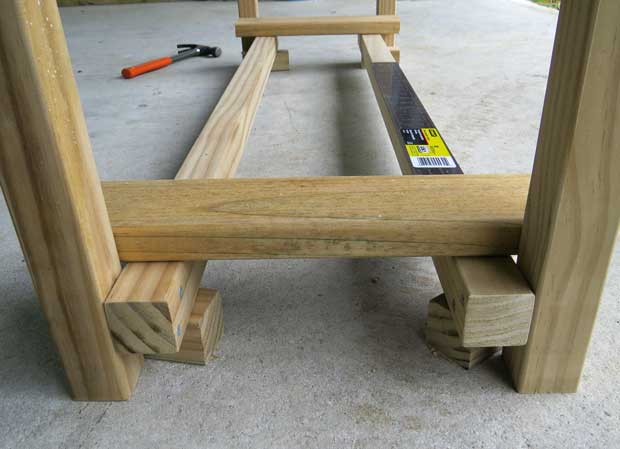
STEP 1: For each front and back frame side, vertically lay 2 x 1m lengths of 45 x 45mm and place 2 x 1.2m lengths horizontally on top: one 45mm and one 670mm from base of verticals. Affix each connecting length with 2 x 75mm screws.
STEP 2: Stand frames upright to face each other (the horizontal lengths facing inwards). Chock with blocks so they stand self-supported.
Shelves
STEP 3: Cut decking into 22 lengths of 390mm slats. To make the lower shelf: place 11 slats between front and back frames, resting on the lower horizontal supports. Evenly space slats (about 12mm between each) and adjust where necessary to ensure edges sit flush with outside legs of the frame. A length of wood clamped to each leg can act as a straight edge for the slats.
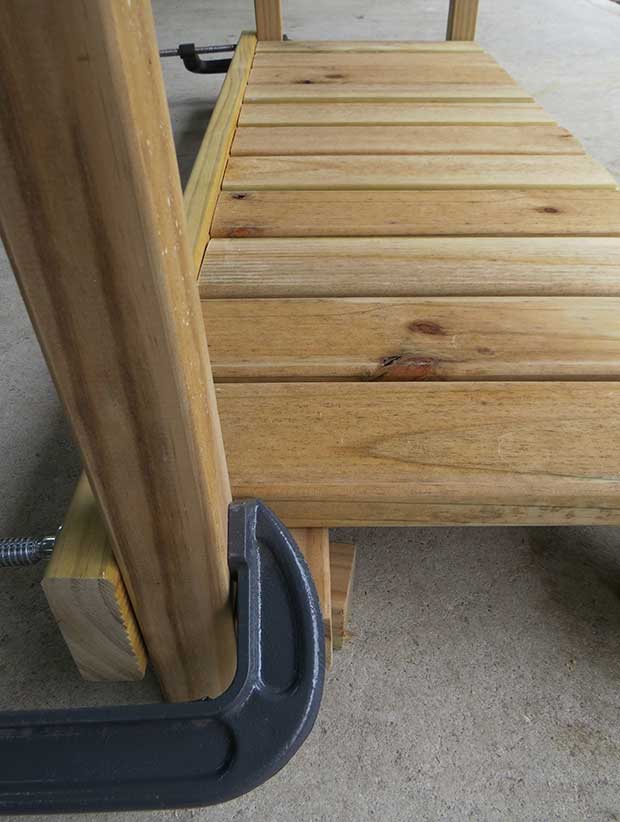
STEP 4: Screw slats into place with 4 x 65mm screws per slat.

STEP 5: To make the upper shelf, repeat as above with remaining 11 slats, spacing them evenly apart and screwing them into place.
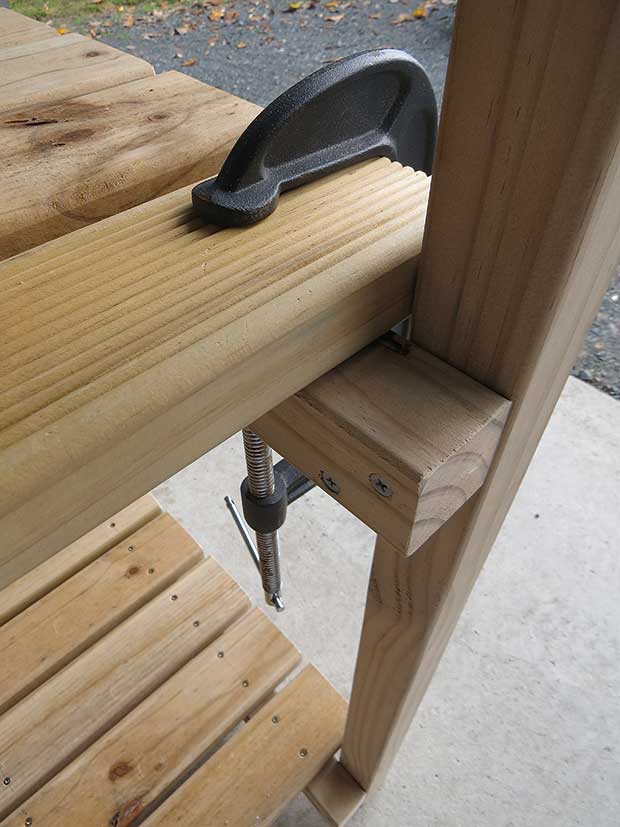
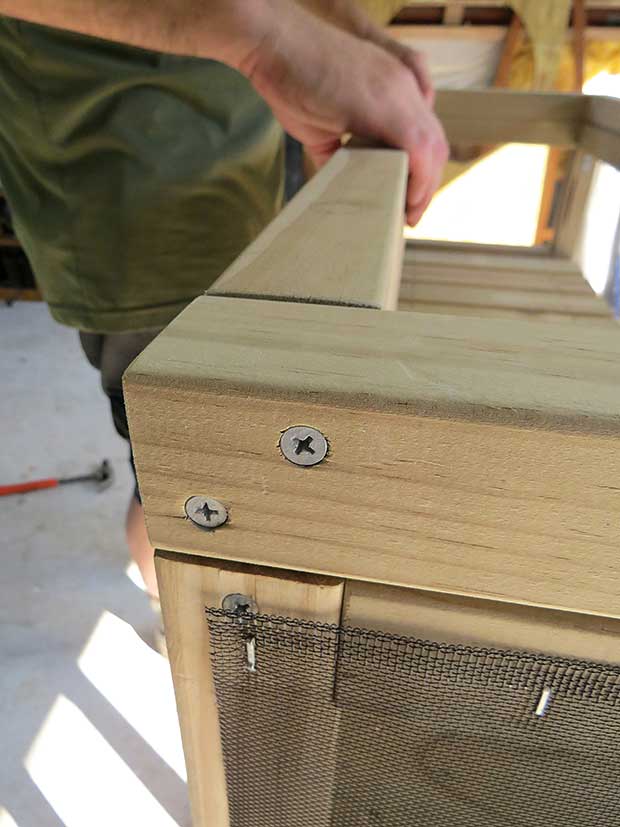
Tip: For strength and rigidity, screw an L-bracket into each corner under the top shelf, connecting the horizontal length with each adjoining vertical leg.
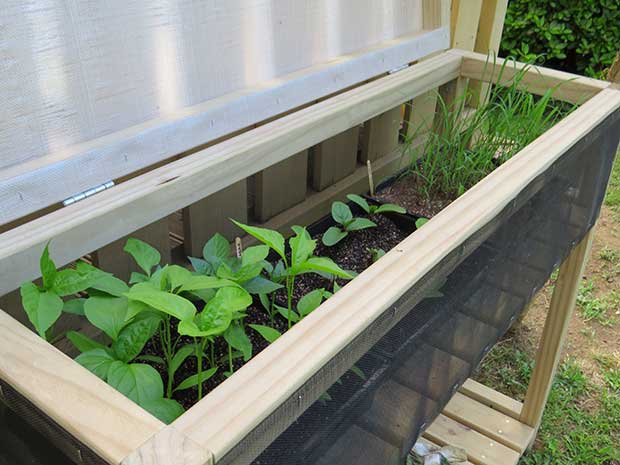
Seedling box
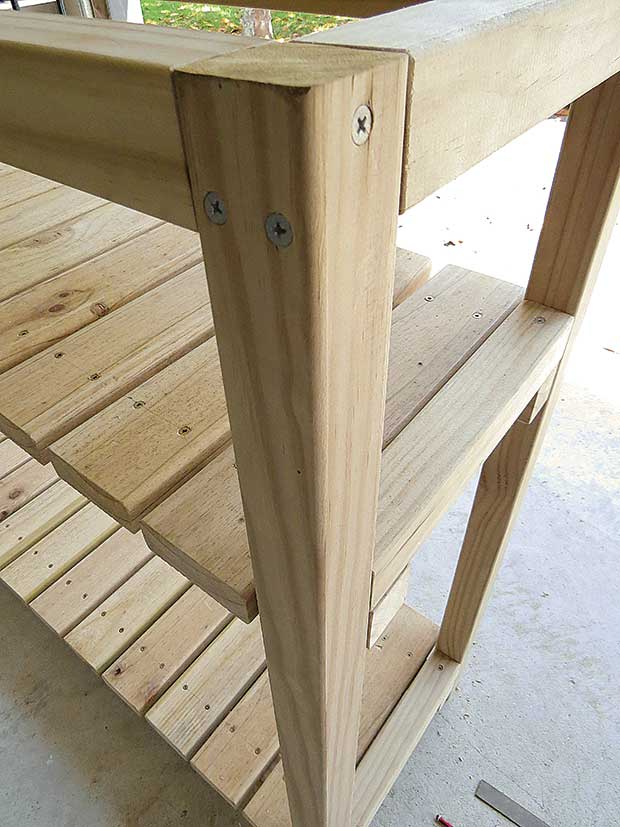
STEP 6: Screw a 300mm x 45 x 45mm length of timber onto each narrow end of the frame to box it in: lower shelf, upper shelf and top of frame. Repeat on other side. To complete the box frame, screw a 1110mm length of 45 x 45mm onto each long side of the top frame. For strength and rigidity, screw an L-bracket into each corner under the top of the frame connecting the horizontal length with each adjoining vertical leg.
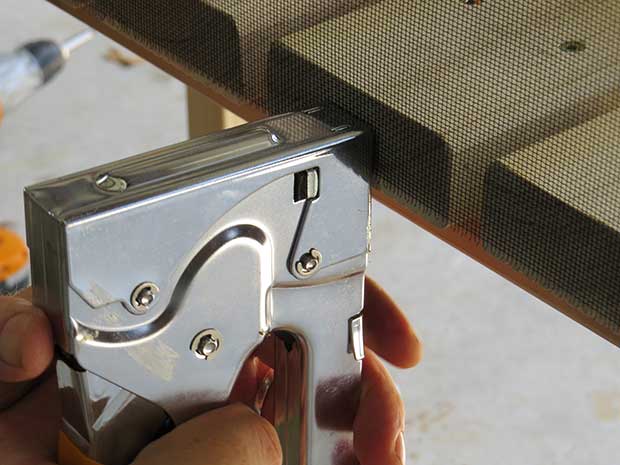
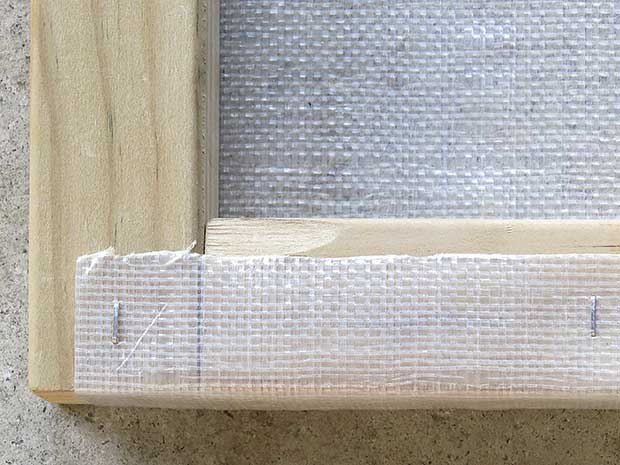
STEP 7: Use a Stanley knife to cut 2 x 1170 x 270mm pieces of mesh for sides and 2 x 360 x 270mm for ends. Staple to outside of upper shelf, enclosing the box on all 4 sides.

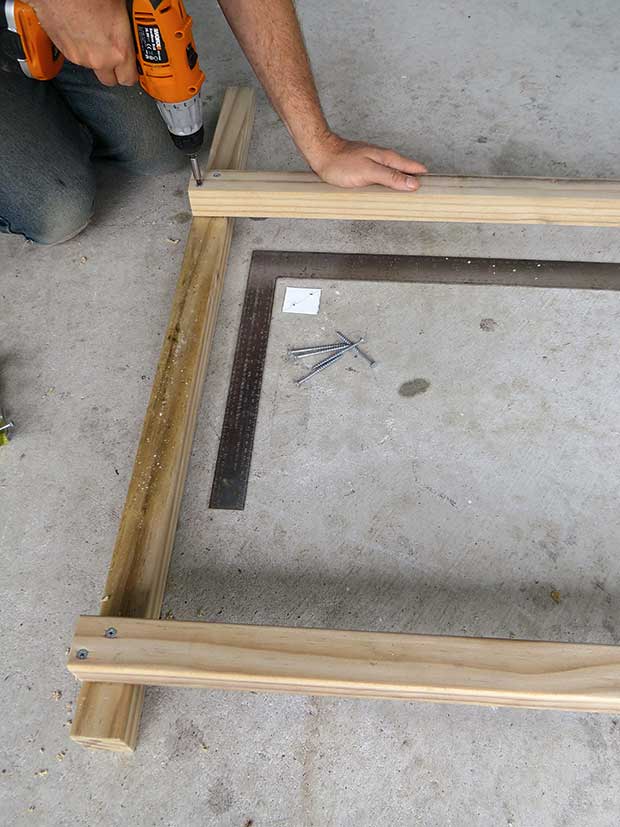
STEP 8: Create the lid by screwing 2 x 390mm and 2 x 1110mm together to fit top of frame, using 8 x 75mm screws.
STEP 9: Cut and attach a 1.2 x 0.5m piece of plastic over the outside of lid, stapling and trimming where necessary.
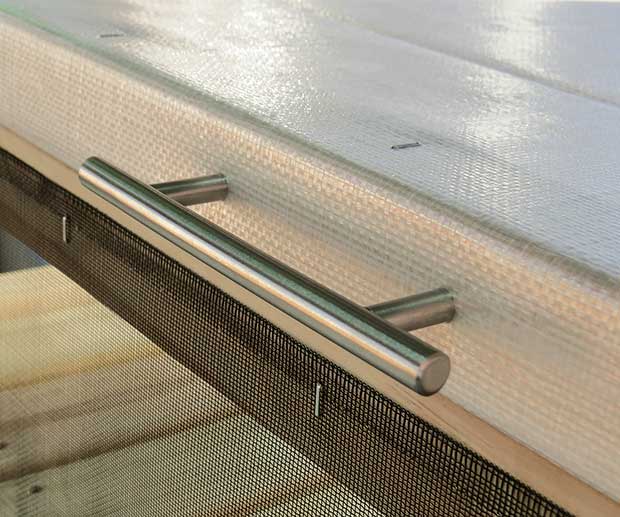
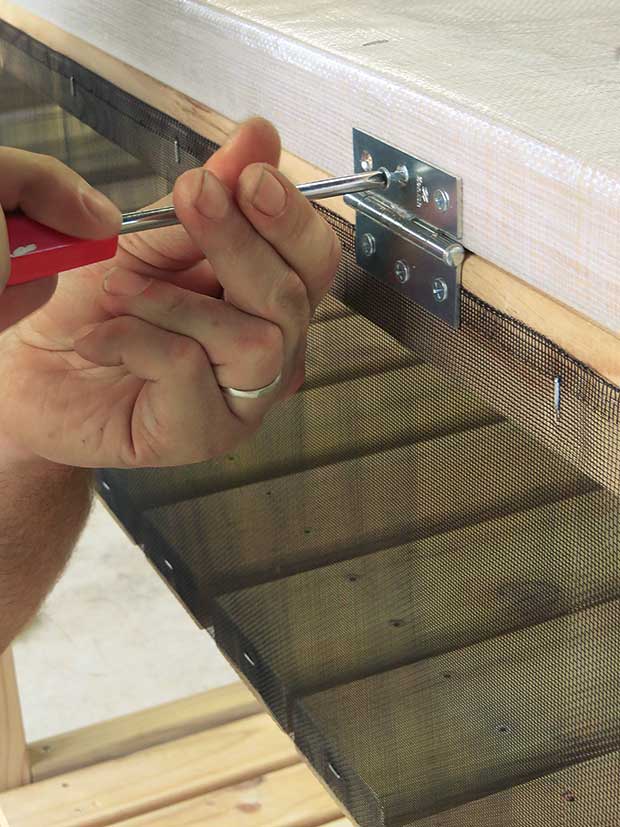
STEP 10: Attach handle to front of lid and hinges to the back.
TIPS:
• Buy 10-20% more timber to allow for cutting errors
• Ensure you buy straight timber to prevent warping
• Where possible, repurpose insect netting, plastic, old kitchen handles and wood offcuts
The step by step instructions to this project appear in our special edition In Your Backyard: Urban Harvest.
Download the Propagator Station Diagram pdf
This project appeared in In Your Backyard: Urban Harvest, a special edition of NZ Life & Leisure about growing food in small city spaces. Packed with advice such as how to start a productive veggie garden, the best crops, creating awesome soil, vertical growing, container gardening, hydroponics, espaliered trees and edible hedges.
The latest In Your Backyard edition is available here.