Garden jobs for August
Spring is just around the corner, get ready by planting tomato seedlings and aubergines.
Words: Jane Bellerby
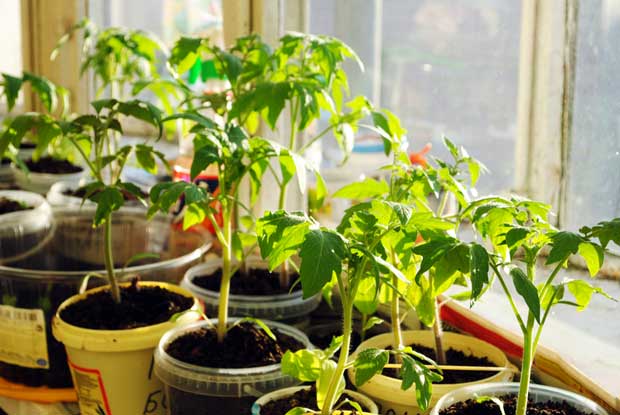
Start growing tomato seedlings on window sills in preparation for spring.
GARDEN WORK FOR AUGUST
• Spread fertiliser around plants to sustain new emerging growth.
• Ensure weeds are gone.
• Start planting out hardy annuals to fill in any gaps.
• Division of perennials can still be done. The plants will soon settle in and take advantage of the increasing warmth.
• It’s time to get busy on soil preparation in the vegetable garden as the season warms and the urge to plant fresh food strengthens.
• Seedlings of long growing summer plants such as tomatoes and aubergine can be started and sown in pots and kept in a warm spot.
• Hardy lettuce, rocket, coriander and parsley can all be sown or planted out.
• Make sure garlic is well mulched as it powers into growth.
TOMATOES MADE EASIER
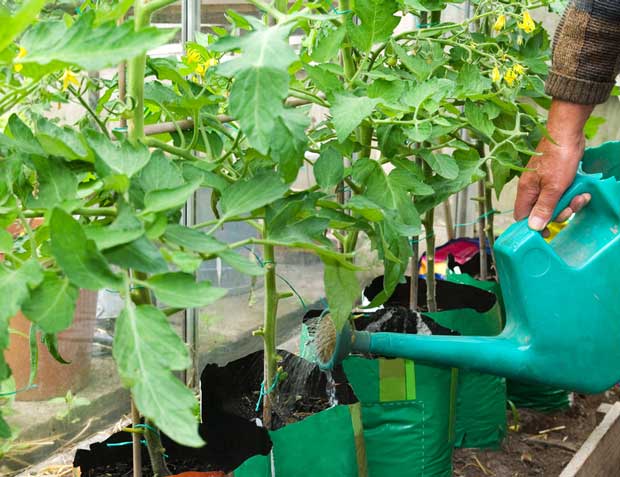
Short of space, consider growing tomato plants in the Florida Weave formation.
Growing tomatoes can be a never-ending, time-consuming business, especially if you like to grow a lot of different varieties.
But the ‘Florida weave’ system takes a lot of the hassle out of keeping your tomato plants tidy and healthy. Note: this is for determinate varieties that tend to grow to about 1.5m high.
Young tomato seedlings should be transplanted out at 60cm spacings in a straight row. Bang in some strong support stakes like waratahs at each end and between every second plant.
Once plants are around 30cm high, tie some gardening twine to the first stake at about the 15cm mark and weave it through the plants, looping it around each stake until it is tight, then around the stake at the end and weave back along the row, tying it off to the first stake. Repeat about once a week or when your plants have grown 15-20cm until your tomatoes reach their adult height.
Watch this video for more information on The Florida Weave.
IN THE VEGETABLE GARDEN
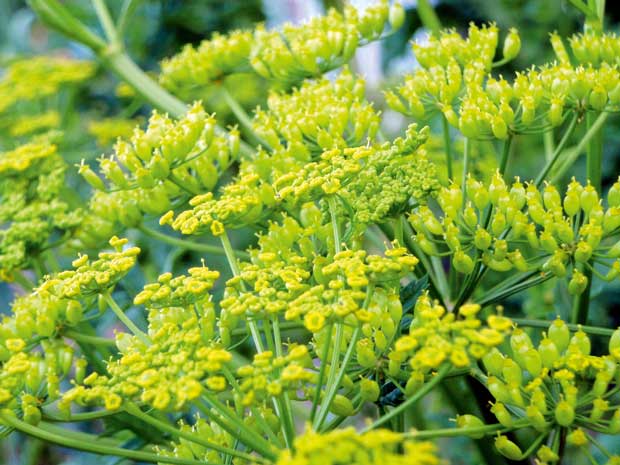
Jane’s Parsnip flowers
In August your thoughts begin to turn to warm season eating, so as the winter rotations of brassicas, carrots, parsnips and yams begin to finish, we can start thinking of sowing spinach, silver beet, peas and lettuce. Soon after that it’s time for parsnips.
We have found through trial and error that it is best to plant parsnips in early spring as this long-maturing crop needs plenty of time to grow to a good size and provide eating for both mid-to-late summer and the following winter. Roasted, mashed, in soups, casseroles and curries, all are good ways to enjoy parsnips.
Parsnip seed needs to be fresh, and because germination is sometimes erratic we plant the whole packet by scattering the seeds down rows of finely-worked soil. Avoid any fresh fertiliser for this root crop. Instead, plant it into ground well fed from a previous heavy feeding crop such as any of the brassicas.
Keep the soil moist and weed-free and thin plants to final spacings of about 8cm. We thin a couple of times, the first time to make sure no plants are right beside each other and the second to gain final spacings. By the time of the second thinning the parsnip roots are usually
big enough to toss into the roasting pan with other root vegetables such as carrots and beetroot.
Fertility can be maintained with the application of well-made compost or well-rotted manure. Avoid fresh nitrogen which, as with carrots,
will cause forked roots which become a hassle to process in the kitchen. Parsnips hold well in the ground during the winter months.
About now there is a rush of parsnip eating so we don’t waste the remains of the crop as the weather warms and they begin to put out new green tops and prepare to flower. However, seed can be saved from non-hybridised origins.
Let the plant send out its flower stalk, enjoy the colours of lime green and yellowy flowers, then the browns of setting seed, before gathering the seed when it is fully mature and dry on the plant. Seed can be kept in a paper bag in a warm dry place and then sown as spring comes round again.
IN THE FLOWER GARDEN
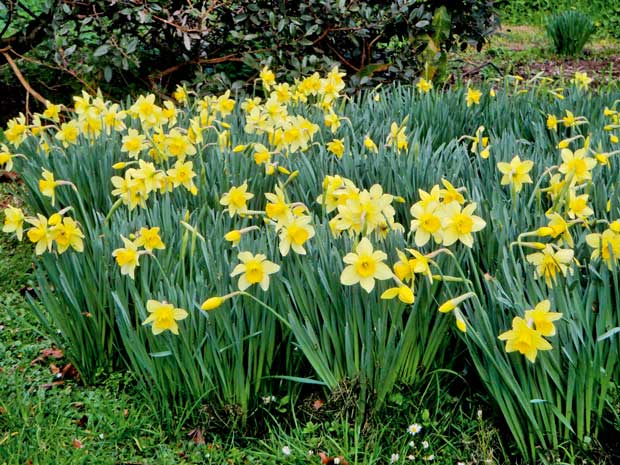
Daffodils growing in Jane’s garden.
It’s daffodil month and all over the country we can enjoy these wonderful gold and yellow flowers. Forget about the challenges of mud, wind, rain and the chill remnants of winter and allow yourself to soak up the gorgeous sunshine colours of daffodils as they glow in your garden.
Daffodils are high on my list of desirable plants because they are beautiful, minimal care, reliable and they increase in number as the years go by, although that can lead to overcrowding.
When my partner Brett first moved here in 1981 he filled an onion bag with daffodil bulbs from one of the early European gardens in Golden Bay. I think he started out by carefully planting them but in the end he just shoved them in and that’s where they are to this day.
They’ve thrived and spread about the place so come springtime there is a good blast of yellow from these old-fashioned daffodils. They’ve spread to paddocks and alongside pathways and these are great easy care plants to have in with animals as stock don’t interfere
with them.
Garden work gets done around here on a ‘gotta sort that now’ basis so yet another season rolls around and we still haven’t got around to dividing and replanting the lawn daffodils. It’s something we’ve talked about for years but it hasn’t happened yet!
They continue to flower, continue to give great pleasure and continue to keep coming up so they can’t be that overcrowded or hungry or compacted by years of foot traffic.
Around mid-June each year we begin to avoid the daffodil patches in the grass as soon as we can feel the shoots pushing through. There is a certain crunch underfoot. Sometimes I toss a bit of bagged fertiliser over them, but not too much as I certainly don’t want to be feeding the grass. These beautiful plants are a constant reminder that left to herself, Papatuanuku (Mother Earth) will grow what she will grow,
with or without human interference.
Planting swathes of bulbs in the autumn is fun and easy. The word that comes to mind is ‘naturalise’ but of course there is nothing natural about the initial process. First there is the acquisition of bulk bulbs which are relatively easy to come by.
Bulb merchants in this country seem able to supply plenty at a reasonable cost. Otherwise it’s a case of gathering up a few bulbs here and there and patiently waiting for them to increase their flowering power. Collecting and saving seed is also possible, but it takes seven years for a daffodil seed to become a flowering bulb.
You can get special bulb planting tools but the job is easily done with a sharp shovel. Dig the shovel in, pull the earth aside and drop the bulb in so it is covered by a depth at least as much as the size of the bulb. Then use your heel to firm it in and move on to the next one. Working as a team and having someone drop in the bulb and heel it in will make the job go even more quickly.
After flowering is over we leave the daffodils to die down of their own accord. The bulbs are replenished from the strappy leaves so cutting them off with the lawnmower too soon will effectively starve them. I mow them off about mid-November because about then I want the lawn space back in time for our annual tea party.
