How to make fruit leathers
The ultimate guide to the do’s and don’ts of fruit leather.
Words: Marina Steinke
Most fruits that are available for free or almost free are windfalls and over-ripe fruit. These are not suitable for dehydrating raw but they are very well suited for making fruit leathers, also known as fruit roll-ups. However, there is a big difference between what you produce in your own dehydrator and some commercially-produced fruit treats, which can be as low as 3% fruit. Your home-dried leathers will have one ingredient: fruit.
THE BEST FRUIT FOR FRUIT LEATHERS
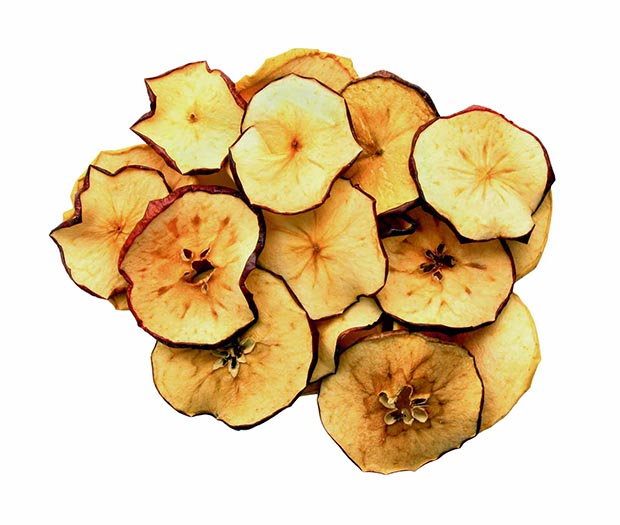
Our favourite fruit leathers are made of a mixture of about 50% apples and 50% plums and prunes. As with dehydrating, the later varieties are not as juicy as the earlier varieties and so make a thicker puree and therefore thicker and more pliable fruit leathers. Apples are also a great filler if you have some surplus strawberries or cherries: 80% apple and 20% strawberries or cherries makes a most delicious fruit leather. Raspberries and blueberries are suitable but will add a lot of seeds to the end product. Most other berries have too many seeds to make a palatable fruit leather. Apricots and peaches with apple are delicious and so are pears. Fruit leathers made solely from apples or pears tend to develop gaps during the dehydration process due to too much fibrous material which makes them difficult to roll up.
We find nashis unsuitable for making fruit leathers. They are too watery and what is left once the water has evaporated is a lot of tasteless fibre. Adding a single large nashi to a pot of fruit for making fruit leathers tends to result in coarse leathers with lots
of holes. Citrus fruit adds a bitter taste which doesn’t appeal to us. Most fruit leathers we make are a mixture of whatever fruit is left over after filling up the dehydrator with raw fruit halves or slices. The possibilities are endless and even quinces, mixed with apple, make a most delicious fruit leather. Don’t be afraid to be creative. I often have a small pot beside a big pot on the stove, the small pot for a new combination and the bigger one for an old favourite.
PREPARING AND COOKING THE FRUIT
All fruit should be washed. We also remove everything we wouldn’t want to eat raw like pips, worm holes and bruises, before cutting the fruit into thumb-size chunks. Plums, prunes and other stone fruit are cut in half to remove the stones. Mouldy and rotten bits are cut out very generously and discarded. We leave skins on. It is better to start with a small pot as large pots which hold 4 litres of water or even more take a lot longer to bring to a gentle boil. Fill the pot with chunks of cleaned fruit. The juiciest fruit is best placed in the bottom of the pot as it releases more fluid than apples or quinces, thus preventing the fruit from burning easily.
We add a little bit of water (2 Tbsp) so that the fruit at the bottom doesn’t burn, then put the lid on. On low-medium heat, bring the fruit to a gentle boil. Stir occasionally.
Due to the heat the fruit slowly starts to release its juices so that after a while the fruit is cooking in it. Simmer until all fruit is fully cooked. This takes about 15 minutes for a 1 litre pot on medium heat. Once cooled down, this stewed fruit can be eaten as is or with yoghurt or on muesli, or it can be pureed and made into fruit leathers.

MAKING FRUIT LEATHERS
To make these delicious and healthy treats you need solid trays for your dehydrator. These trays are put on top of your racks and filled with fruit puree, or baking paper can be cut to size for one-off uses. To prevent the fruit leather from sticking to the tray or paper, it is best to rub on some olive oil. I use my (washed) hands to do this as using a brush means too much oil ends up on the trays, making the fruit leather fatty. Three or four drops of oil per tray, well spread, is usually sufficient. A blender or food processor is very handy to have for pureeing the stewed fruit. Before blenders were commonly available, the stewed fruit was forced through a coarse sieve but it’s something I have done only once as a lot of fruit material ends up having to be discarded.
Once in the blender or food processor, skins (not banana, pineapple, citrus etc) become part of the puree, adding fibre and flavour. The more powerful the model of food processor, the finer the consistency of the fruit leather will be. Our 30-year-old blender makes a reasonably fine fruit puree and, once dehydrated, the small shreds of skin are not noticeable. We also have a top-of-the-line blender where even close visual inspection does not show any lumps of skin. The fruit puree should only be luke-warm (or cold) when it is put into the blender. If it is still very hot, the glass vessel in some blenders can crack, and as the solid trays for fruit leathers are made from plastic, they would buckle when the hot puree is poured onto them.
It only takes 10-20 seconds for a cup of stewed fruit to be transformed into fruit puree by a blender. This puree can then be poured onto a tray – never leave the tray on the dehydrator when pouring puree as the machine could be seriously damaged if puree runs down into the cavity between the fan and motor. Don’t overfill or underfill the trays. The thicker the layer of puree, the longer it takes to dehydrate, but if the layer is too thin, the fruit leather becomes brittle and has no taste. Around 4-5mm thick is probably ideal, just thick enough to not see the colour of the tray under the puree. I use the back of a large spoon to spread the puree as evenly as possible, but slight variations in thickness are unavoidable and don’t matter.
MARINA’S TIP
If the fruit puree is watery and runny, the chosen fruit was not suitable for making fruit leathers. This can happen if too many early season plums or nashis have been used.
Most dehydrator trays hold 1.5 to 2.5 cups of fruit puree, depending on their size. In round dehydrators, the puree along the outside tends to dehydrate faster than the puree closer to the centre. Spreading the puree slightly thinner around the centre is an advantage.
As many of the vitamins have already been sacrificed during cooking, a fruit leather can be dehydrated at about 50°C which will take about 15-24 hours, depending on thickness. To avoid over-drying, the temperature should be reduced to 35°C once the outside of the leather has become firm.
We have tried making fruit leathers from raw fruit but have found that the pureed raw fruit starts to ferment during the dehydrating process. Pureed raw fruit oxidizes at a phenomenal rate in the warm humid environment a dehydrator provides at the beginning of the process, especially if apples or pears have been added which turns the leather an unpalatable dark brown.
Cooking the fruit also kills off any bacteria that may be present which is especially valuable if some over-ripe fruit have been added.
We don’t add sugar to our leathers as summer fruit contains enough fructose to make them a yummy treat, but adding cinnamon to apple fruit leather is worth a try.
STORAGE
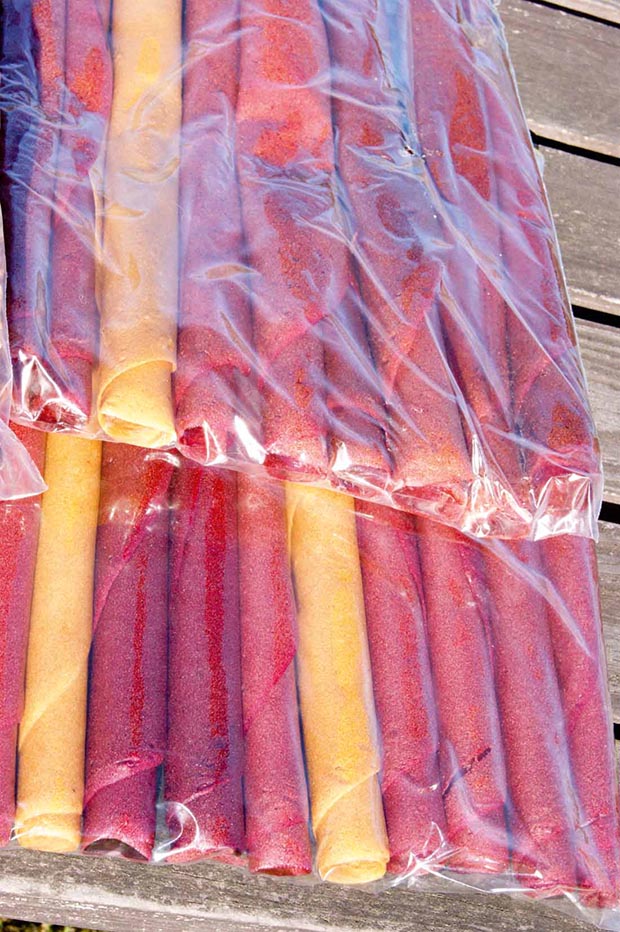
The dry fruit leather should be removed from the tray while it is still warm as it may stick to the tray once it is cold. It should also be rolled up while still warm as it is more flexible. If it cracks or breaks during the roll-up process it is too dry. If grease-proof paper has been used and the paper sticks to the fruit leather, slightly moisten the paper and it should then come off more easily. A rubber ring, a large clothes peg or a tie can be used to prevent the fruit leather from unrolling. Once it has cooled down, the ring or tie can be removed. The rolls can be stored in resealable plastic bags or cut down and stored in glass jars, plastic containers, or anything airtight that will keep moisture out. Store in a cool dark place and consume before the next season provides you with new raw material.
A SPECIAL TREAT
Cooked, pureed fruit can be cooked up again with 1-2 cups of sugar added for every 4 cups of fruit puree to make a delicious multi-layered treat. Simmer on low heat until the puree is the consistency of pancake dough and the frothiness created by the blender has disappeared. This can take up to two hours and frequent stirring is necessary.
The resulting fruit mass can either be bottled and stored to be used at a later stage (it tastes yummy with yoghurt or pancakes) or spread on the solid trays of your dehydrator to be dehydrated. As sugar has been added and as this puree is more viscous than the puree used for fruit leathers, it will take a lot longer to dehydrate than simple fruit puree.
Once this first layer of puree is firm, a second layer can be added on top of it and the dehydration process started again. After a couple of days the leathery treat should be turned over so that the bottom becomes the top and vice versa. After about three days a third layer can be added to it.
Dehydrating this way takes a lot of patience and the sheet needs to be turned around several times during the 4-5 additional days but the end product is worth the effort. The finished fruit treat will be 5-6mm thick and quite firm but still flexible, and sticky due to the sugar content so it should be dusted with icing sugar before being cut up into cubes.
Although it takes well over a week to produce a 3-layered fruit treat, these are absolutely scrumptious and will keep for many months if stored with lots of icing sugar in airtight containers. I often do 2-3 layers on the bottom racks of our dehydrator while using the top racks for dehydrating fresh fruit to make best use of the electricity.
The best suited fruit for this treat are prunes, apricots, peaches and quinces. If apples are added, the flavour of the end product is not quite as intense.
Due to the highly-concentrated nature of the treat it is not a good idea to use fruit with seeds like berries. Quinces don’t contain much water so a cup of water needs to be added to each litre of quince chunks before stewing. The skin can be left on quinces but the cores need to be removed. The pureed stewed quinces, after simmering them with added sugar, are known as quince paste.
After about 1.5 hours of simmering on low heat the colour of the quince paste turns into an attractive deep red colour. The finished dehydrated treat is known as quince bread. The more sugar you add, the sweeter it becomes and the shorter the time until a paste consistency is reached.
