9 things to consider when raising chicks
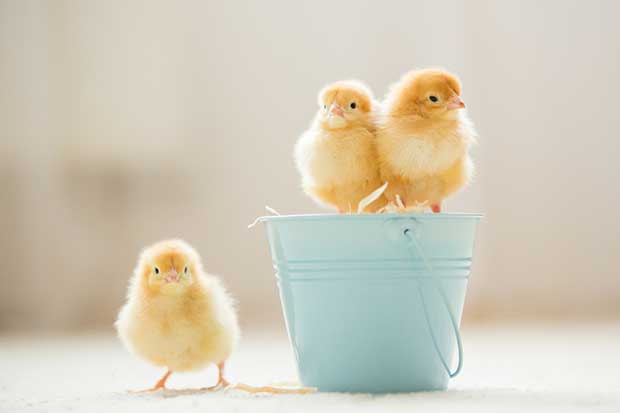
If you’re raising chicks this spring, here’s how to avoid some common mistakes and ensure yours get the very best start in life.
Words: Sue Clarke
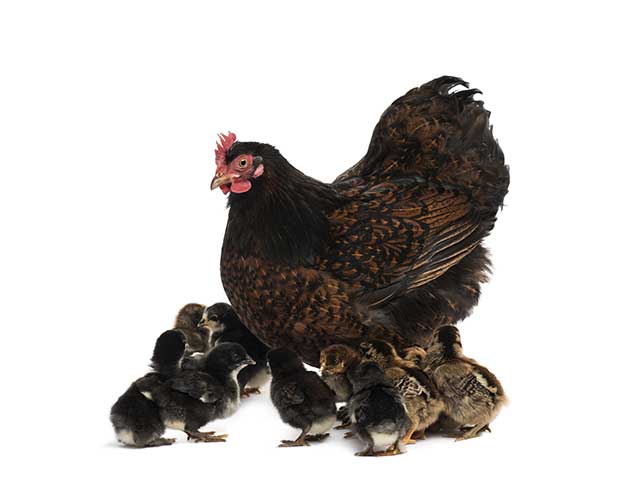
If you rear chicks under a broody hen, many of these issues are taken care of naturally. But if you are doing it yourself, it makes a big difference if you are well prepared. There’s less chance things will go wrong, and the higher the likelihood you’ll successfully raise healthy birds to adulthood.
1. Have a brooder ready before your chicks arrive
Even if you have a hen hatching out chicks in a nest, you still need somewhere safe to keep the family while they learn to cope with growing up. Move her – if possible, well before her eggs hatch – into a separate run or a secure coop.
Young chicks cannot control their body temperature. They need a heat source for when they are cold and the option to move away from it when they get too hot. If you are rearing chicks yourself, you will need a heat source that is safe for both you and them.
It needs to provide sufficient heat for at least four weeks and be easily adjustable, so you can increase or reduce the temperature as required.
There are various ceramic heaters specifically for brooders which don’t emit light but will still fit into a light fitting. There are also ones that are like a plate on adjustable legs. These sit in the brooder and chicks can sit under or around it when they need to, as they would with a mother hen.
The brooder itself needs to be a confined space to start with so chicks cannot get out or lost. However they do need space to get away from the heat source to cool off at times. A large glass fish tank or plastic bin can suffice at the start, but a larger, purpose-built area is better.
For flooring, use a surface that is not slippery which can cause splay legs. Pine wood shavings is good as it is absorbent. Don’t use sawdust. Chicks may eat it and it can cause a digestive blockage.
Newspaper is a good standby, if you use it in thick layers and remove wet/dirty layers frequently.
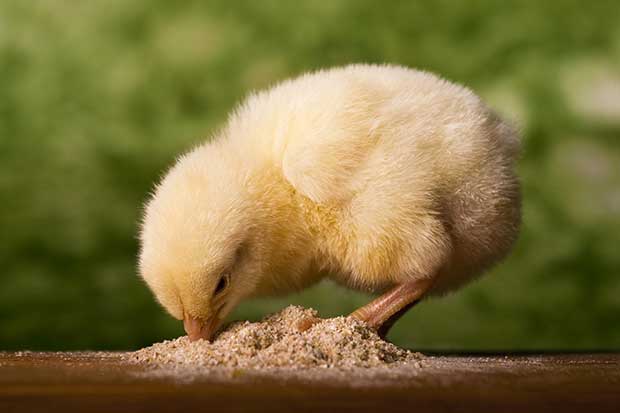
A sheet of newspaper is useful on day one. Sprinkle starter feed onto it and encourage pecking by tapping your finger amongst the crumbs.
3 REPURPOSED BROODER IDEAS
◊ Old plastic bathtub
◊ Metal pool siding
◊ Wooden drawers
2. Get the temperature right
Chicks in a brooder will need heat for at least 4-5 weeks.
Once you decide on a heat source, you need to work out how to give chicks the option to get warmer or cooler. You also need to be able to reduce the temperature so you can wean them off heat over a period of time.
But what is the ideal temperature? Some breeds and strains of poultry require different temperatures for them to be comfortable.
Ideally, a starting temperature should be at least 30°C at chick level. It can be 25°C in the coolest part of the brooder area.
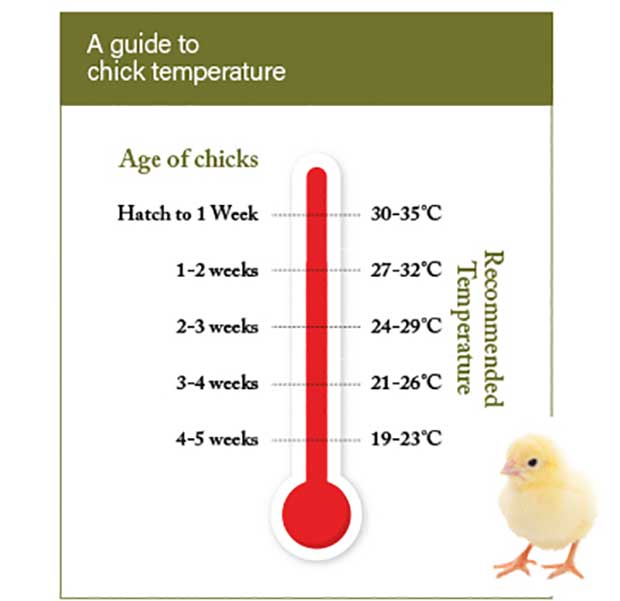
For commercial hybrids (Hylines and Shavers), the recommended starting temperature is 35°C for the first three days at the heat source, and 28-29°C in the coolest part.
Some black-downed breeds like Australorps also prefer higher brooding temperatures than yellow-downed chicks. Heavy breed meat chicks do better with a temperature of 28-30°C to start, otherwise they just sit around and sleep and do not eat.
The temperature should be progressively reduced every three to four days. At 14 days, chicks need it be around 27-29°C at the warmest point, down to around 19°C at 35 days.
It’s important to wean chicks off warmer temperatures gradually, by either lifting the heat source higher or turning it off for periods on warm days. Chick behaviour should always be the guide.
A cold chick will not seek food and may starve itself. It will try to huddle with its mates, often standing with its eyes almost shut, cheeping loudly.
A chick which is too hot will pant and often press itself in the far corners of the brooder space. It may also lay prostrate.
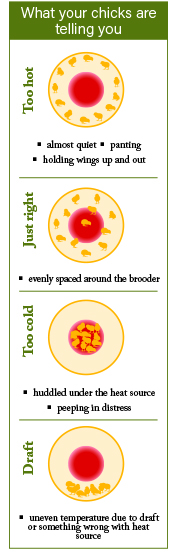
Do not confuse this with sleeping. A sleeping chick may sit in a dish with its mates, or just drop where it is and lie with head, neck and maybe wings and legs outstretched.
TIP
A thriving chick that is getting the warmth and nutrition it needs will grow at a fairly steady rate, doubling its weight from week 1 to week 2, and more than doubling in weight again by week 4.
Noting a chick’s condition and weighing it every few days or so allows you to compare growth and quickly work out if a particular chick is struggling, or if a group is not gaining weight like it should.
WHY LIGHT ISN’T THE BEST FORM OF HEAT
Heat lamps or a 100 watt light bulb used to be the standard way to provide warmth for chicks. However, having a light on 24 hours a day is not good for chicks.
◊ They need a dark period for their hormones to activate properly; these stimulate eating and digestion when it gets light;
◊ Too bright a light can overstimulate activity and this can lead to feather pecking, which rapidly leads to cannibalism and death.
A red light bulb can overcome this stimulation and would be ok to leave on overnight. The reduction of natural light is enough to give them a rest period.
Beware: painted, ordinary red bulbs are usually much lower wattage and therefore give off less heat.
If you are using a light bulb, no light means no heat. A way to overcome this would be to put the chicks in a box in a warm place overnight. However, a lack of air, especially when the digestive process is working, can cause suffocation.
The temperature needs to be at least 30°C for the first week which can be difficult to provide without a specific heat source.
If you need to improvise and only have small numbers, a light bulb covered with a terracotta pot, sitting on a tile would allow the chicks to cuddle up to the warm sides.
3. Use the correct feed
The easiest way to get the best feed for your chicks is to buy a commercial starter crumble. These are formulated to meet all a chick’s special nutritional needs.
Never use a layer feed for new chicks. It contains very high levels of calcium in the form of lime flour which will damage their kidneys.
They can die of kidney failure, often as they reach maturity (18 weeks+).
Commercial chick starter feed will contain a coccidiostat, a low level of medication to help prevent a parasitic disease called coccidiosis. Coccidiosis can wipe out whole clutches so using this kind of feed is important. There will be details about it on the bag, and most companies will have more information on their website.
Some also add essential oils like oregano, which help to maintain gut health.
If you offer other types of feeds alongside chick starter, you are reducing the amount of medication the chicks receive daily, which will render the protection it gives useless.
If you have a broody hen she can eat chick starter along with her chicks, until she starts laying again.
TIP
In an emergency, if you get chicks unexpectedly and can’t get starter feed, you can use mashed-up, hard-boiled egg as a one-day-only substitute.
Do not feed things like Weetbix, biscuits, rice, spaghetti etc. These foods are deficient in the nutrients chicks need. It is very important to quickly source a starter feed. Do not use layer feed.
4. Have chick-specific equipment
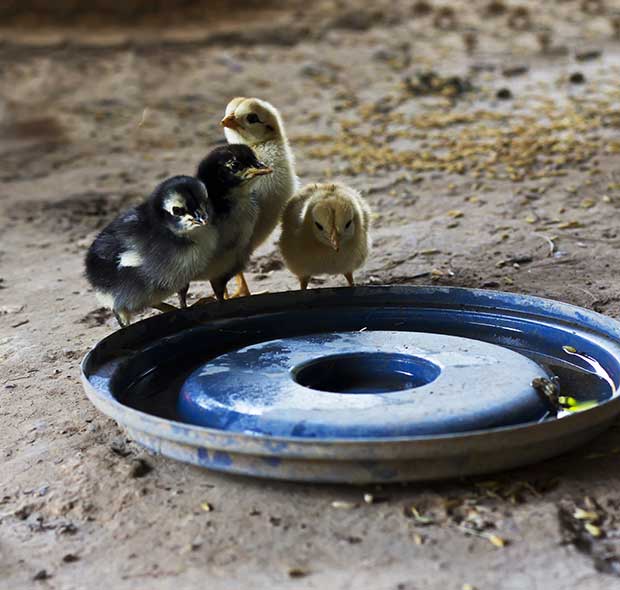
Shallow, chick-specific waterers are important, to prevent contamination and drowning.
Chick-sized feeders and waterers are also important. You can improvise with plastic plates and low-sided dishes but it’s important to prevent feed becoming contaminated if other birds or pets can access it, and spoilage from chicks defecating in it themselves.
It’s a waste, but it’s also how disease is spread.
Waterers need to be shallow enough to prevent drowning, easy to keep clean, and preferably have a clean reservoir of water that replenishes as it is drunk.
Do not put food and water near the heat source as chicks will not drink water or eat if it is too hot. Test it yourself with your finger – if it’s warm, move it further away.
5. Choose the right breed for your needs
Always talk to a breeder about the productivity of the line they are breeding.
If you want birds to lay eggs, choose an egg-laying breed. The most efficient and productive are commercial hybrids (Shaver or Hyline). The bonus of buying day-old chicks direct from the producer is that you are guaranteed a female chick with a pedigree to lay lots of eggs.
If your choice for a good layer is a heritage breed, aim for the lighter breeds, eg New Hampshires, Leghorns.
Always enquire about the productivity of the line you choose. Sometimes a breeder selects birds to breed for show looks. This means egg production can be reduced if they are not also selecting to choose the best layers to breed from.
If you are after meat birds, the fastest-growing and largest are commercial meat birds like a Cobb or a Ross. These are genetically selected for fast growth, feed efficiency and docile nature.
They do need to be fed well on a high protein meatbird ration to achieve this. You also need to be prepared to cull and process them at around 10-12 weeks of age.
Heritage meat breeds like Dorkings, Sussex and Indian Game are much slower growing, but will get to a large size too. There are many dual-purpose breeds which lay reasonable numbers of eggs and grow enough meat for a roast. These include Plymouth Rocks, some strains of Australorps and Light Sussex. Bantams have their place as small egg layers. They have a tendency to go broody and good mothering genes.
There are also ornamental breeds with pretty feathers, and some that lay fancy coloured eggs, from blue to olive green, deep brown and chalky white. A poultry show is a great place to see a wide range of heritage birds and meet local breeders.
Always talk to a breeder about the productivity of the line they are breeding.
6. Get a good source
Commercial birds should be sourced direct from the original hatchery if possible.
Bromley Park Hatcheries
Ph: 09 236 7011
Where: Tuakau (south of Auckland) & Christchurch
What: Shaver Brown layer chicks (1 day old), Cobb meat chicks (1 day old)
www.bromley.co.nz
Golden Coast
Ph 0800 495 463
Where: New Plymouth
What: Hyline Brown layer chicks (1 day old), pullets (16 weeks), Ross meat chicks (1 day old)
www.goldencoast.co.nz
Heaslip Hatcheries
Ph 03 685 8778
Where: Fairlie, South Canterbury
What: Shaver Brown layer chicks(1 day old), pullets (10 weeks, 18 weeks), Cobb meat chicks (1 day old)
www.heslipshatcheries.co.nz
Some people also sell commercial chicks by buying small batches of chicks and on-selling them. However, beware that transporting very young chicks (older than one day but before they are weaned off heat, ie 4 weeks) can be a risky business.
Once chicks have eaten and their digestive system starts up, they can overheat very easily when enclosed in a small box. If you’d like to hatch eggs or raise chicks from heritage breeds, you can find them on Trade Me.
The best option would be to talk to your local poultry club and find the people who are dedicated to breeding these birds. www.nzpoultryassociationsinc.co.nz
TIP
If you find someone saying they are selling ‘Shaver’ or ‘Hyline’ chicks that they have bred themselves, this will be incorrect. No-one outside the two big commercial breeding companies (Bromley Park and Golden Coast) have the breeding stock for these birds.
An individual may have hatched fertile eggs laid by commercial hens but any progeny will be crossed with something else. Even if they have a Shaver or Hyline rooster (which exist, but are rare to find), the progeny are still not ‘true’ Shavers or Hylines due to the complex genetics involved. They may still be good layers, but not as good as their mothers.
7. Choose healthy chicks
A chick’s health status can be hard to judge. Check thoroughly, if possible, as to their health, their living conditions, and those of the parents.
Commercial chicks will be vaccinated against Marek’s disease and salmonella in the hatchery. However, this protection only works if the chicks are isolated in clean conditions from older birds for at least a month afterwards.
If you are buying in day-old or very young chicks that still need heat, their immune system will not be fully developed and there’s a real risk of them getting sick. Moving them onto your property will expose them to disease.
You may have disease organisms typical to your area that birds – even adults – coming from a different source may have no immunity to.
While some breeders will say their birds are selected for immunity to various diseases, chicks from these birds that are then transported to another area where there is a different range of diseases will still be prone to infection.
Immunity takes time to build. Young birds are gradually exposed to new sets of infective agents as they grow.
Basic hygiene is essential and it needs to be in place before chicks arrive:
1. Don’t put day-old chicks into areas already soiled by other poultry or wild birds. Keep them separate while they are in the brooder, and preferably in an area away from your other poultry for a few weeks after this.
2. Make sure all the equipment they come in contact with is new or very clean. If it has been used for birds before, scrub it well to remove all traces of dust and faecal deposits. Rinse it in a sanitiser such as Virkon S (available from your vet or farm supply store) which works against bacteria, virus and moulds. Most normal disinfectants are only suitable to kill bacteria.
3. If you have other poultry, always tend to the youngest birds first so you avoid trekking dirty shoes or equipment into their area.
4. The disease challenge is always present. Your role as a chicken carer is to understand what threats your chicks may face as they grow up. Gradual exposure to the environment in which they will eventually reach adulthood is important. A chick living in a home or lifestyle situation is far more vulnerable to catching a virus or bacterial disease inadvertently introduced by the family. Contrast that with a chick living in a commercial environment. They are vaccinated against several very common diseases as they grow up. They are (mostly) protected from contact with disease vectors like wild birds, predators and visitors, and are also regularly monitored via blood sampling or swabbing to ensure they remain healthy.
8. Be prepared for the unfair sex ratio
When you hatch or buy in chicks, you have no control over the ratio of males to females. The only way you can guarantee all girls (layers) is to source them from a commercial hatchery.
The ratio of pullets to cockerels in a clutch should be 50:50, but in small batches you could get anything. You may get 100 per cent boys. Are you prepared to deal with the roosters when they start to show up?
With some breeds, it’s easier to determine the sex early due to physical characteristics, feather growth and colouring. But with many you cannot tell until the roosters start crowing aged 4-5 months.
You need a plan: keep, cull and compost (or bury), eat, or sell.
It is NOT lawful to turn them loose to fend for themselves. It is an Animal Welfare issue to abandon a domesticated animal. Dumped poultry suffer terribly before their inevitable death due to injury, illness and starvation.
9. Keep chicks safe
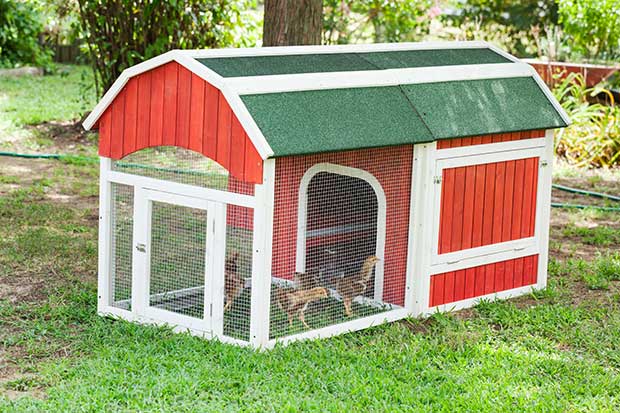
It’s common to lose a chick or chicks to predators. A broody hen and her chicks are at risk of attack from hedgehogs, stoats, rats, feral cats and dogs.
A small coop and run with small, strong wire mesh sides and floor will help keep them safe.
THE BIGGEST HEALTH CHALLENGE WHEN RAISING CHICKS
Coccidiosis is the most common killer of young chicks in their first few weeks of life.
It is a gut parasite that is easily transported as eggs (oocysts), even on the feet of flies. It thrives in hot, wet conditions like those you commonly find in brooders. Chicks can pick up a large dose of ‘cocci’ (pronounced ‘cocksy’) while pecking around the floor, especially if it is damp and soiled.
Prevention is key:
◊ Keep the brooder dry – chick-specific waterers and a highly absorbent bedding like wood shavings are important;
◊ Feed a medicated chick starter crumble – this helps to reduce the effect, but won’t stop it if there’s a large or sudden build-up of coccidia oocysts;
◊ Check chicks carefully and regularly throughout the day – symptoms include bloody droppings, chicks standing around with their eyes closed and chicks with cold feet.
Chicks are particularly at risk at around the 4-5 week mark. This is when you’ll be going from a heated brooder to no heat, possibly changing feed (from starter to grower), and perhaps introducing chicks to older members of the flock.
This can result in a huge build-up of cocciodia oocysts in the gut lining. It’s important to have a medication on-hand so you can treat chicks immediately if you see symptoms or they can die very quickly (within 24 hours). The best options are Coxiprol and Baycox.
