8 secrets to growing trees
The ins-and-outs from a tree farmer.
Words & images: Hel Loader
1. Do your research – by this, I mean proper research
You want to do a lot more than just read a book, especially if it’s one full of idealised romantic pastoral visions or based solely on the northern hemisphere.
Successfully growing plants and trees is very much about the site you select and the unique climate, soil, and structural issues that limit what can be grown there.
If you’re considering a life in horticulture, I highly recommend you join the NZ Tree Crops Association. It will give you access to others, most of whom live on blocks, who are keen to share their successes and, more importantly, their failures.
Talk to other growers too. Visit your local botanical garden, nurseries, and any significant gardens in your region.
If you live in town, join garden groups and visit parks. Take a long walk around your neighbourhood and talk to the gardeners you find.
2. Be patient
You’ll never stop learning about growing plants and trees, their needs, care, and management throughout their lives. It’s a partnership between you, the soil, the weather, and the plants themselves.
As you develop your block, the rewards and challenges will grow, along with the plants.
3. Know the trees you need to plant before the trees you really want
Before you begin planting expensive, desirable trees, establish the protection that will help them flourish. In most cases, this means planting hedges and other types of windbreak. If you’ve done good research, you’ll know the best ones for your situation. In our case, the most important shelter trees are alders, my mother’s favourite.
There are very few productive trees that naturally grow on their own in open ground. Most benefit from the microclimate and soil improvement that comes from a well-maintained hedging system.
The added benefit is you’ll learn how to keep plants alive in your unique situation with relatively inexpensive and easier-to-grow trees before moving on to the more difficult ones.
4. Critical things to consider when planning windbreaks
Make a list of your site’s advantages and disadvantages.
The top two are:
• which area gets the best sunlight?
• which area gets the most damaging winds?
You can always improve other aspects, such as soil type and water, through fertilising and irrigation, but it’s difficult to move the sun or stop the wind.
Finding the sunniest spots is usually easy, but sometimes surrounding hills, buildings, and other trees can complicate things. You might get good morning sun, but not all day or the terrain may not suit the type of trees you want to grow.
Working out the whims of the wind can be trickier. The prevailing wind for most parts of NZ is westerly, but the strongest gusts may come from another direction, or your block may be affected by salty, coastal breezes.
5. The 3 types of windbreak
Windbreak 1: artificial
These are usually fences, tunnel houses, or wind cloth.
Pros: fast, as you’re not waiting for anything to grow.
Cons: expensive, and not economical if you want to protect a large orchard or all of your block.
I also don’t recommend protecting individual trees with barrels or a circle of wind cloth. They only help for a very short period, and can stunt the tree’s development when the enclosed area around the base becomes clogged with grass or weeds.
Windbreak 2: open stands of trees
These are typically planted on the outer edges to help slow the wind before it reaches hedges or other plantings.
These are typically planted close together (5-7m from trunk to trunk). It’s best to select slower growing tree species rather than say pines and eucalyptus that will quickly dominate the view and cause problems when they topple over.
Windbreak 3: hedges
These are typically 3-5m high, often deciduous, and need regular pruning.
When laying out a hedge, you need to consider:
• plant selection to suit your site;
• access for trimming (including fencing);
• the time it will take to establish;
• ongoing nutrition and watering;
• protection from stock and pests.
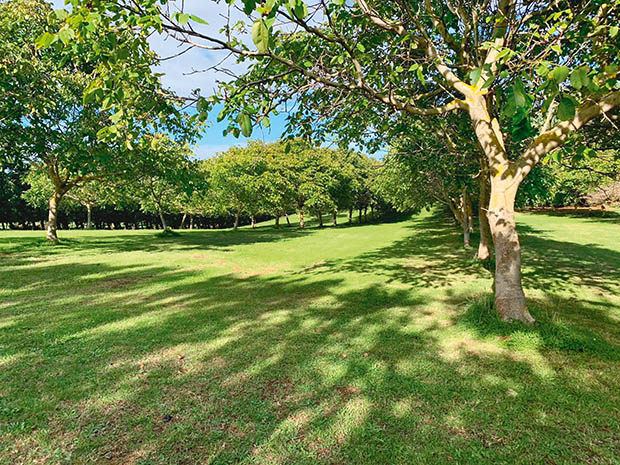
A glimpse of the neatly pruned alders that grow in vast hedges around Nuts ‘N May.
6. Make it easy to maintain your hedges
Unpruned hedges block access and don’t function well as wind protection compared to pruned ones. Annual hedge trimming is best.
You’ll need access to both sides of a hedge. Ideally, have a 5m race on either side, especially those on a boundary. You need space for a large tractor to drive along each side so there’s room for you to tidy up afterward.
If you can, keep fence lines away from hedges. Where this isn’t possible, for example, where a fence line runs alongside it, check with your hedge trimmer to find the best option.
For example, a deciduous windbreak hedge can be less than 1m wide when trimmed. A fence line 800mm from the centre line of the hedge leaves enough room for a good hedging contractor to drop their saws down between the trees and fencing wire.
Every time a fence line crosses a hedge, you need gates on either side to allow room for access.
In corners and where hedges meet, you also need room for a tractor to move in, then turn around.
7. Why evergreens often aren’t the solution
It might seem tempting to use solid blocks of evergreen trees or hedges to provide protection, but it can work against you. For example, an evergreen hedge on the north side of an orchard will block light. A thick evergreen hedge can also act like a solid fence; its lack of porosity means the wind hits one side, jumps up and over, and lands heavily on the other side.
If you get a lot of wind, a hedge alone often won’t provide adequate protection. It’s better to allow extra room and plant a group of trees on the windward side of the hedge to slow the wind before it gets to the hedge. The best trees in this situation are slow-growing and preferably deciduous, so they can better stand up to the wind and won’t overshadow the main hedge.
Hel has a fascinating mix of trees in her hedges, including elderflower.
8. Show the young ones some love
It’s critical that you can reliably water and maintain the space around young trees.
Trees in a windbreak hedge are often bare-rooted, planted 1.2m apart in winter. You need to allow for a mow strip on either side and regularly mow around them to ensure they don’t get smothered by weeds and grass.
If you spray, install spray guards, and don’t spray on windy days or you’ll kill them.
Protection from stock is vital. We used semi-permanent electric fences around ours until they reached a size where they could cope with stock grazing. Rabbits and hares can also cause problems, ringbarking young trees.
The first couple of years are the toughest for a hedge, especially when it’s dry – it’s likely they’ll need watering through summer.
Begin lightly pruning hedges when trees reach around 2m. This encourages the hedge to form evenly.
After five years, you should have a robust young hedge, but it takes around 10 years for even a fast-growing alder hedge to become well established.
While walnuts, chestnuts, and hazelnuts are Hel’s three main crops, she also has macadamia. They fruit on and off throughout the year.
ABOUT HEL
Hel (Helen) Loader runs a commercial nut and fruit farm on her block just north of Whanganui. She’s the daughter of Diana Loader, a legendary NZ tree cropper, and took over running the farm established by her parents in 2012.
She grows a variety of walnuts, including ‘Diana’ that was developed by her family: a large, round, sweet-tasting nut that’s easy to crack.
Nuts are harvested in autumn, and ready in May, which inspired the farm’s name, Nuts ‘n May.
