How to build a hugelkultur garden bed
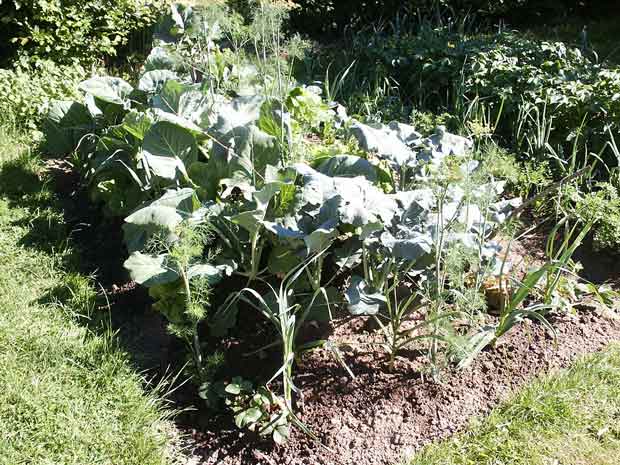
A Hugelkultur (‘mound culture’) garden bed. Photo: WikiCommons/ Maseltov
Do your raised garden beds dry out? Why not create a hugelkultur garden bed instead.
Words: Nadene Hall
A raised bed is a useful gardening tool but the soil can quickly dry out. Austrian Sepp Holzer had the same problem with the terraced gardens on his hilly farm and came up with the idea of using nature to help him.
His hugelkultur (‘mound culture’) garden beds used waste products from the forest surrounding his land like logs and brush to create a carbon-dense biomass. He then covered this with compost and topsoil and planted over the top.
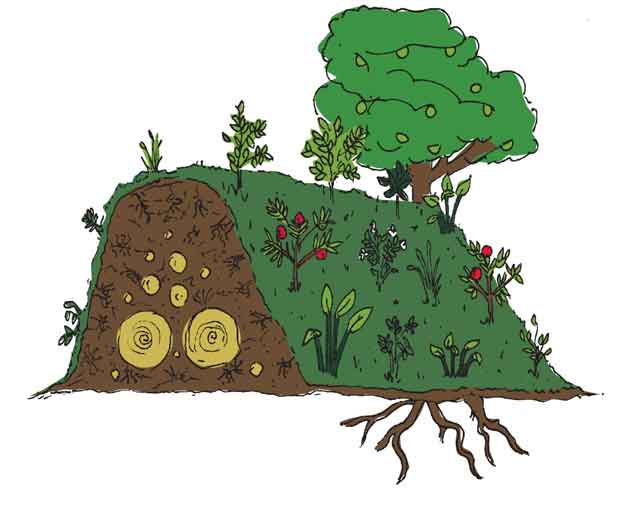
When there is an excess of water, it drains easily through the aerated soil above and is absorbed by the wood. This helps to decompose the wood at the bottom, releasing nutrients that feed the plants, plus the wood acts as a sponge, holding water that the plants can access as they need it.
These beds stay warmer than the normal ground soil for the first couple of years. Over time the wood breaks down, aerating the soil further and creating new soil.
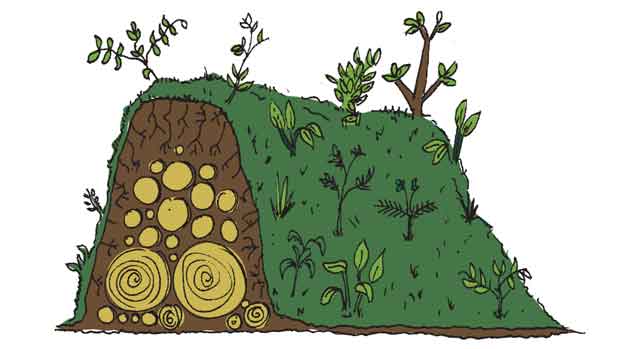
Hugelkultur after one month.
BENEFITS OF HUGELKULTUR
• Work well in very dry areas, even deserts
• Require little, if any irrigation or fertiliser (depending on size)
• Use up waste wood or fallen trees
• Build-up nutrient-rich soil
• Very easy to create
5 STEPS TO CREATING HUGELKULTUR GARDEN BED
STEP 1. Bigger is better as the larger the mound, the more resilient it will be in regards to irrigation and fertiliser. The minimum recommended size is 2m by 1m and you’re going to want to mound it up to be about 2m high or slightly taller to allow for shrinkage in the first month as it settles down. Good woods to try are alder, willow and poplar, and the more rotted, the better as they will be more sponge-like.
STEP 2. Make a mound of large trunks, stumps and branches where you want your bed to be. Top with smaller twigs and branches. Water well.
STEP 3. Fill the gaps with compost, manure, leaves, kitchen-waste etc. This nitrogen-rich layer will help balance high levels of carbon in the wood.
STEP 4. Finish with a layer of topsoil about 5cm deep and then a layer of mulch (eg, straw).
STEP 5. You can plant into it straight away, but allowing it to cure (for example, over winter) gives it time to settle and to soak in rainwater.
Tip: You can start off with smaller/lower beds and add to them over a few years to create a taller bed (the taller the bed, the less irrigation is required). However, these smaller beds won’t be quite as resilient and may require some watering, although far less than a ‘normal’ raised bed containing just soil and compost.
