DIY project: Create a reusable tote from an old pillowcase
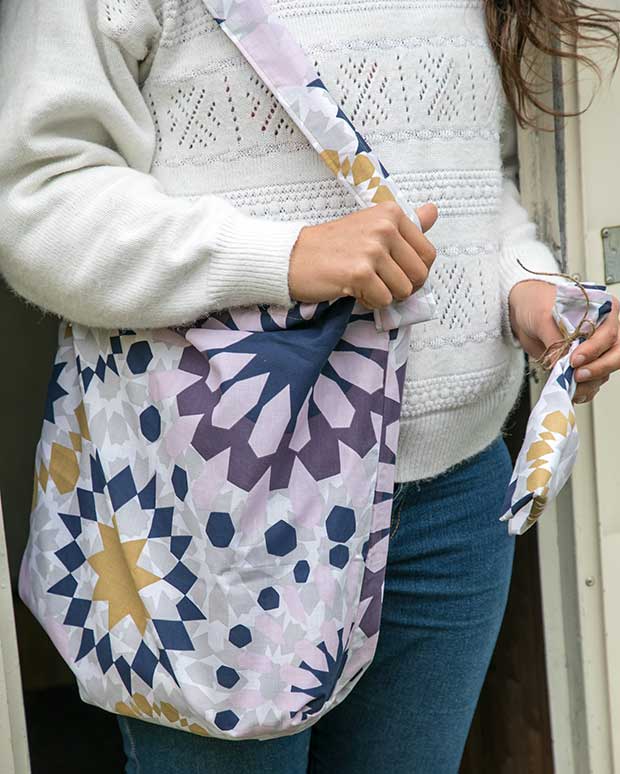
With just a few straight lines, create a set of reusable bags from rescued fabrics.
Words and photos: Sarah Lancaster
MATERIALS
cotton pillowcase (50c from an op shop)
scissors
pins
thread
twine or ribbon
sewing machine
METHOD
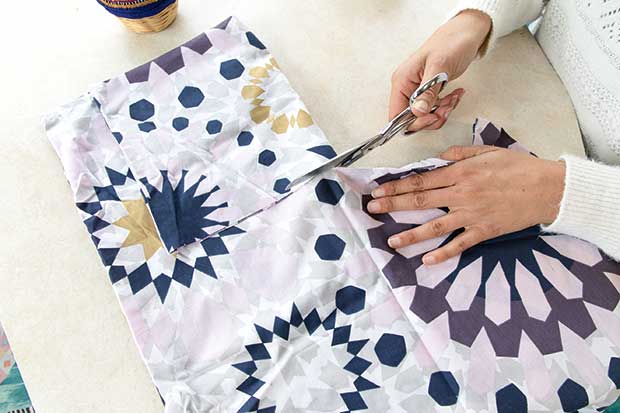
Step 1: Cut across the pillowcase a third of the way down from the open end. This offcut is used to make bag straps and a separate mini bag. Unpick or cut off the stitching on the sides of the offcut.
Step 2: Line up the two already finished long edges of the offcut and cut off the rectangle flap of excess fabric (this will become the mini bag made at the end). Leave at least 10cm from the finished edge, for the width of the strap.
Step 3: Sew the short sides of the two rectangles together to make one long strip.
Step 4: Fold the long strip lengthways into thirds and pin.
Step 5: Top stitch down both long sides of the strap. Set aside.
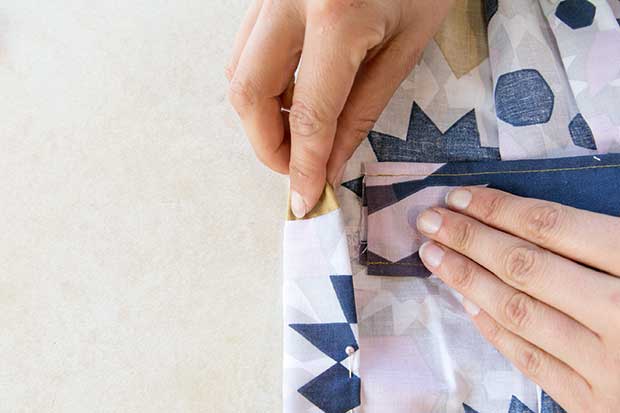
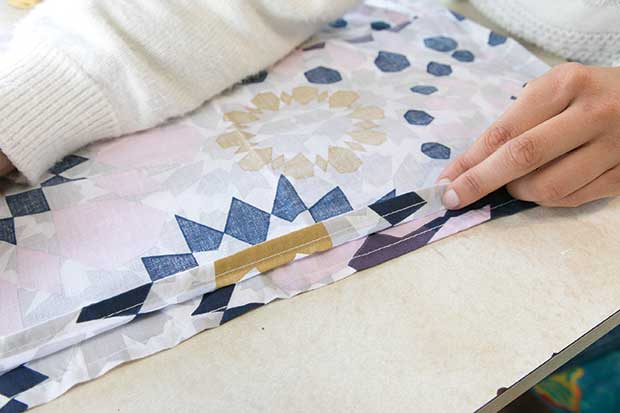
Step 6: Grab the pillowcase and fold over the top raw edge twice, then pin.
Step 7: On one of the side seams, tuck in the strap end, fold up, and pin.
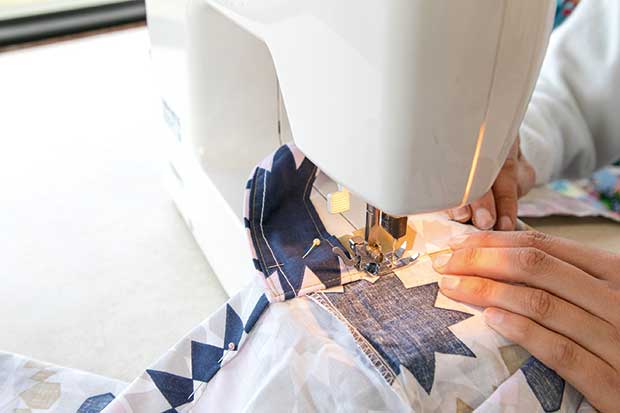
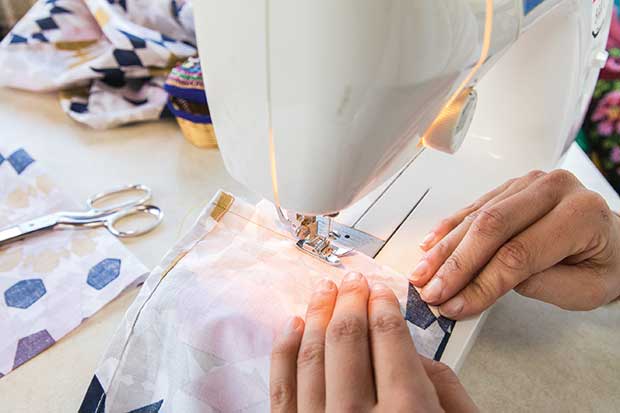
Step 8: Edgestitch all the way around the bottom edge of the fold.

Step 9: When back to the beginning, pivot and sew on a 90° angle up to the top edge and repeat the stitch line around the top edge.
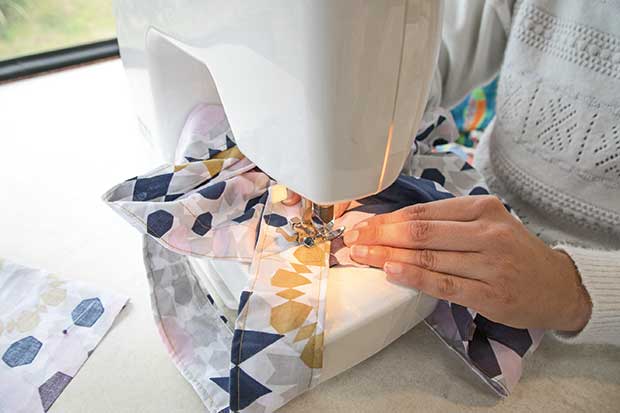
Step 10: Fold the other strap end into a loop. Then pin to the outside of the other bag side seam.
Step 11: Attach by sewing a box and a line through the middle of each strap for extra strength.
Step 12: Turn the bag inside out and poke out the bottom corners, so they are flat with the seam line in the centre of the triangle. Sew across the two bottom corners approximately 6cm to 10cm from the end. Turn through, and the tote is complete.
Make a small drawstring bag from the leftover scrap
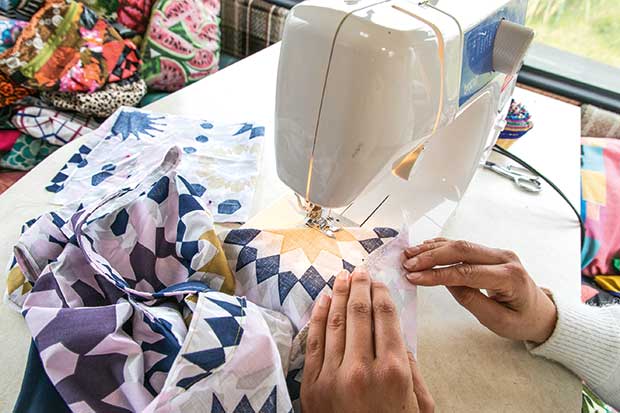
Step 13: Fold scrap in half and sew up two long sides. It’s OK to leave the edges raw, or finish with pinking shears, overlocker, or french seams.
Step 14: Fold over the top raw edge once, twice then pin.
Step 15: Topstitch the top edge all the way around.
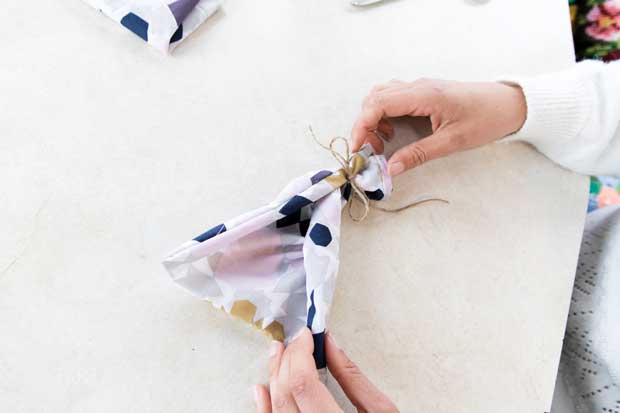
Step 16: Cut a length of twine 15–20cm long.
Step 17: Secure the twine by topstitching it to the side seam about 4cm from the bag opening.
Scrunch the bag and use the twine to tie it snug. Perfect for nuts, seeds, or pick ‘n’ mix.
For more eco ideas see our new special edition: In Your Backyard: Living Lightly

MORE HERE:
Take a tour of fabric upcycler Sarah Lancaster’s cute-as-a-button tiny house
