How to make tempeh: the high-protein, low-fat food you can ferment yourself
If you’re interested in eating more plant protein, a little fermentation can go a long way.
Words & Images: Diana Noonan
WHAT IS TEMPEH?
Tempeh (pronounced tem-pay) is made of fermented soybean or other legumes, inoculated with the mould Rhizopus oligosporus (known as RZ).
Tempeh is best described as a ‘cake’ of fermented soy. In comparison, the more common tofu is curdled soy milk which has been extracted from cooked, ground soybeans.
Tempeh is thought to have originated on the island of Java where it was first made hundreds (possibly thousands) of years ago. It’s now a common sight in shops, markets, and eateries all over Indonesia.
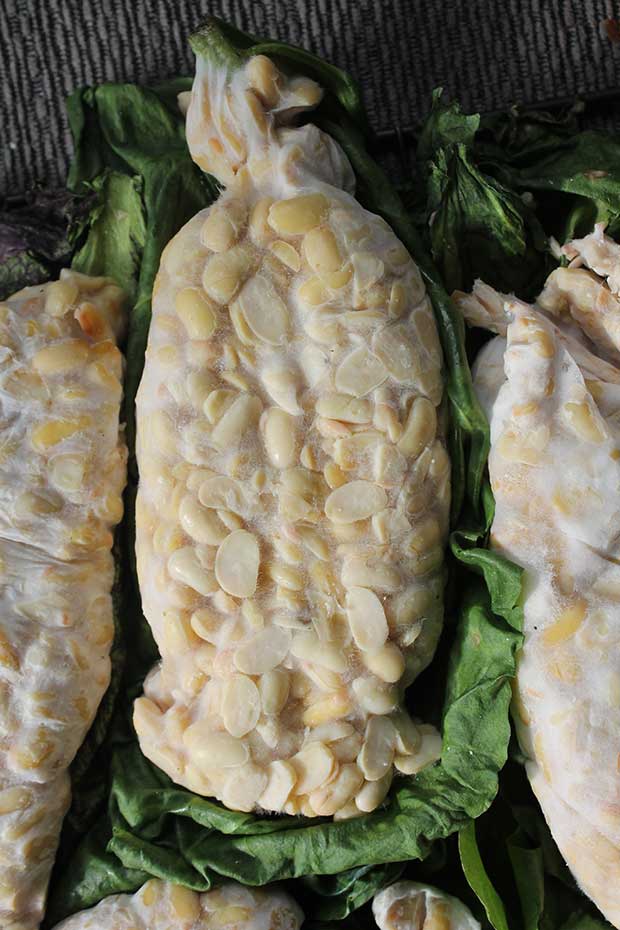
It is traditionally fermented inside banana leaves, creating a versatile, sliceable, savoury product. In Indonesian homes it ferments with little assistance in the naturally warm, humid environment.
Here in New Zealand, tempeh is produced commercially by Auckland-based company Tonzu and can be found in most supermarkets.
The problem is it costs close to the price of a nice steak, around $25 per kilogram
You can make it yourself and it is an interesting challenge. What I never expected was that the challenge would be far easier than I’d been led to believe, and the finished product so superior to the commercial variety that it bore little resemblance.
DELICIOUS AND GOOD FOR YOU
Tempeh comes with a genuine high protein, low-fat guarantee.
It also carries all the proclaimed benefits of probiotic foods which are said to boost immunity and assist in the breakdown of sugars.
It also packs a calcium punch, a plus for people who don’t or can’t eat dairy.
Even if tempeh wasn’t one of the healthiest foods around, it’s still a great option for vegetarians and vegans.
When it comes to texture and flavour, no other plant protein comes anywhere near it. Fresh tempeh is firm to the bite, has all the flavour and aroma of fine, light ale, with nutty, earthy qualities thrown in.
Those familiar with Indonesian cuisine will probably have encountered tempeh as a fried ingredient in a range of delicious dishes. Kering, a crunchy, sweet-sour side made using tempeh and comes with almost everything when you order food in Indonesia.
If you want to be healthier, you can grill or steam tempeh. It readily absorbs flavours in the same way as tofu, and can be steeped in your favourite marinades.
Personally, I prefer tempeh as unadulterated as possible. I just give it a quick squeeze in an oiled sandwich press or, for a special treat, top it with a gado-gado sauce.
But tempeh is so versatile and accommodating that I would confidently say it goes superbly with almost anything.
Warning: Fermenting of any kind carries risks. If you have any doubts about the safety of consuming your tempeh or using the spores you have made, don’t.
HOW TO MAKE TEMPEH
Start by perfecting this textbook technique which can then be modified as you become more experienced.
Tempeh starter is often available on Trade Me and specialty food stores online. Unless you have a friend who will share their starter with you, you’ll pay around $17 for 100g, including packaging and freight. If you can’t find it from NZ sources, you can order it from overseas suppliers (search for ‘tempeh culture’) so long as it’s commercially packaged, labelled, and sealed within the original packaging.
You use 2 tsp of starter per 500g of legumes, and it can be stored for many years in the freezer.
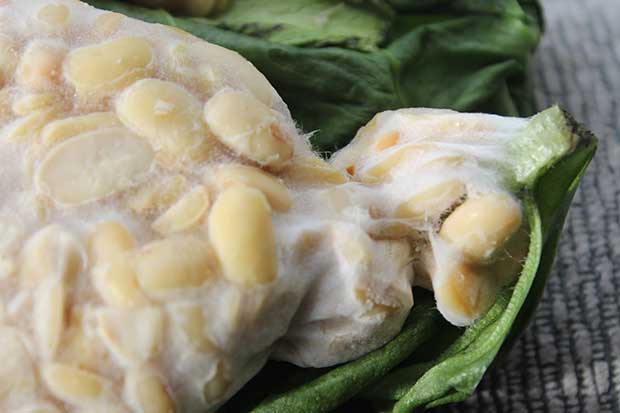
Well fermented tempeh slice easily.
EQUIPMENT
◊ sieve
◊ towel
◊ large pot
◊ two 7 x 7 inch resealable plastic bags
◊ a low wattage heat source*
◊ food cooking thermometer
INGREDIENTS
500g dried soybeans
2 tsp vinegar
½ tsp tempeh starter (known as RZ)
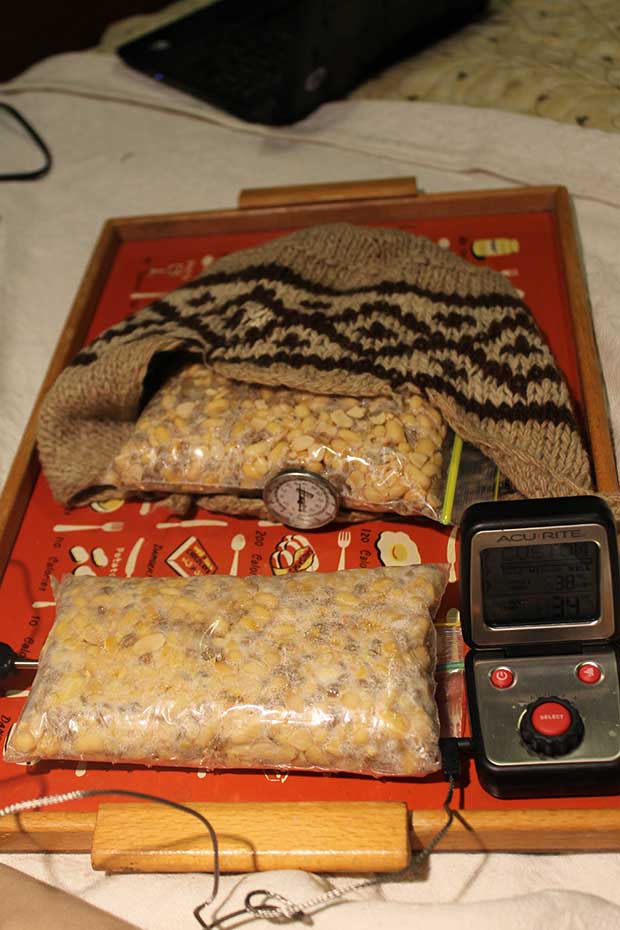
*I use a seed raising pad (pictured above). Other suggestions I have read about include an oven on very low or a box-style dehydrator. Some fermenting fanatics take their bags to bed with them.
METHOD
Soak the beans overnight.
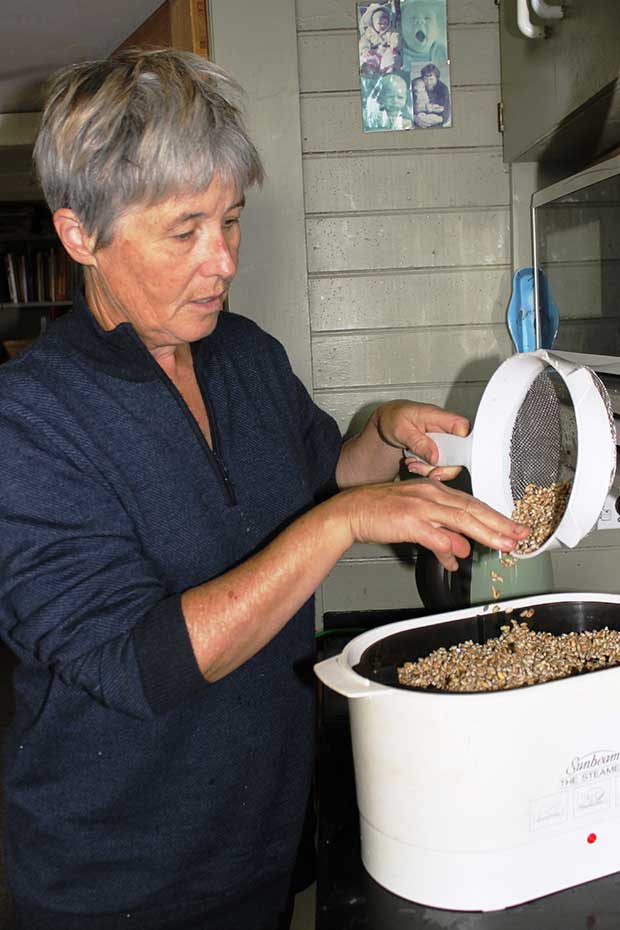
The next day, put the beans in a pot, cover with plenty of water, and boil for 10 minutes. Cool to blood heat before rubbing the beans between your fingers to remove their hulls. Stir the water to disturb the loose hulls, sieving them off as they float to the surface. Discard the hulls.
Boil or steam the beans until they are tender-to-the-bite but not mushy. Drain well, spread on a towel, and leave to dry off. This will take about 3-4 hours in the sunshine or in a very warm room.
Place the beans in a dry pot and stir in the vinegar. Add the culture, stirring well to distribute evenly. Divide the beans between the plastic bags, taking care to push them into the corners.
Lay bags flat and prick one side of each all over with a skewer (make holes about 6mm apart). Place bags on/in your chosen heat source. Insert a food thermometer horizontally into one bag.
Raise the temperature of the beans to 32-33°C.
After approximately 12 hours, you will notice a sweet, yeasty aroma coming from the bags, a sign the RZ is beginning to multiply. The temperature of the beans will now begin to rise independent of their heat source due to the action of the culture. Your job is to keep the temperature within the designated range.
Remove the beans from their heat source and maintain them at 32-33°C until the white mould is visible and the beans form a dense, solid pack (around 26-30 hours). Store in your fridge or freezer for use in cooking.
DIANA’S TIPS FOR SUCCESS
• Temperature is important. RZ multiplies most rapidly between 32-33°C. Once it reaches 50°C, it will die.
• Cover tempeh with items of woolen clothing or a rug to help raise its temperature. Sit it on a cake cooler to reduce its temperature.
• RZ doesn’t like moisture – dry your beans well.
• RZ can’t penetrate hulls – remove these or whiz the beans to break up the hulls.
• A food themometer with an alarm is useful if you don’t want to wake up through the night to check on the temperature.
• Start your tempeh project at the weekend, unless you want to babysit the beans at work.
• Start the fermentation in the evening as the project requires the greatest degree of vigilance after the first 12 hours of progress.
OTHER TYPES OF TEMPEH
Soybean tempeh is just the beginning.
Once you’ve got the hang of the process, you can experiment with different legumes and legume-grain combinations, including:
• mung beans
• dried fava beans
• chickpeas
• lentils
• rice
• pearl barley
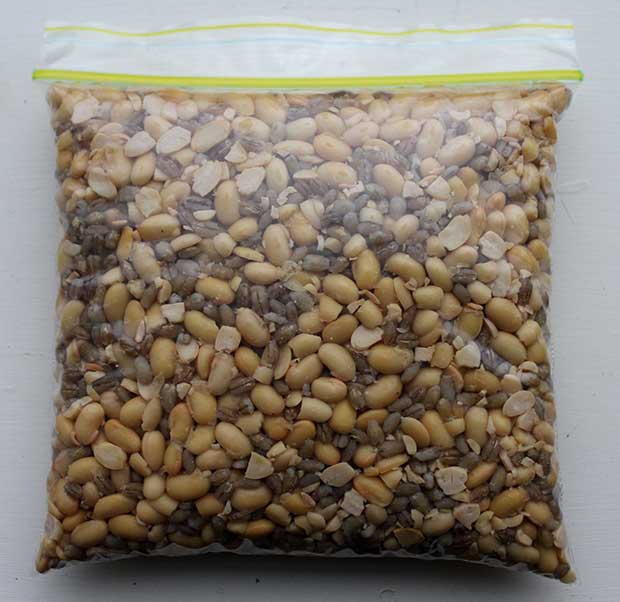
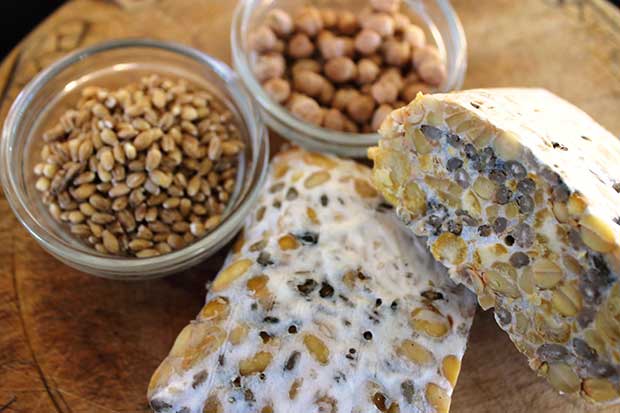
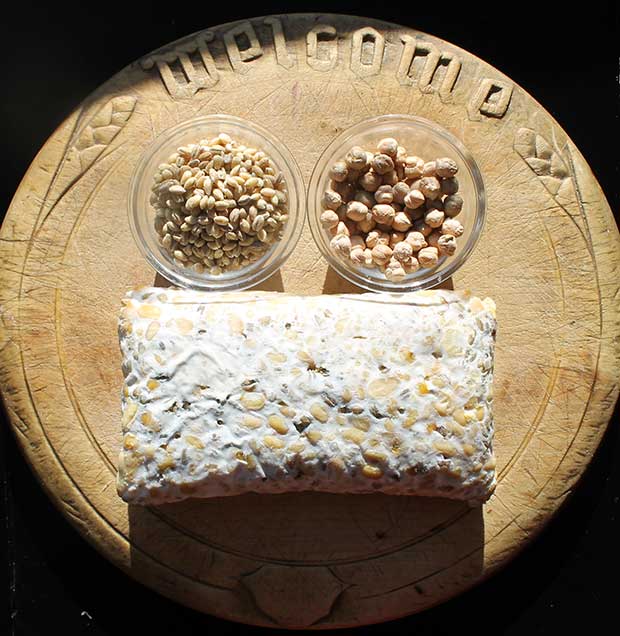
A loaded bag of inoculated chickpea and barley, ready to be placed on the heat pad.
It pays to avoid red kidney beans as they require rapid boiling for an extended period to make them safe for consumption, and this process may render them too wet for use in tempeh.
Whatever combination you use, ensure the legumes are hulled (or shelled) and well drained. It’s often better to steam rather than boil ingredients as steaming limits the absorption of water.
Don’t mix batches as brewing times will vary according to individual combinations. Barley, for instance, slows down the fermenting process because no matter how well drained and dry-to-the-touch it may be, it still has a high moisture content.
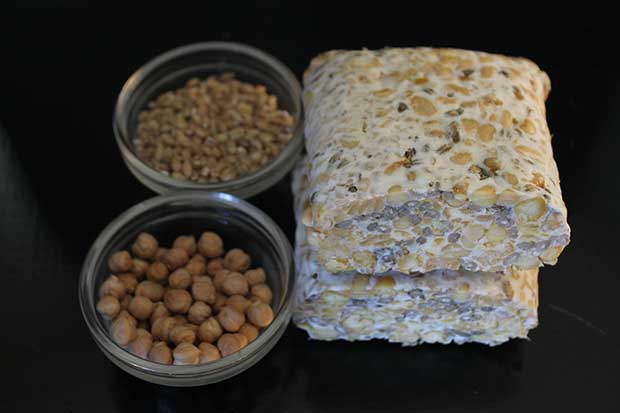
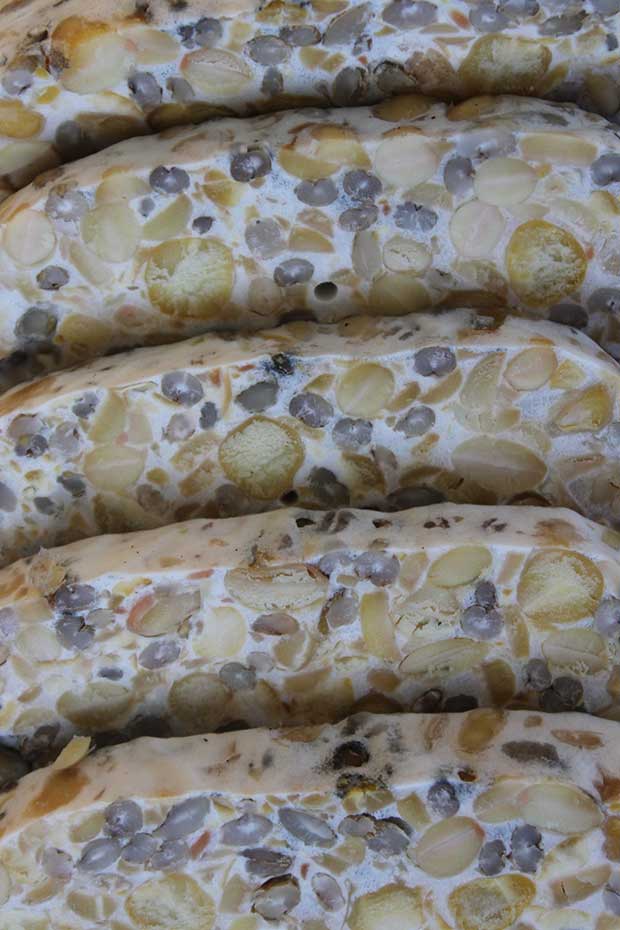
Chickpea and barley tempeh tastes as good as it looks.
GROW YOUR OWN
While it’s possible to grow soybeans in New Zealand, especially if you live in the warm north, it’s not an option for those in colder climes. However, broad beans will grow almost anywhere and broad bean tempeh, with its light, lemony flavour, is a delicacy.
I pod the beans and boil them, before popping them out of their shells and preparing them for tempeh exactly as I do for soybeans.
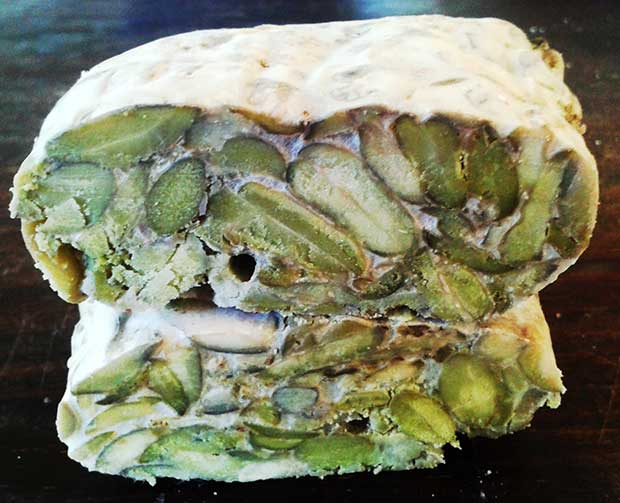
Broadbean tempeh is lemony with a hint of mushroom.
HOW TO GET MORE SPORES FOR FREE
Once you’ve sourced your Rhizopus oligosporus spores, it can be fun to make your own to replenish your supplies or to give away to friends as gifts.
When your tempeh has finished fermenting, leave it in its plastic bag (or leaves, if you are using them) until dark mould-like patches form on the beans.
Allow these patches to develop for 1-2 days, then slice off the dark areas and place them in a dehydrator (on low) or in a very low oven until they are thoroughly dry.
Place the pieces in a blender and whizz until they form a fine powder. Store in sealed jars or plastic bags in the freezer until ready to use.

For more on tempeh see the NZ Lifestyle Block, July 2018
