Make your own: A beginner-friendly macramé plant holder
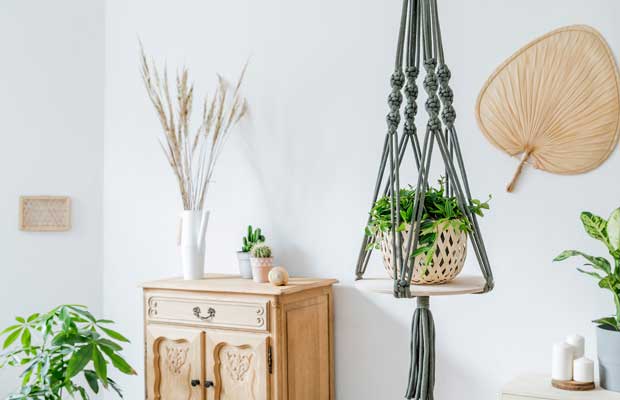
This macramé plant holder project is ideal for beginners - and your next rainy afternoon.
Words and images: Jane Wrigglesworth
This macrame plant holder project is ideal for beginners. It uses only three knots: a square knot, a half-square knot, and a gathering knot. Any type of cotton cord can be used so choose a favourite colour and choose a size that fits the plant saucer or tray. I’ve used cotton cord that is 8mm in diameter because I wanted a chunky look. However, there is no reason why you cannot use a thinner one.
MATERIALS:
- 44m soft cotton cord 8mm in diameter
- Wooden or metal ring at least 60mm in diameter
- Round wooden board or ceramic plant saucer about 28cm in diameter
- Sharp scissors
- Masking tape (optional)
INSTRUCTIONS
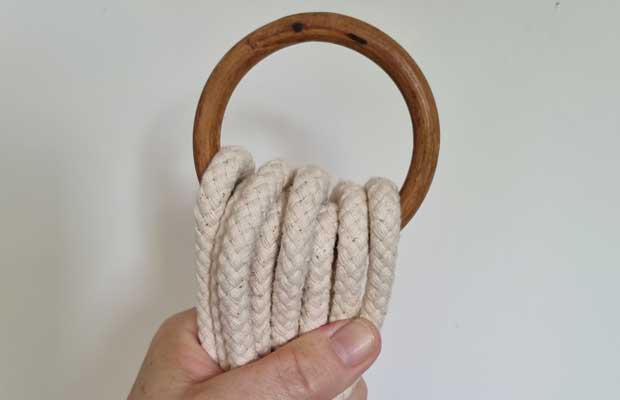
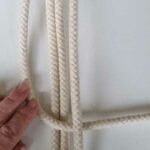
Step 1: Cut eight 5m lengths of cord and another two pieces of 2m lengths of cord. Fold the 5m lengths of cord in half and thread through the ring.
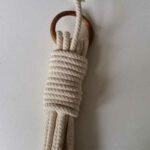
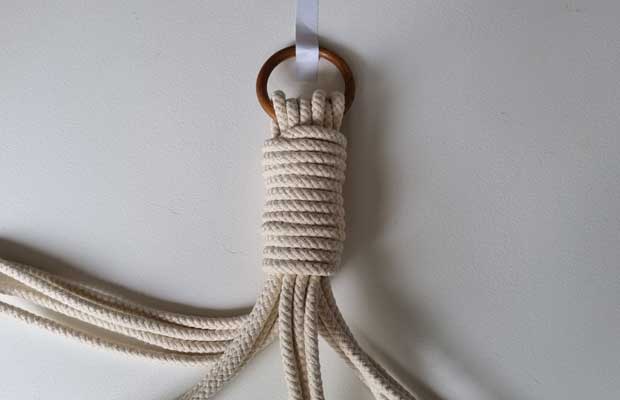
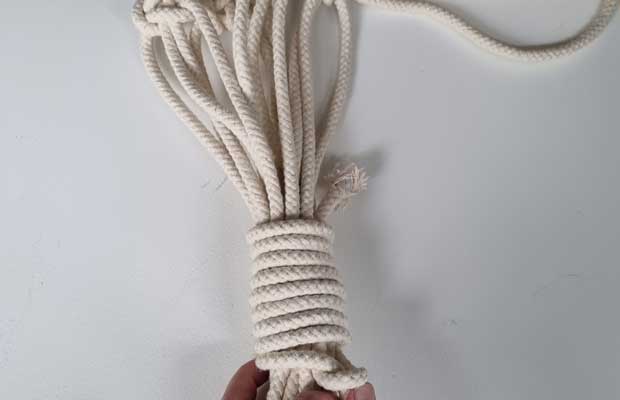
Step 2: Using one of your 2m lengths, tie a gathering knot beneath the ring. To do this, fold the string in an S shape, as shown , placing the top end just beneath the ring.


Take the long end of the cord and wrap it around all the cords, as shown. Thread the end through the loop at the bottom and pull the top of the cord until the bottom is securely tucked in . Cut off the excess cord with a pair of sharp scissors.

Step 3: Place the ring on a hook to work, or, using masking tape, tape it securely to a flat surface. Divide the cord into four bundles, with four cords in each bundle.
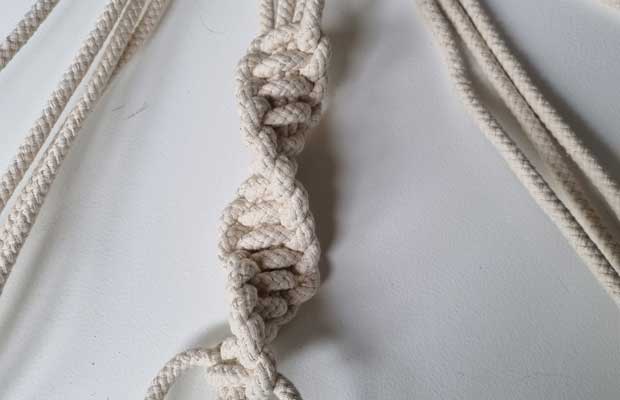
Step 4: Take one bundle and about 20cm down from the base of the gathering knot, tie a sinnet of 15 half square knots. This will form a spiral. To create half knots, bring the far left cord (no. 1 cord) of the bundle over the two inner cords (cords 2 and 3) and under the far right cord (cord 4). Bring the far right cord (cord 4) under the two inner cords and over the far left cord. Pull on out cords to form a knot. This is one left-facing half square knot.

Step 5: Repeat until there are 15 half knots. Then repeat for the remaining three bundles.
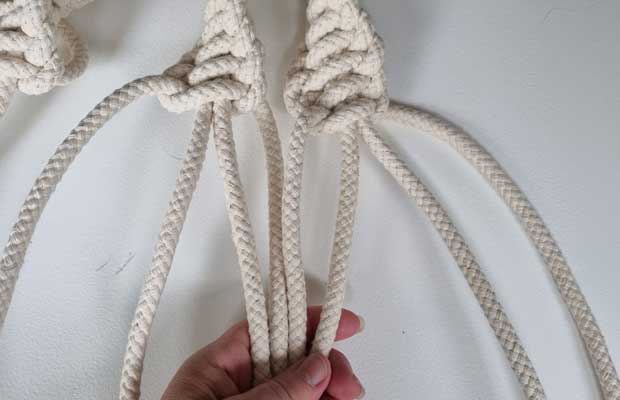
Step 6: On one of the bundles, take one outside and one inner cord and join them with one outside and inner cord of another bundle.
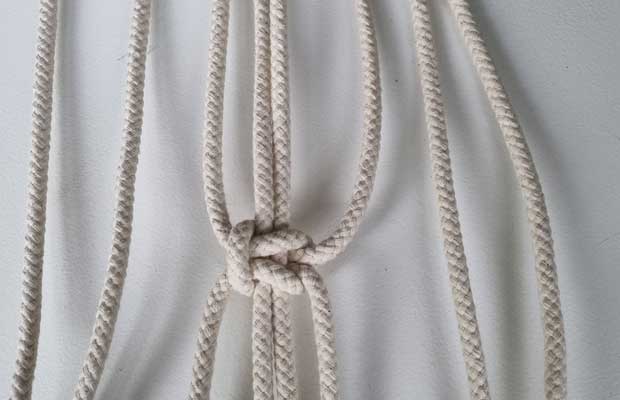
Step 7: Leave a gap of 50cm and tie a square knot. To do this, tie a half square knot as before, then tie another half square knot, but start with the right far cord and take it to the left, passing it over the inner cords and under the left most cord. You have now completed one left-facing square knot. Repeat for the remaining bundles.
Step 8: Bundle all the cords together. Leave a gap of about 18cm, depending on the size of your tray, from the bottom of the square knots and tie a gathering knot using the remaining 2m cord.
Step 9: Before trimming the excess cord at the base, insert the plant tray to ensure the placement in the hanger is correct. If not, adjust the gathering knot. When the placement of the tray is correct, trim the excess cord, leaving a tassel of around 25-30cm long.

