The 10 most cost-effective edibles to grow

Food is the biggest household expense after accommodation, so what are the most high value things you can grow to save money?
Words: Jane Wrigglesworth
Most gardeners will grow their own veges – or at least some of them – to cut back on their grocery bill. Tomatoes, cucumbers and lemons are a mainstay of Kiwi gardens, but there are more exotic, high value plants that can also be grown to cut your food bill, healthy, nutritious foods that cost a fine packet in the shops.
1. Quinoa
Quinoa is one of the world’s most popular health foods, but the cost of it is likely to make your eyes water. Given that it sells between $18 and $22 a kilo in the shops, growing your own has never looked more attractive. It’s lucky then that it’s easy to grow.
“Unless,” says Kay Baxter of Koanga Institute, based in Wairoa in the northern Hawke’s Bay, “it turns really wet at harvest time.”
Kay and her fellow gardeners sow their quinoa in late November for harvesting in February, at which time it’s usually – though not always – dry.
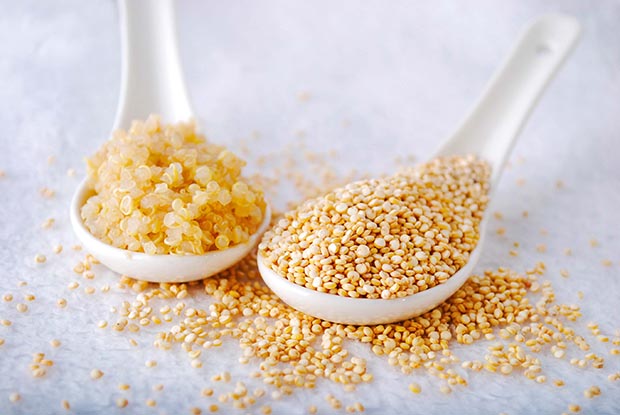
Cooked and uncooked quinoa.
“The way I get around avoiding rain is to stagger-plant,” says Kay. “You can plant it through until mid-December and still have it mature. That way you only lose one crop instead of all of the crop in the case of a wet summer.”
Quinoa is generally an undemanding crop and beneficial to the land.
“It is drought hardy, and it provides heaps of carbon, which is great for the growing of soil,” says Kay.
She and her team garden bio-intensively, a method that focuses on achieving maximum yields from a minimum area of land, while at the same time sustaining the fertility of the soil.
“Using the bio-intensive methods, we are able to harvest 7kg of quinoa from nine square metres.”
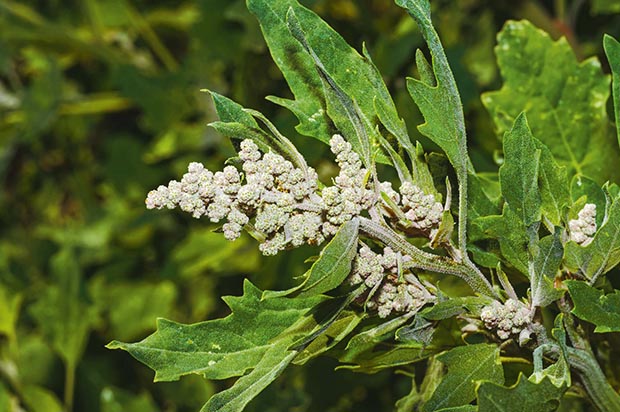
Growing quinoa plant with seed head.
Quinoa withstands light frosts at most stages of its development except when flowering, but if sowing in spring this won’t be a problem. You can sow later in the season, but you need to time it so that flowering and seeding occurs well before the first autumn frosts.
Seeds are ready to harvest when the first ripe seeds fall easily from the flowerhead. Cut the flowerheads and lay them on a sheet in a warm, dry spot for a few days to dry. The seeds will fall off readily when fully ripe. Winnowing is required to get rid of the chaff, as is soaking of the seeds.
“Homegrown quinoa needs a long soaking time to get all the bitter saponins out of the grain,” says Kay. “These saponins are taken off the commercially available quinoa by grinding the outside layer off the grain. Traditionally the grain was soaked for a day or so in running water. We’ve created a sort of net bag that we place under a running tap or in the stream for a few hours.”
Seed is available from Koanga Institute and other online seed stores.
2. Sorghum
Sorghum is the world’s fifth most important cereal crop. It’s also increasingly becoming known across the globe as a health food, as organic gardener and author Adrian Myers
of sustainablegardener.org writes on his blog:
“You not only get a valuable nutritious gluten-free grain – and you can chew on the canes like sugar cane, or press the syrup from the stalks and boil it down into one litre of thick syrup from only two square metres of land – you also have lots of two metre high carbon material for compost making!”
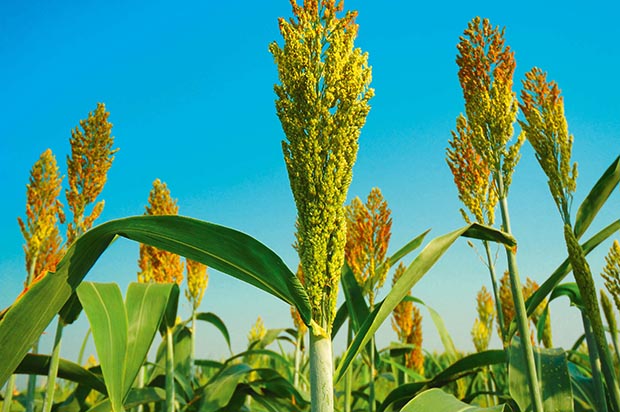
Seed heads of sorghum ripening.
In the shops you’ll pay around $7 for a 450g packet of sorghum, $7.80 for a 400g packet of sorghum flour and $20 for 1.5 litres of sorghum syrup.
Or you could grow your own (in warm temperate areas with long, hot summers), something Adrian did successfully in Nelson at the Waimarama Community Gardens. The only problem they encountered was birds.
“The plants grow tall, over 2m, so it’s quite hard to keep the birds off the seed heads. However, if you have a relatively small crop you can tie covers over each individual seed head. At Waimarama Community Gardens, we grew about a 12 square metre block of sorghum and covered the whole block with fine netting supported on canes, at least 15cm away from the seed heads, and the bottom of the netting pinned down.”
To get the longest growing season possible, sow your seeds under cover and plant out when the weather warms up says Adrian.
“Plant into deep seed trays, or into cardboard toilet roll centres filled with seed-raising mix. Transplant into the garden well after the last frosts, at 30cm diagonal spacing, when 5-10cm high and soil temperature has reached around 15°C. It is advisable to cover the crop with frost fleece at night, taken off each morning for the first week; or if you are only growing a few, you can cover each plant at night with plastic cloches made from 5 litre clear plastic juice bottles with the bottoms cut off.”
When ripe, the seed heads are cut off and hung up to dry.
Seed is available from Koanga Institute.
3. Pine nuts
It may take 10 years to harvest your own pine nuts, but the wait, for some, is well worth it. Pine nuts retail for over $80 a kilo at supermarkets, and let’s face it, what is pesto without pine nuts? A mature pine nut tree can yield 5-15kg of kernels per year.
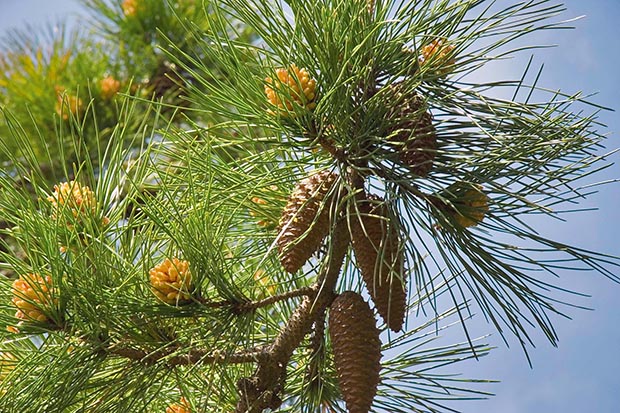
Pine nut cones.
About 20 species in the pinus family produce seeds large enough to be worth harvesting, but only four are commercially cultivated. Pinus pinea is the one most commonly grown in New Zealand. These are large trees, eventually growing up to 15m+, and they are hardy too, withstanding temperatures down to -23°C, wind, and coastal areas with salt-laden winds. About the only thing they don’t tolerate is wet soil.
Once planted, it’s simply a matter of waiting. It can take 6-8 years for trees to start producing cones, then you need to wait another three years for the cones to mature.
The cones are ready for harvesting in late winter or spring of their third year, and before summer when they’ll shed the nuts on their own. A long-armed hook can be used to remove the cones, or you can use a mechanical tree shaker. The cones are then laid in the sun to dry and, with luck, the kernels will eventually fall out. However, they don’t always do that, so some growers place the cones in burlap sacks to dry, and then bash the sacks at a later time to coerce the kernels to drop off. You then need to remove the edible nut from the shell.
4. Macadamias
Macadamias are another long-term investment, but given that they retail for about $70 a kilo, I’m betting many gardeners wish they had a macadamia tree in their backyard.
A general rule is, if you can grow tamarillos in your garden, you can grow macadamias. It takes four or five years for grafted trees to start producing and a decent crop won’t come for seven or eight years. If you plant a seedling tree, it can be 10-12 years before it crops.
However, an 8-year-old grafted tree in good condition can produce 10kg of nuts, and that will only increase in number each year.
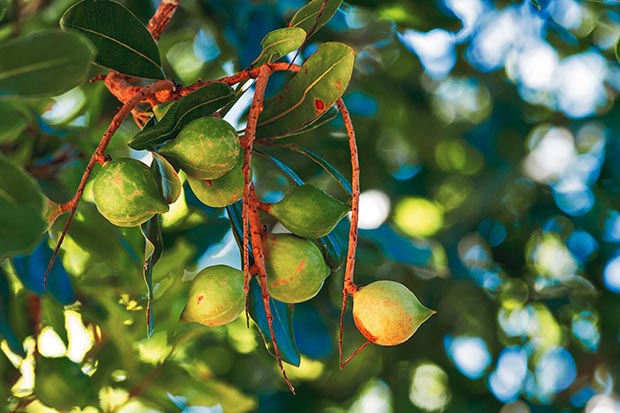
Macadamia tree.
Left unpruned, trees can reach 15-20m in height, but they can be kept to a manageable height of 3-4m. They’ll grow in a wide range soils, so long as it’s free-draining. Dig in plenty of organic matter for optimal conditions, and they need shelter from wind and frosts, although mature trees can withstand some frosts.
Most macadamia varieties need a compatible variety nearby for cross-pollination and increased yields. Even those trees that are self-fertile will do better with a pollinator close by.
Depending on the weather and area, nuts are ripe anywhere from June to August. Some trees will drop their nuts, some won’t (like Beaumont).
If the latter is the case, a long pole can be used to knock down mature nuts. You then need to husk and dry them. Nuts should be husked within 24 hours of picking, otherwise mould and rancidity can occur. After husking, the nuts need to be dried before cracking. When fully dry the nuts will rattle when shaken.
5. Pomegranates
In summer, pomegranates sell for around $2.50 each, but at the start of the season they can retail for $5 or more. If you need several, the price soon adds up. Pomegranates are worth growing at home if your climate suits, and mature trees can produce 15-30kg of fruit a year.
Trees grow best in areas with cold winters and long, hot, dry summers. Fruit may not ripen if the summer season is too cool or too short. In the right situation, trees will begin to bear fruit 2-3 years after planting. Grow your pomegranate in a sunny spot that’s sheltered from wind. They are hardy to -10°C but must have free-draining soil as the roots will not tolerate any waterlogging. A soil pH of around 7 is ideal.
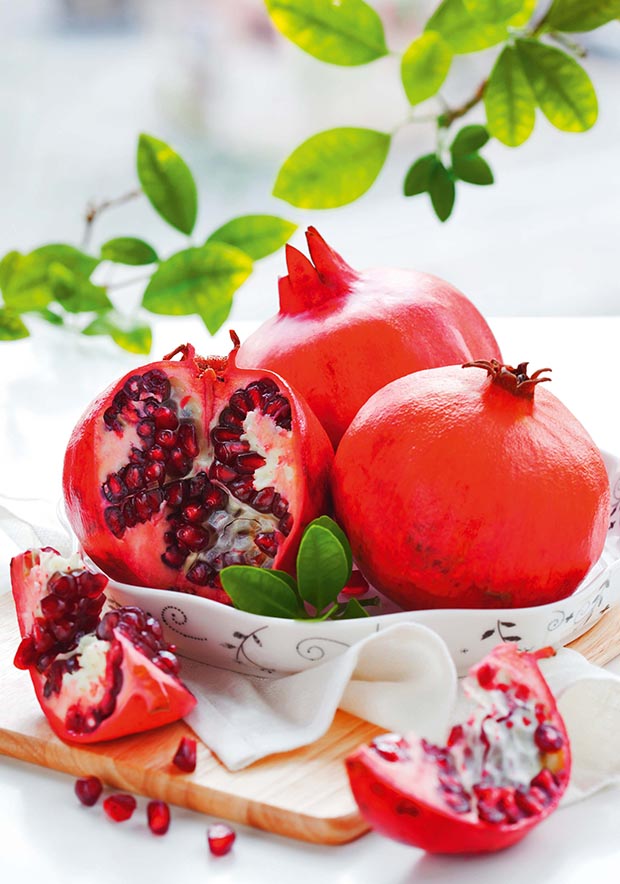
Plant 4-5m apart for single trees or if growing as a hedge, plant the centre stems 2-3m apart. Pomegranates grow 2-3m high so they are ideal for large containers too.
Pomegranates need only a light haircut as fruit is borne at the tips of new stems. During the first three years, branches should have their tips removed to encourage the growth of lateral branches. After the third year, lightly prune once a year after fruiting to encourage further growth. Pomegranates continuously produce suckers from the root and crown area, so these should be removed as soon as they appear. You should also remove any dead, damaged or unproductive old wood during winter.
Young trees need regular moisture and food during the growing season, but once established they don’t need as much.
6. Makrut (kaffir) lime leaves
If you love Asian food, the makrut (kaffir) lime is a must. Its aromatic leaves are an essential ingredient in many Thai and other south-east Asian dishes, but in the grocery store, a pack of six leaves can set you back about $5.
For the sake of your bank balance, you can grow your own tree and have fresh leaves year-round, and the bonus of the knobbly fruit. These contain little juice, but what there is can be used, along with the rind, in curry pastes and as a flavouring in other dishes.
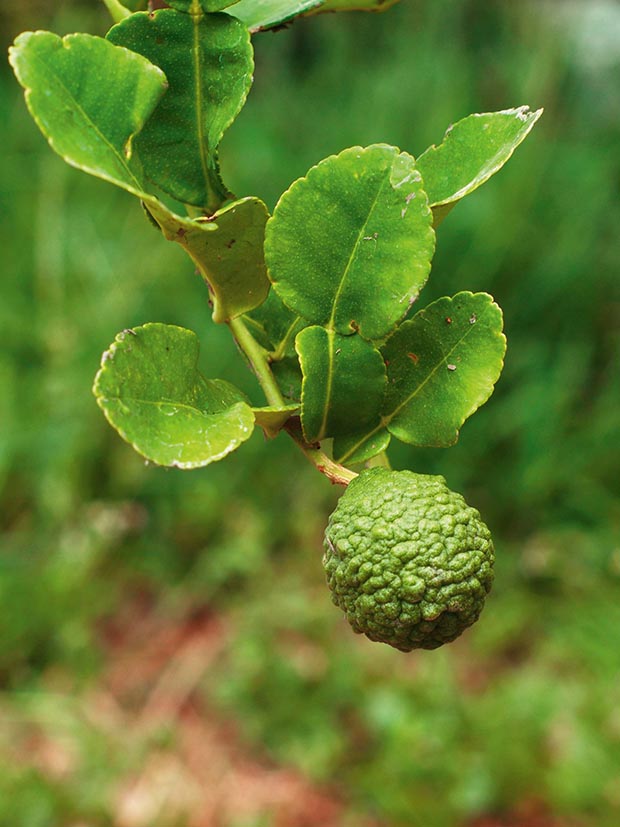
The makrut (or kaffir) lime is a must if you like Thai food.
Plants are frost tender, so in cooler regions the tree should be grown in pots to bring indoors or in a sheltered north-facing position over winter. When planting in the garden, position in a warm, sunny spot away from cold winds. Water regularly – they like plenty of moisture as citrus trees have shallow, fibrous roots and are prone to drying out. However, the soil must be free-draining as they’ll also turn their toes up in soggy soil.
If planting in the lawn, hand-weed a small circle around the base so that grass doesn’t compete for moisture. Mulch the base to conserve moisture, but keep the mulch away from the trunk. The kaffir lime is a small tree that grows to about 4m. However, it’s slow-growing, and unless you’re growing it in tropical-like conditions, it’s unlikely to get that tall in New Zealand.
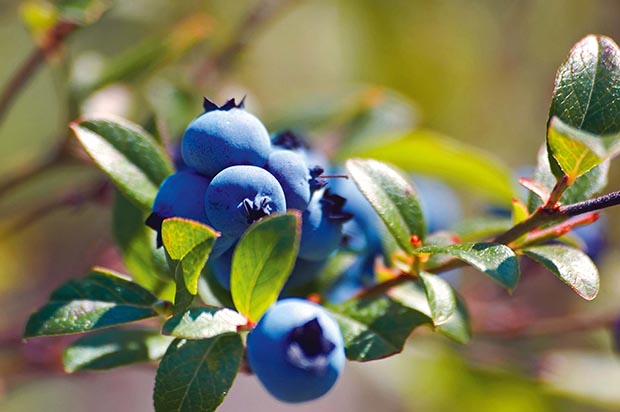
7. BERRIES
If you have kids who like berries, it’s much more economical to grow your own. Kids can get through a couple of punnets of berries in one sitting – that’s about $8 worth! Soft fruits are easy to grow and can be grown on a large or small scale. The most popular are blueberries, raspberries and currants.
Blueberries like acidic soil. You can use an ericaceous (acidic) potting mix or amend garden soil with the addition of pine needles or conifer clippings. If your garden soil has a high pH, you’d be best to grow blueberries in containers. Mulching with pine needles will help amend soil slowly and protect the plants’ shallow roots.
Blueberries can cope with partial shade but berry production is best in free-draining locations with full sun. You can plant blueberries all year round and they will fruit in summer.
Raspberries are one of the easiest berries to grow. Bare root canes can be planted from late autumn through to early spring. There are summer and autumn fruiting varieties so by choosing well, you can have berries all the way through from summer to mid-autumn. Choose a fertile, slightly acidic site in free-draining soil. Provide a thick mulch of bulky organic matter around the canes. Providing support in the form of a trellis or posts and wires will allow for a more organised set-up and easier picking.
Autumn-bearing varieties can be cut right back to the ground after fruiting, as the canes that regrow will fruit the following year. However, with summer-bearing varieties, leave the smaller canes that didn’t fruit this year, as fruit will grow on these next summer. You can prune out the canes that did fruit this year though, as they won’t fruit again.
There are several Ribes species that provide edible fruit. They do best in full sun in a sheltered spot but will also tolerate some shade. Black, red and white currants can all be grown, but they do best in cooler regions. The number of flowers and fruit are reduced if there is a lack of winter chill. Plant in the dormant season from late autumn until early spring. They like plenty of nitrogen, so dig in some well-rotted poultry manure before planting and mulch with compost.
8. Avocados
At the start of the season, avocados are frightfully expensive – $5 or more a piece. Even at $2 a pop, your grocery bill will soon add up if you like your avocados. Compare that to a homegrown tree.
A 7-year-old grafted avocado tree can bear more than 200 fruit each year. That’s an enormous saving.
Avocados grow best in areas with mild winters, so for southern gardeners it may be a distant dream. Even a light frost will knock back tender growth and a dip below -3°C will kill a young tree. More established trees might withstand a light frost, but good fruit production is dependent on favourable – that is, warm – conditions, especially during flowering.
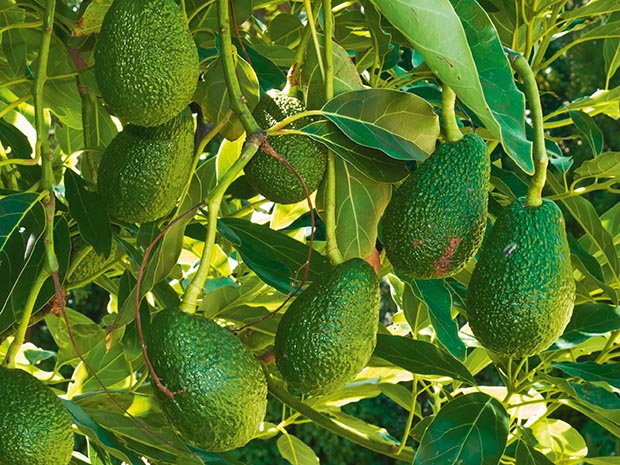
Ripening fruit on an avocado tree.
Plant avocados in a warm, sunny spot sheltered from winds. A cool prevailing wind is detrimental to fruit set. Avocado branches are fairly brittle, too, so a gust of wind might cause one or two to snap.
Avocados must have free-draining soil or their roots will succumb to rot. The soil should be loose – they need at least 90cm of free-draining soil – and heavy, clay soil is unsuitable.
Add compost and blood and bone to the soil before planting, and plant carefully as the roots are easily damaged. As a rule of thumb, the main nutrient needed by avocados is nitrogen, but a balanced fertiliser is a good option once a year. Yellow leaves are typically an indication of nitrogen deficiency.
Annual pruning is not required. However, prune to remove dead or unproductive branches, or those facing inwards. Mature trees may eventually need a prune to reduce height, though bear in mind that fruiting will be affected for a couple of years afterwards.
9. Limes
At around $27 a kilo in shops, it’s worth growing your own limes for a regular, much cheaper supply.
Lime trees are the most tender of all citrus. For optimal growth, they need a frost-free spot in full sun, however they can be grown in containers and shifted to a sheltered spot over winter if you’re in a cooler area.
Lime trees can be a little fussy, especially in the early stages. They need a richly fertile and free-draining soil. If nutrients are in short supply, leaves may turn yellow and fruit can be sparse. Feed plants in the ground with a specialised citrus mix every six weeks. Continue until March, then hold off feeding over winter until September. If growing in containers, apply a slow-release fertiliser in September and again in summer and give them a monthly feed of liquid fertiliser too.
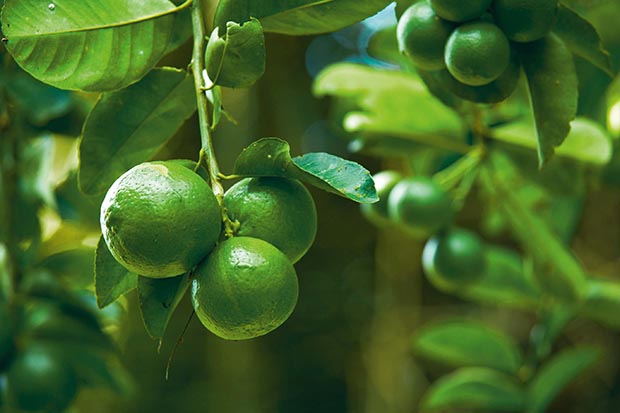
Limes are one of the most expensive of fruit to buy.
Regular watering is essential, particularly when young trees are establishing and when more mature trees are flowering and developing fruit. Lack of water can cause fruit drop or a low juice factor, so in hot dry spells, provide a good soaking every couple of days, or daily for container-grown plants. That being said, overwatering can kill plants too. The rule of thumb is to water consistently but not obsessively.
Don’t be discouraged if your trees drop fruit in their initial years. Citrus trees often abort their fruit during this time, until they are about five years old.
Pruning isn’t necessary for citrus other than to clear out dead or damaged stems, to open up the centre of the plant to improve airflow, or to maintain height.
10. Cauliflowers
Cauliflowers can be ridiculously expensive when there’s a shortage (up to $8 a head!), making it well worth growing your own if you have the space. However, of all the brassicas, cauliflowers are the trickiest to grow. They’re sensitive to hot and cold at certain stages of growth. Seedlings, for instance, need protection from frost, though established plants will happily grow in cold conditions. Head formation is affected by extreme temperatures (both hot and cold), so a tunnel house might be best in cool areas.
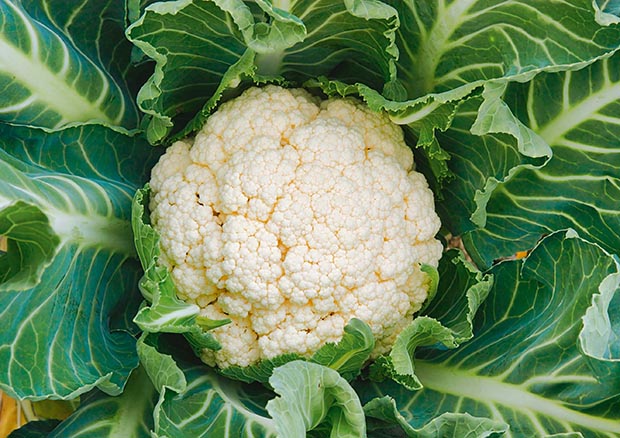
In a shortage, cauliflowers are ridiculously expensive.
Cauliflowers also need uninterrupted growth to be successful. If growth is checked due to not enough food or water to keep them growing, heads may be small, or in some cases they won’t form at all.
Plant seedlings in rich, well-composted soil and give them plenty of space. For full-sized cauliflower heads you will need to leave 60-75cm between plants. You can also grow smaller heads with a spacing of around 45cm. Make sure that the soil is firmed well around the plants as like all brassicas, cauliflowers can suffer if they are subjected to root rot.
Feed and water regularly during growth. Use a balanced fertiliser that also includes boron and magnesium. A boron deficiency can cause cauliflowers to have hollow stems.
As cauliflower produces only one head per plant, you should stagger your planting throughout the growing season so that you don’t end up with hundreds of heads maturing all at once.
