5 steps to creating your own food forest garden

Food forests can seem like the most complicated of garden designs, but here’s how to do it yourself, step-by-step.
Words and photos: Carl Pickens
There is almost no-one I know who doesn’t get excited by the mere mention of the words ‘food forest.’ It seems to evoke distant memories buried deep in the subconscious, of a Garden of Eden-like scenario where food is abundant, free, and easy to obtain.
Such romantic notions belie the fact that food forests are a lot of work, especially in the early stages, and it can take seven years before the system reaches a seriously productive yield. You may also have to share your yield with over-enthusiastic birds and insects, something the promoters of food forests don’t often mention but those of you with productive orchards already know.
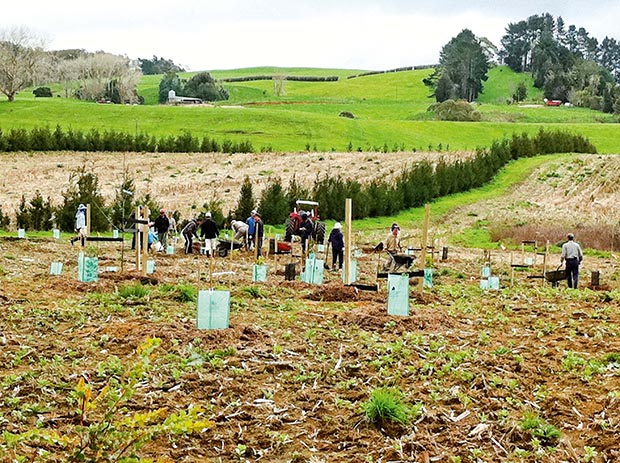
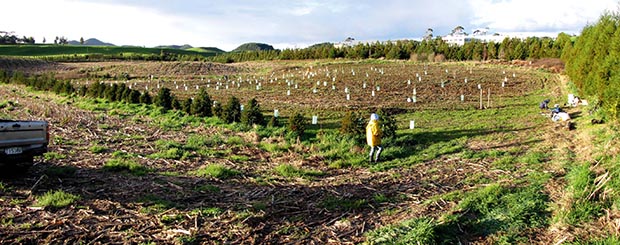
A new food forest going in at Waihi.
However, let’s not dismiss the many merits of a well-planned, properly-established and well-managed food forest. Now that I’ve hopefully brought you down to earth, let’s look at some of the key factors to consider when starting from scratch:
4 KEY FACTORS TO CONSIDER
1. Climate
It’s a no-brainer but it has to be said that it’s most important to choose plants that are well adapted to your particular climate. While you may want to plant subtropicals, if your block is subject to intermittent frosts you are wasting your time and money, especially in the early stages. A food forest, once established, creates some protection and opportune niches for frost tender species, but in the early stages on open ground? Forget about it.
What about sunlight? If you look closely you’ll notice a natural forest has varying niches for plants to grow. There will be sunnier places at the forest edge, shadier places behind large evergreen trees, and intermittent winter sun/summer shade under deciduous fruit trees. This is where planning is essential, to figure out the relationship between deciduous and evergreen species and which plants will shade others out over time.
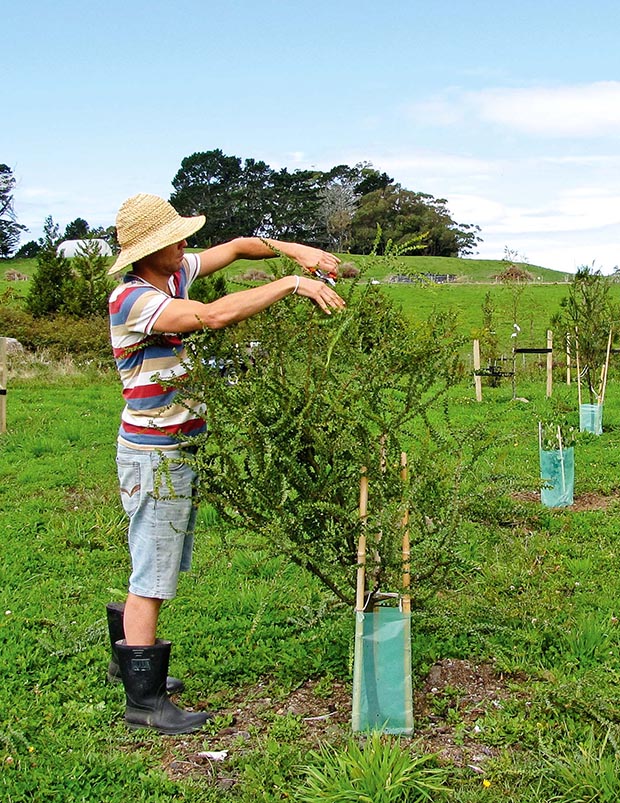
Chopping and dropping is an important food forest technique.
Prevailing winds are a little easier to work with, not because fruit and nut trees love strong winds - most don’t, although deciduous trees do like a bit of breeze, especially in humid areas.
Rather it’s because you can alter wind patterns by planting shelterbelts. You can plant fast growing species like silver wattle, which can be seen as temporary and removed after 5-7 years, once more permanent shelter trees have established. Japanese cedar is another good shelterbelt tree, and there are many more.
A forest of sufficient size will eventually create its own microclimate; however you may well need hardier species to take the edge off cold prevailing winds, especially in the early stages.
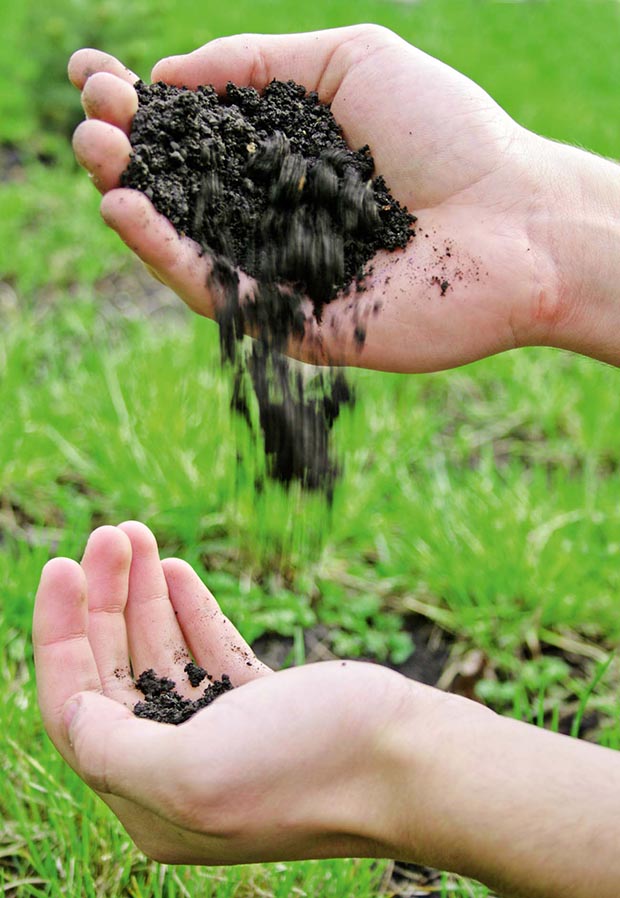
Testing soil should be your number one priority.
2. Money, time, tools
It helps to decide early on what kind of management regime to adopt. For example, a more intensive approach would involve pruning trees to enable better access to the fruit, and you’d likely adopt a closer plant spacing.
Using a less intensive approach, you would allow trees their full expression of growth and accept that some fruit will be out of reach. If you’re prepared to collect seed and propagate your own plants then establishment can be relatively cheap, the disadvantage here being this approach is comparatively slow.
The management regime you decide to adopt will also depend on the existing situation on the ground, eg is it bare land? Is there grass cover? Are you working within an existing orchard?).
3. Grass cover
More often than not I meet people who want to establish a food forest on existing grassland. If you’re lucky this will be pastoral ryegrass with an established shelterbelt nearby. However the law of Murphy generally dictates the existing cover is riddled with either kikuyu or couch grasses.
If possible you want to eliminate these grasses before you begin, and if (like me) you prefer an organic approach, it isn’t easy or necessarily straightforward. You can spray, but don’t be surprised if you need several applications.
4. Soil
Many undiagnosed problems come back to the soil so - if you can - choose your site wisely. If you have a predominantly clay loam that is poorly drained, don’t expect great nitrogen-fixing trees like tagasaste or avocados to do well. They will both turn up their heels and likely die if you have a very wet winter soil.
Similarly don’t expect citrus to do well in a sandy soil, not without the addition of organic matter and heavy mulching as their shallows roots don’t like drying out. There are many things we can do to alter the structure of the soil. The only problem is they tend to be either slow to make change or expensive in terms of labour or monetary cost, such as ripping the soil, adding gypsum, adding organic matter, and growing green manure crops.

It also makes complete sense to choose appropriate rootstocks for your particular soil. Here in the north of the North Island for example, Northern Spy rootstock for apples is well adapted to heavier, wetter soils.
5 steps to a food forest
Succession refers to a process, something evolving in stages where one stage logically follows the other, the most ‘purist’ method of establishing a forest garden.
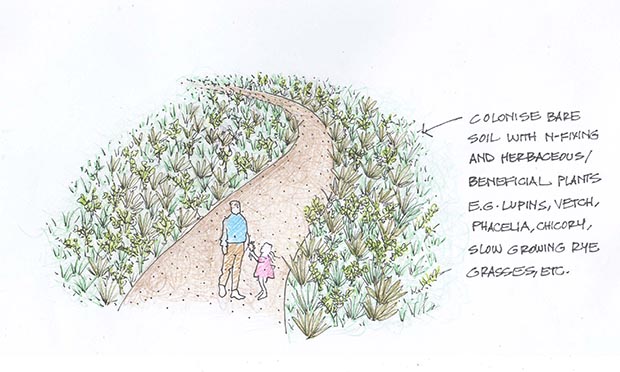
1. Plant beneficial groundcovers
You’ve removed the existing grass, and the ground has been tilled and made ready for seeding. Perhaps it has even been ripped to improve drainage (this can work wonders, depending on the site and soil), and you may have added organibor (a BioGROapproved form of boron), lime and rPr (rock phosphate) to resolve soil deficiencies.
Now we are ready to sow nitrogen-fixing groundcovers. Lupins are a popular and effective nitrogen-fixing plant, and vetch also performs well in cold winters. You could also add mustard seed and phacelia for general soil conditioning, and maybe even some slow-growing ryegrass, chicory and buckwheat if you want to create a more biodiverse herbal ley.
These beneficial plants add nitrogen, mine the base soil for minerals, and help deter unwanted weed species. 2. Plant nitrogen-fixing shrubs and small trees The relationship between fruiting species and nitrogen-fixing species is an important one, with up to four required for every fruiting species.
Nitrogen is essential for leafy plant growth (hence photosynthesis), and is constantly being leached from the soil and taken up by plants. It is by no means the only important nutrient though. Phosphorous (which assists cell division, bud development and fruit set) and potassium (which assists fruiting, and provides disease resistance) are examples of two other important nutrients which may require targeted inputs in order to correct any deficiencies.
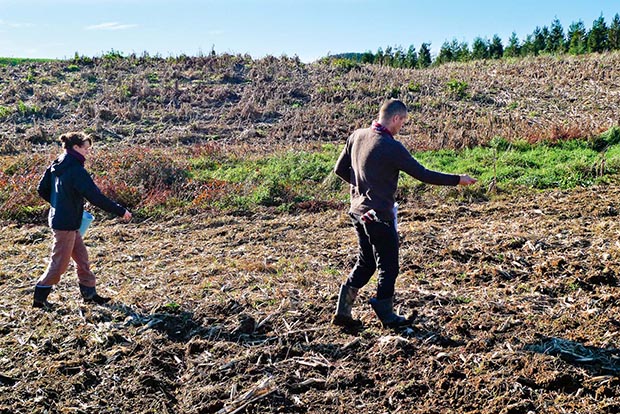
Hand sowing groundcovers on bare land (this seed mix was later disced into the soil).
Small trees or shrubs to consider include tagasaste, Acacia pravissma, and Siberian pea shrub (if you can get hold of the seed, try the Koanga Institute), or you could try native plants like poroporo and broom. Some of these will be sacrificial, designed to be there for only a few years to assist fruit trees in getting established. You can plant all of these species at a reasonably high density.
2. Do you need to dig?
Geoff Lawton is a renowned Australian permaculture designer and something of a food forest expert. His approach to establishing food forests is quite systematic and often includes an earthworks phase. He creates swales in the landscape, which capture, hold, and infiltrate rainwater/stormwater. This process involves some fairly serious intervention early on, and subsequent upfront cost of heavy machinery.
He then seeds the mounded part of the swale with nitrogen-fixing/beneficial annual and perennial groundcovers. This is a great way to make use of intermittent and low rainfall levels throughout much of the year in dry climates, like in parts of Australia.
However in much of NZ we have rainfall levels which are reasonably high and more evenly distributed throughout the year. In Auckland and Northland for example, swales are probably not necessary, although they could be helpful in times of drought and for establishment purposes, or where soils are very light and porous.
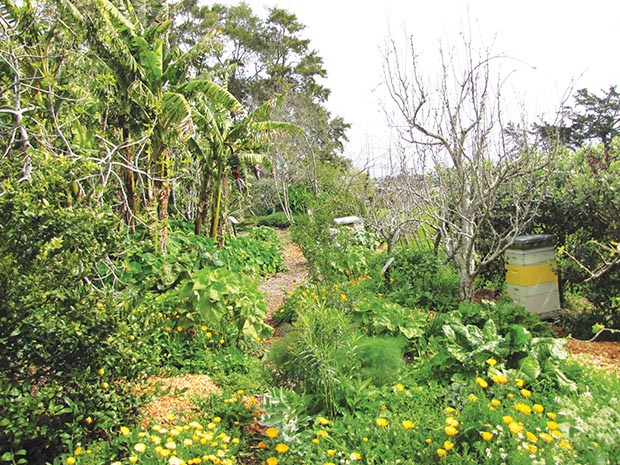
Food forest with lower growing citrus and companion plants at the edges, Kelmarna.
However, you’d also want a release point at the end of the swale for times of prolonged heavy rainfall, or excess water could risk collapsing the mounded part of the swale (referred to as the ‘spoil’). Other watering options for drought conditions include: heavy mulching, planting on soil benches in steeply sloped areas, and adding lots of organic matter.
You could also just get out there and water the plants, if this is feasible. You need surprisingly small amounts of water to keep plants alive; they may not thrive with this approach, but they will survive.
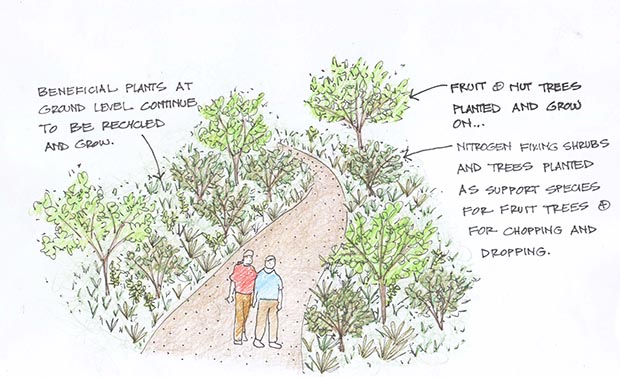
3. Plant fruit and nut trees
These can actually be planted at the same time as the nitrogen-fixing shrubs/small trees, but it doesn’t hurt to let the nitrogen-fixers grow a bit first to create a really beneficial environment for the productive species that follow. Planting methodology is important. I like to colonise the bare roots of fruit and nut trees with mycorrhiza fungi by simply dusting the fungi spores (sold as a powder) over the bare roots of fruit trees prior to planting. This is one reason why it’s good to plant deciduous trees bare-rooted in winter, and it also greatly decreases transplant stress.
The mycorrhiza fungi colonise the root system and effectively increase its surface area, pumping more nutrients into the plant. Staking is helpful too in windy environments, and pretty much essential to avoid rocking of the root system which can easily kill young plants.
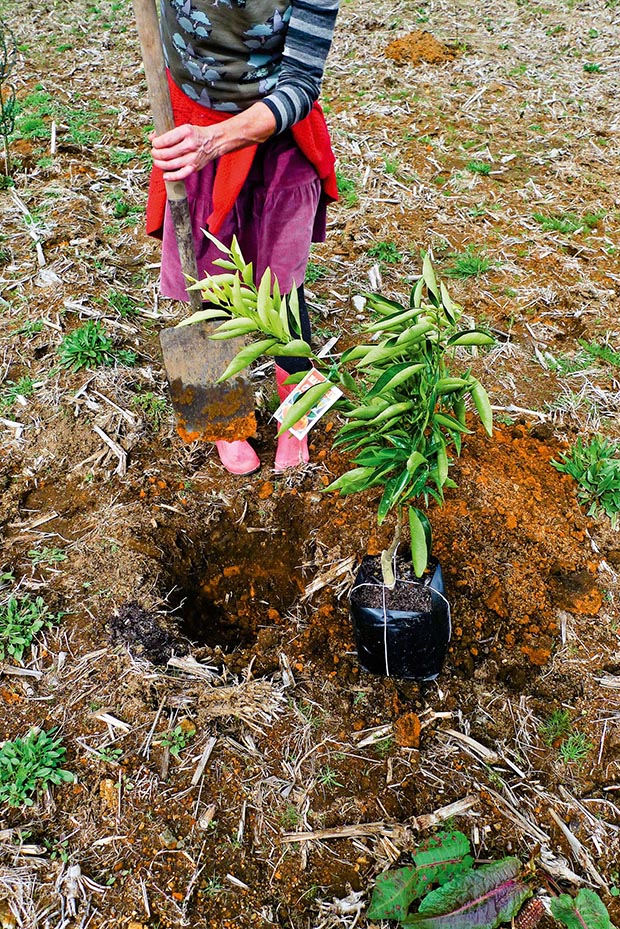
Fruit trees going into the food forest. It’s important to make sure trees are suited to your soil and climate conditions otherwise it’s an expensive waste of time to include them.
At this stage you may want to plant groundcovers like comfrey around the base of your trees. Comfrey is an excellent plant due to its ability to mine the base soil for minerals (which may not be present in the upper layers), provide a barrier to the reinvasion of unwanted grasses, and as a source of potassium as it has very high levels. Potassium builds levels of phytoalexins in plants, which is a natural anti-fungal agent, and the more of this the better as fungi account for 80% of all plant diseases.
Incidentally, seaweed is also an excellent source of potassium. You may also want to include some larger, more long-lived nitrogen fixing trees at this point. Possibilities include robinia (although it can be invasive), tipu (also called the ‘pride of Bolivia’), virgilia (not uncommon as a street tree), or even native kowhai.
4. Chop and drop
‘Chop and drop’ is a way of accelerating a process that takes place naturally in a forest environment. Trees and shrubs (often large-leafed, but not exclusively so) are repeatedly and heavily pruned, with the prunings left to decompose naturally on the ground.
The goal here is to create a humus-rich layer of decomposing vegetative matter on the forest floor. This will attract earthworms, assist beneficial fungi and insect life cycles, helps to build soil, and will be a major contributor to a healthy ecosystem in the long run.
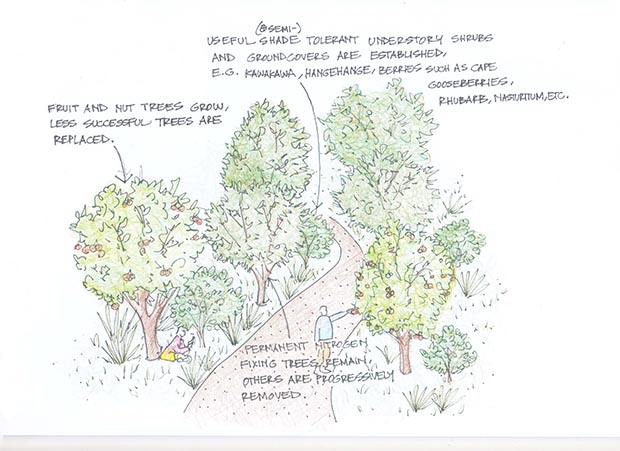
5. Build layers
Some people talk about the seven layers present in a food forest but building this many productive layers is very challenging, and I feel it is a rather lofty goal. In order for this to be achieved you’d have to have several layers growing in shady conditions, something the vast majority of productive plants despise, so I prefer to be a bit looser in my definition.
Sometimes only a few layers are going to be appropriate (especially in heavy shade), however where you have created a significant light gap you may get up to 4-5 layers.
I prefer to include any kind of beneficial plant in a forest environment (not just food producing), such as native kawakawa as an understorey, shade-tolerating plant which has medicinal properties and makes a great tea. For this reason I prefer the term ‘forest garden’ to food forest as it is more inclusive of all kinds of plants.
When I am asked to design a forest garden I first assess the site conditions (climate and soil), and determine the objective of the food forest eg, to provide an eventual low maintenance source of food, somewhere for the kids to play, for the beauty of it.
I look at the resources available, namely human resources in terms of labour, available skills, time, and capital. I then design a food forest that is tailored to the situation at hand because there really is no ‘one size fits all’.
3 WAYS TO KILL GRASS ORGANICALLY
1. Mulch – option 1
You can mulch heavily using several layers of thick cardboard or old carpet (preferably wool without any underlay) over kikuyu or couch, followed by 200mm thick mulch. This does a good job of suppressing the grass and killing it off (well, most of it anyway). This approach does however make it difficult to establish groundcovers under trees, at least initially.
2. Mulch – option 2
Bales of hay split in half and left on the ground for several months have the uncanny ability to kill off grasses underneath (even kikuyu). The idea is to then plant into this bare patch and prevent the kikuyu or couch reinvading but it helps to be good with a weedeater. You can do the bale thing at quite close intervals and plant a dense mix of trees and shrubs into the bare patches of ground.
The goal here is to shade the ground as quickly as possible because shade is the one natural enemy of kikuyu. This is an approach regularly seen in native revegetation plantings (close plant spacing). With such close spacing, it’s natural to assume some of your plants will be temporary as you’ll cull them out over time, perfect if you’re using shorter-lived nitrogen fixers.
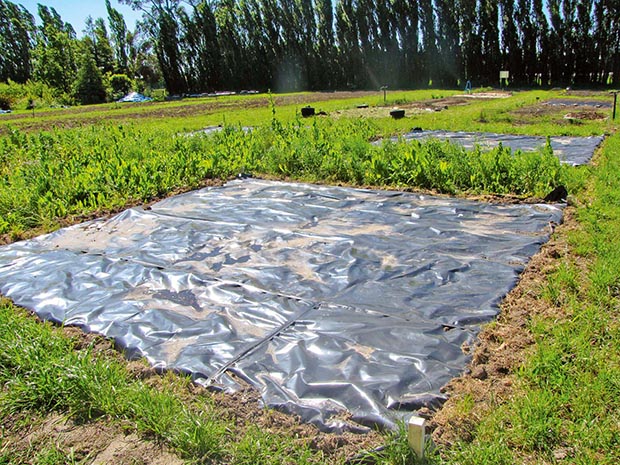
3. Mulch – option 3
There is also the ‘cover the area in black plastic’ technique. This also kills kikuyu,but you had better weigh the plastic down, eliminate all light, and be prepared to wait up to six months before you begin planting. If you have time on your side and a penchant for black plastic, this does avoid the unpleasantness of chemical sprays.
THE ONE THING YOU MUST DO BEFORE YOU START
I can’t stress this enough: start with a soil test. This will bring peace of mind as you seek to remedy any deficiencies that will affect fruit growth or bud set later on. Then, do what you can to remedy any deficiencies at an early stage. If you do test your soil and it is showing low levels of some minerals, and it has a low pH of say 5.5, then lime your soil and test it again prior to bringing in any additives. A low pH can lock up minerals in the soil. Once the pH is lifted any deficiencies present will likely reduce in number and severity.
