DIY: A stylish unit for winter firewood storage
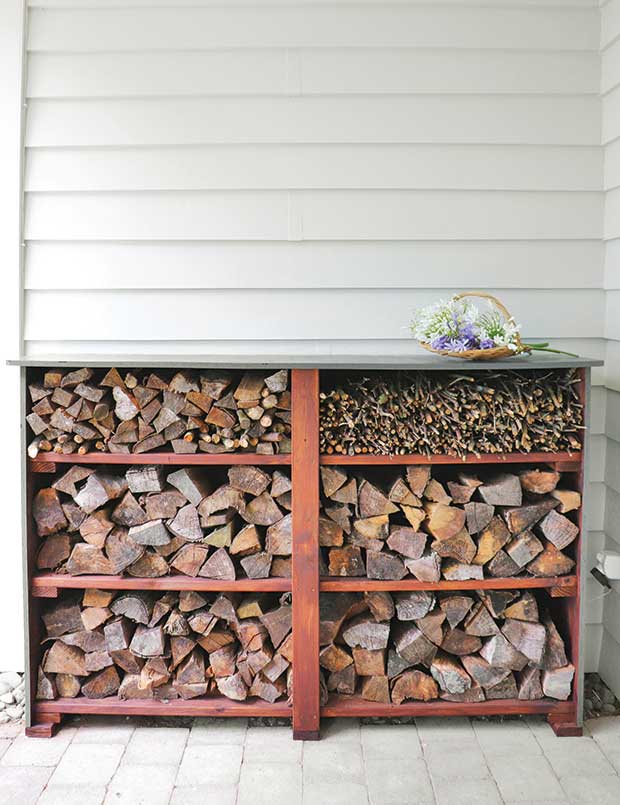
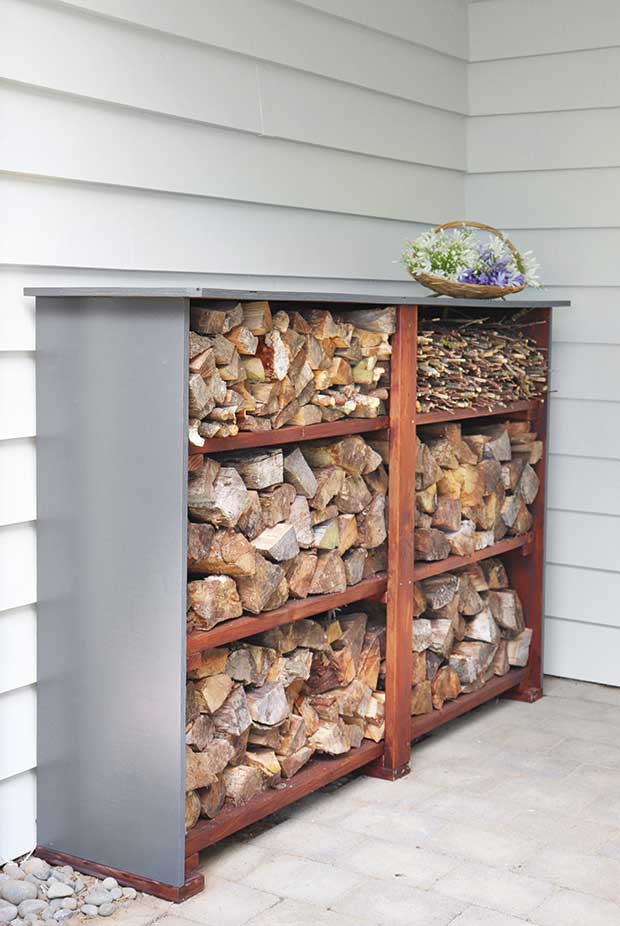
This stylish unit keeps firewood in a handy spot so you can avoid a chilly winter dash to the woodpile.
Words & images: Julie and Jel Legg
Many block owners will have a winter’s worth of cut wood drying outside or tossed into a storage shed.
But no-one wants to make the chilly sprint out into the dark to grab extra wood to top up the fire. This project lets you neatly store 3-4 days’ worth of firewood, just outside your back door.
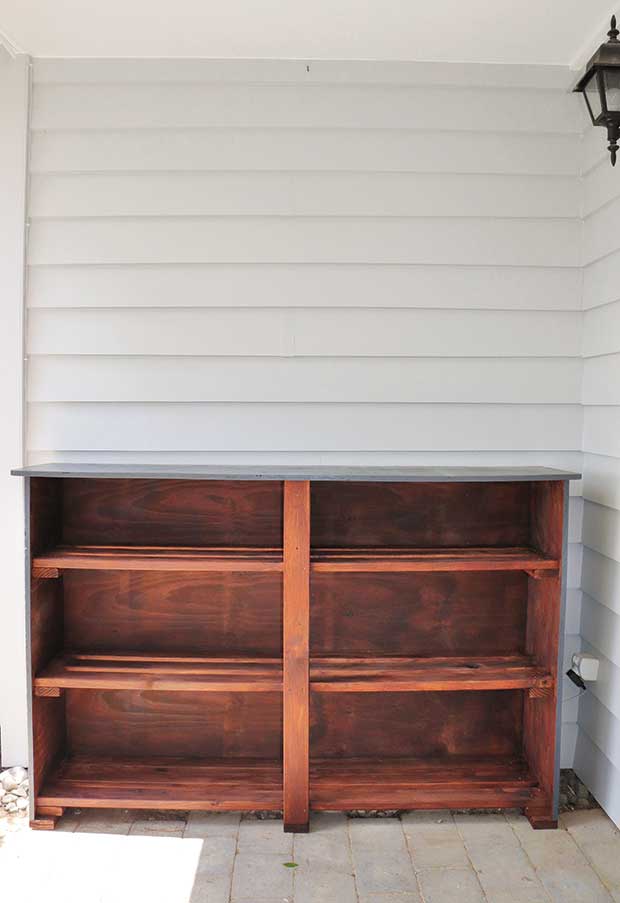
This simple wood store has a solid back and sides, with open shelves that allow air flow, inhibiting moisture build-up.
This example has a flat roof – doubling as a shelf – because it will be sitting on a sheltered porch. If yours will be exposed to rain, cut the side panels at a slight angle so the tilt allows water to run off.
If the unit will be in an area exposed to rain or sitting on the ground, use H4 treated fence railings to allow for air flow and to avoid damp rising in the structure.
Materials
2 sheets x 18mm,
2400 x 1200mm
treated H3.2 plywood
21m x 88 x 32mm smooth decking timber
50mm deck screws
Resene Colorwood
natural wood stain
Resene Quick Dry primer waterborne undercoat
Resene Lustacryl semi-gloss waterborne enamel paint
Tools you will need
skillsaw
sander
drill
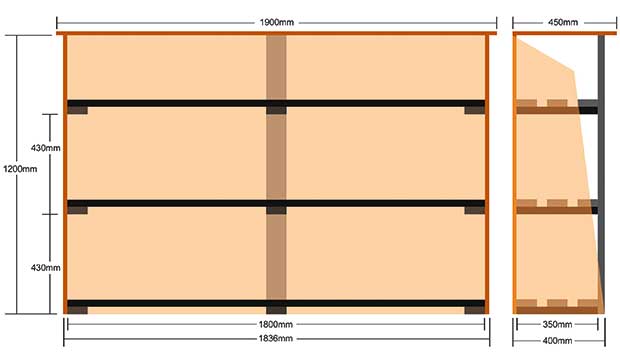
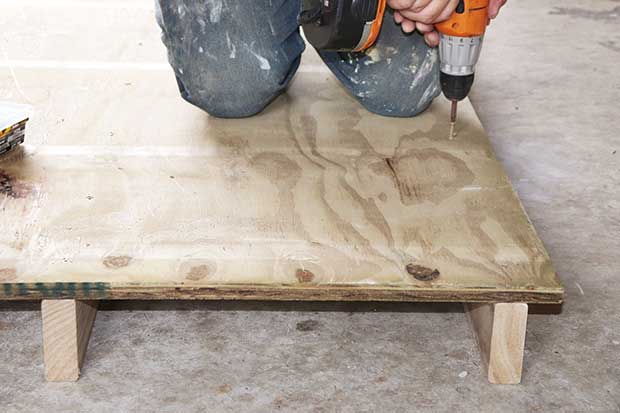
The bottom shelf is 32mm off the ground, to allow room for the bottom shelf support.
1. Measure the plywood
Measure and cut the plywood sheets:
Back: 1 x 1200mm x 1800mm
Sides: 2 x 1200mm x 400mm
Roof: 1 x 450mm x 1900mm (allows for an overhang at the front and sides)
Measure and cut the decking timber:
Shelf slats: 9 x 1800mm lengths
Shelf supports: 9 x 350mm lengths
Centre support: 1 x 1200mm length
Sand surfaces to remove any burrs.
2. Position the plywood parts
Lay the plywood back (1200 x 1800mm) on the ground. Place three of the shelf slats (1800mm) on their narrow edges at the desired shelf levels – these are the back slats of each shelf. Ensure the bottom slat is 32mm back from the panel edge (that will be the bottom of the unit). This is to allow room for the shelf supports (which are sitting in place in this image but won’t be secured until Step 5).
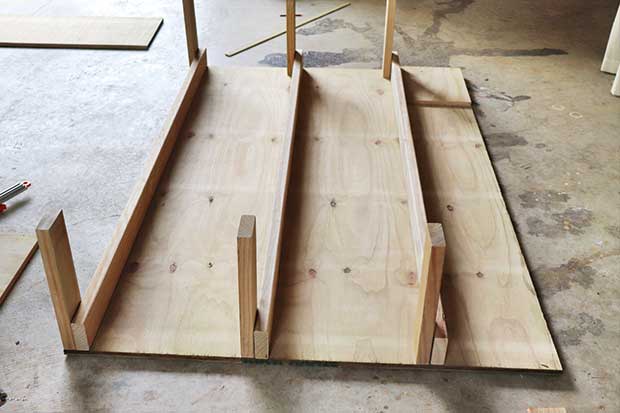
Set the bottom slat back 32mm from the edge to allow room for the bottom shelf support.
Ensure the slats are square to the edge of the plywood, then mark where they are sitting on the edges of the plywood for reference.
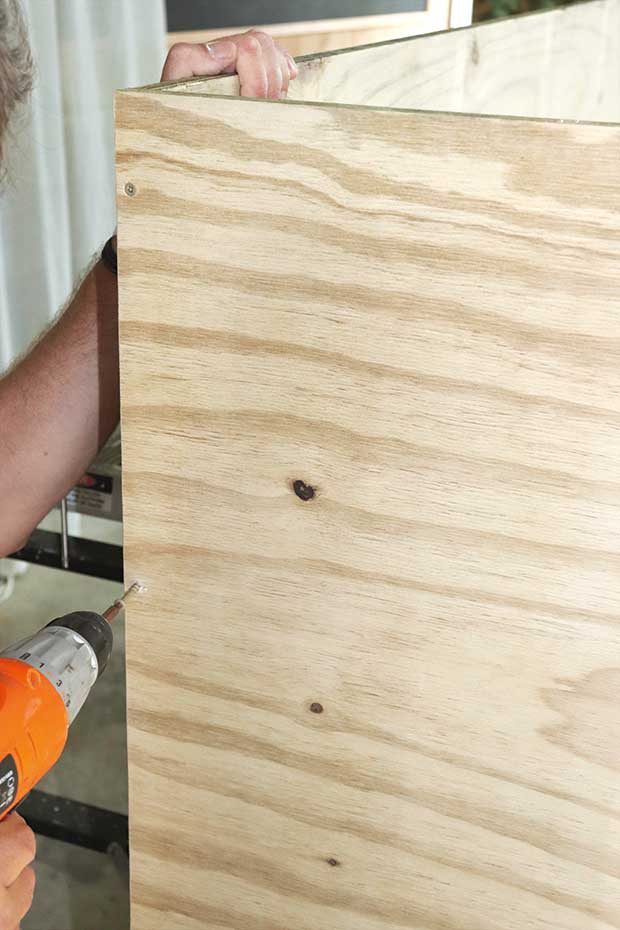
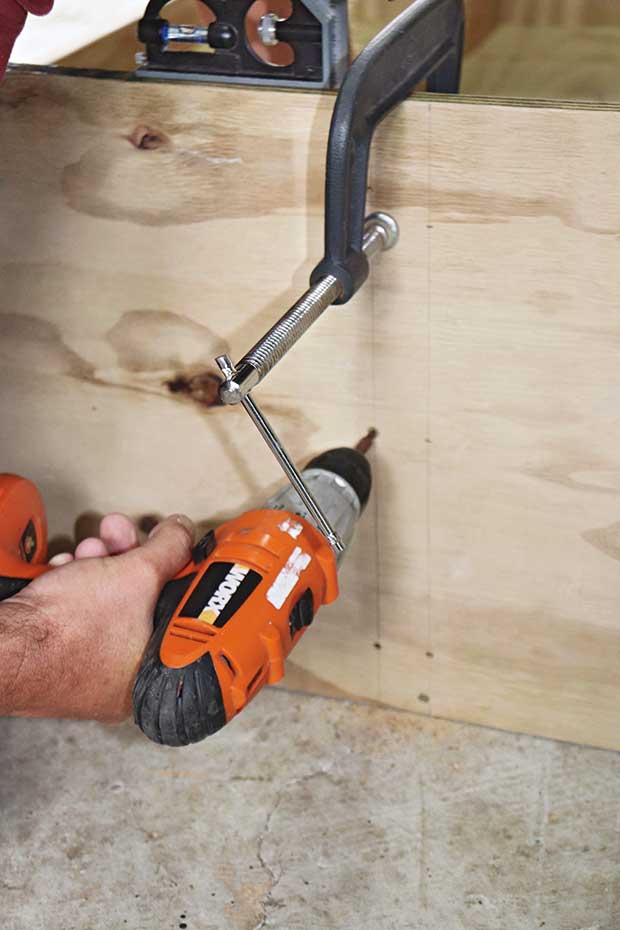
3. Secure the slats
Reposition the three slats so they are underneath the plywood sheet, using the marks to ensure they are in the right place. Drill five, evenly-spaced holes along the back of the plywood, to align with each piece of decking, then secure with screws.
4. Secure the side panels
Secure the two side panels (1200 x 400mm) with screws through the plywood and into the end of each slat, and where the sides and back meet.
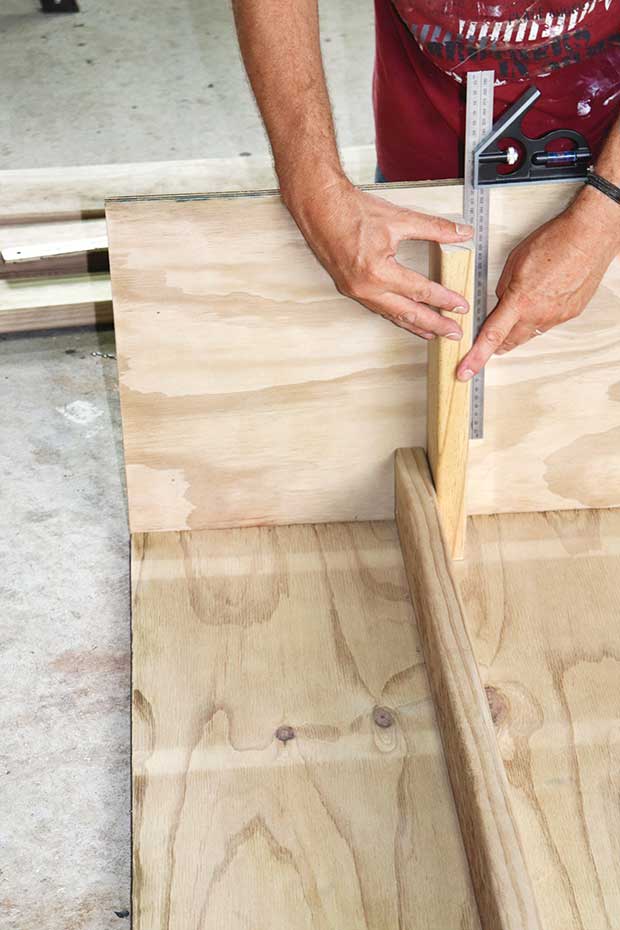
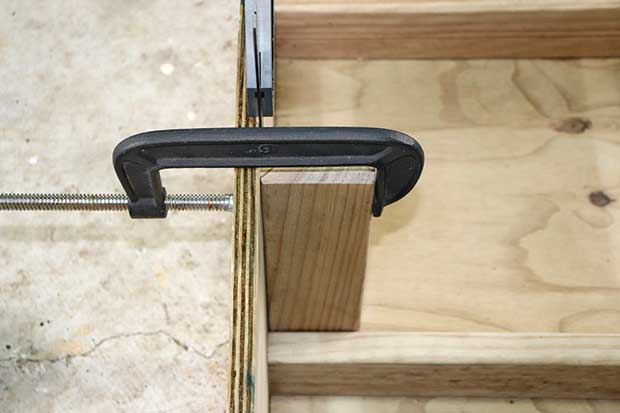
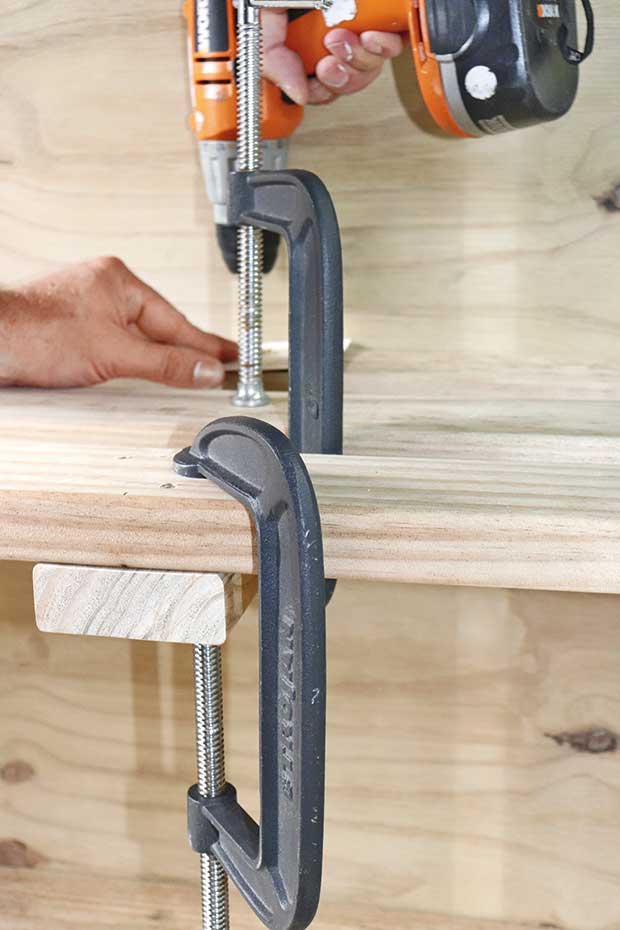
5. Secure the shelf supports
Position the six shelf supports (350mm) underneath the three slats (previously fixed in place in Step 3). You need one on each side of the unit, touching the plywood sides. Screw in place, through the side and back panels – we used a clamp to hold them in place.
6. Form the shelves
Position, then screw the remaining six 1800mm slats in place, to form the shelves. Evenly-spaced gaps between each piece allow for air flow.
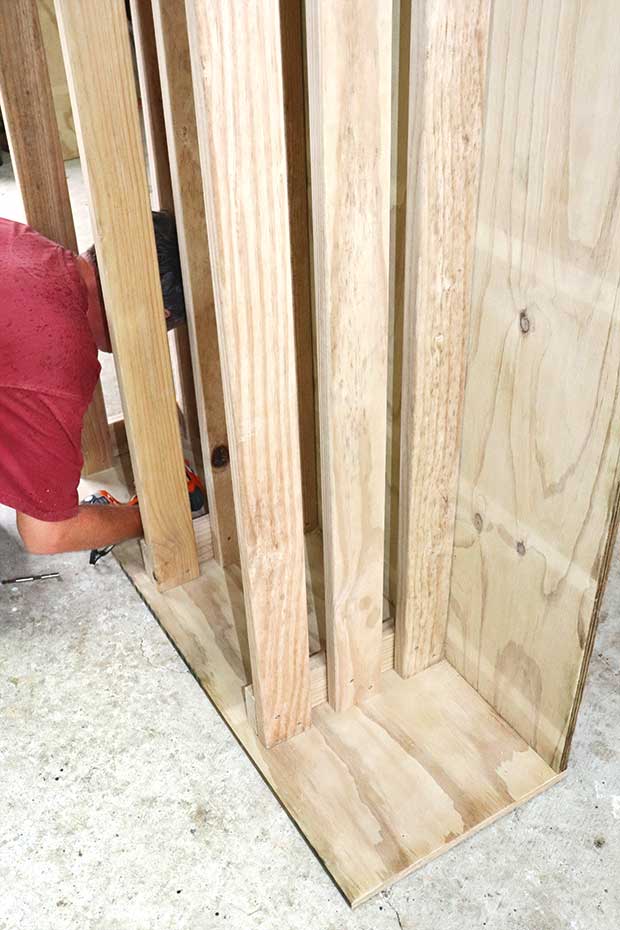
7. Secure the shelves
Screw the three remaining shelf supports (350mm) in place. These should be centred under each shelf, to help carry the weight of the firewood. Secure with screws going into each shelf slat. Also place screws through the back panel and into the centre of the supports.
8. Place the vertical support in the front centre
Stand the vertical support (1200mm) in place at the front, then screw through it into the ends of the centre shelf supports. This also helps with the weight-bearing capacity of the shelves.

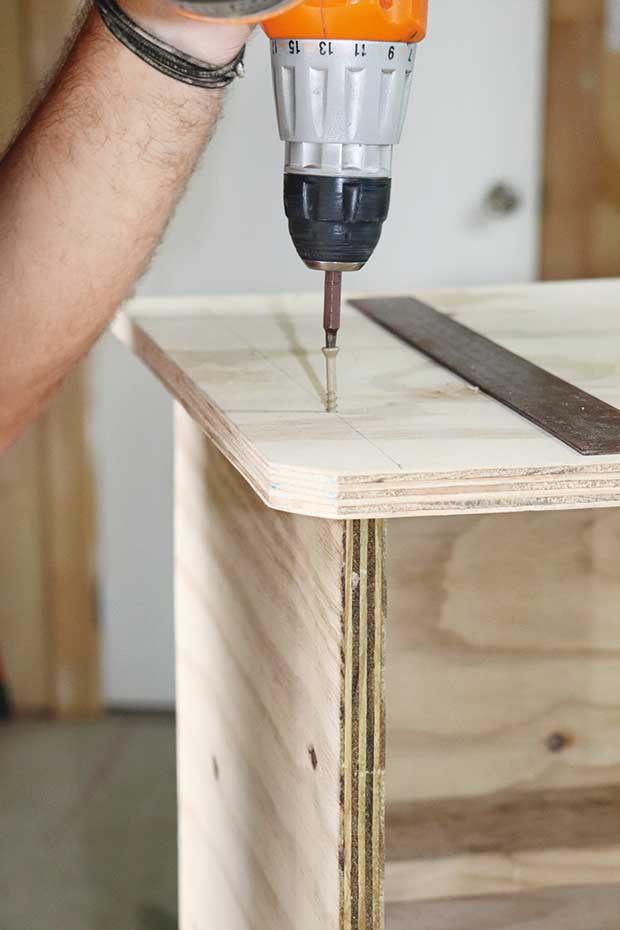
9. Secure top panel
Secure the roof panel to the top. Allow an overhang on the front and sides (it will sit flush with the back). Secure with screws into the back and side panels. Round off the roof edges at the front as square edges at this height (1200mm) can be a hazard.
10. Paint interior and exterior
The interior of our unit is Resene Colorwood natural wood stain. For the exterior, we used Resene Quick Dry waterborne primer (undercoat) and two topcoats of Resene Lustacryl semi-gloss waterborne enamel, tinted to Grey Friars.
MORE HERE: