DIY: How to make fairy light lanterns
Light up your backyard with these glowing orbs of twine.
Words and photos: Sheryl Burson
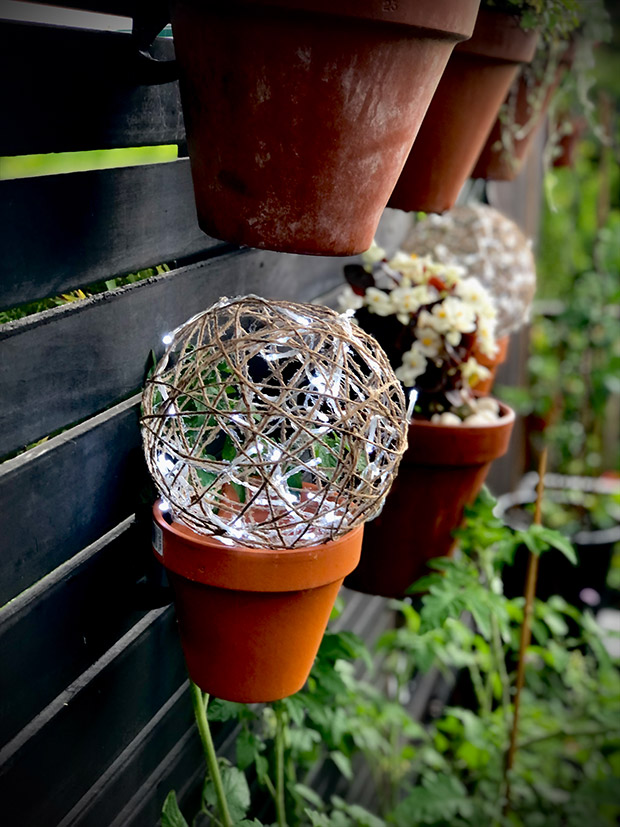
Fairy lights don’t have to be simply strung along a fence or door frame. These rustic globes will brighten up an outdoor living space or a vertical garden, and can easily be moved around depending on the season and décor needs. They’re easy to make, too (though gluey twine can bring back memories of sticky-fingered days of kindy).
If you wish to use your orbs in a shady place, use battery-powered fairy lights. They can then be moved around without concern for the sun. However, these can be difficult to source. After searching high and low, I sourced them at Mitre 10 — only $6.50 per pack.
DIY: How to make fairy light lanterns
Solar-powered fairy lights are widely available and work well so long as the solar panel is placed in a sunny spot. You’ll also need to leave a large enough space to pull the solar-powered back through the dried orb.
To do this, use a marker to draw a circle on the balloon or ball that is large enough to accommodate the solar pack. Use this visual guide to avoid wrapping twine around this area of the balloon.
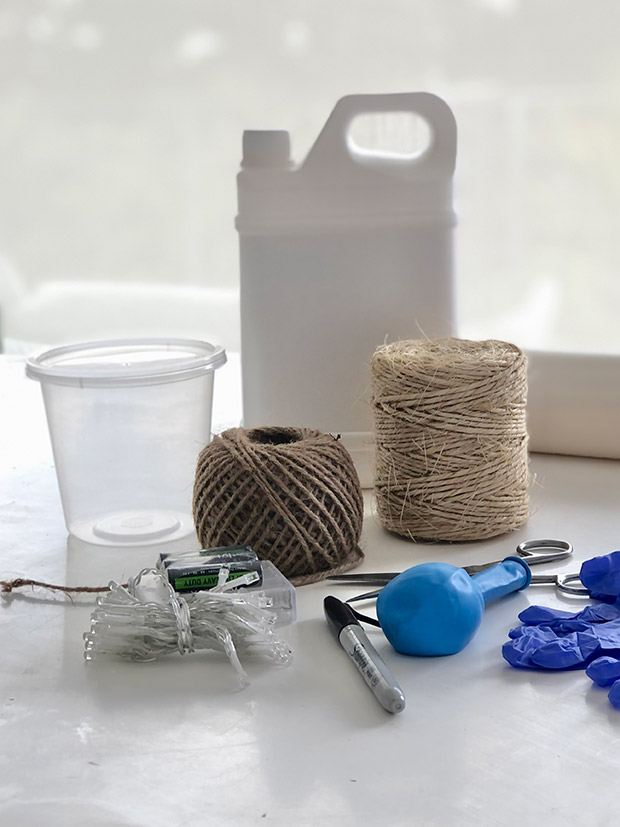
MATERIALS
• Balloons or small toy ball (you can find both at a dollar shop)
• Plastic drop-cloth or paper to protect the work area
• Scissors
• Ball of twine
• PVA glue
• Tape
• Plastic cling wrap
• Disposable gloves (advisable)
• Battery-powered or solar-powered fairy lights
• Pots or jars (to rest the orbs on while drying)
• Marker (if using solar-powered fairy lights)
Handy for glue application:
• Medium-sized bowl
• Wooden dowel (or wooden spoon)
• Tape
INSTRUCTIONS
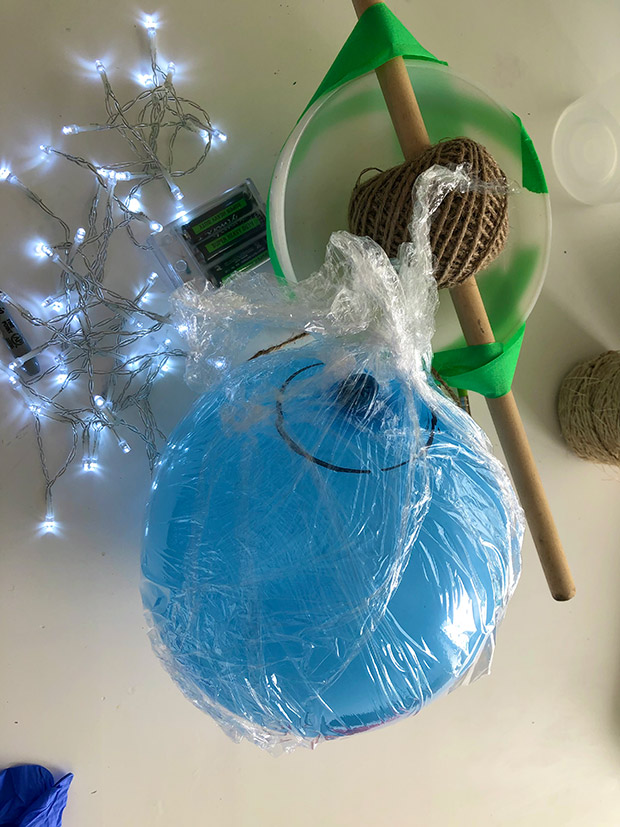
Step 1: Blow balloons up to your preferred size of orbs (or use a toy ball). It’s best not to blow up balloons fully; a bit less air makes rounder balloons. I blew my balloons to roughly 20-22cm in length.
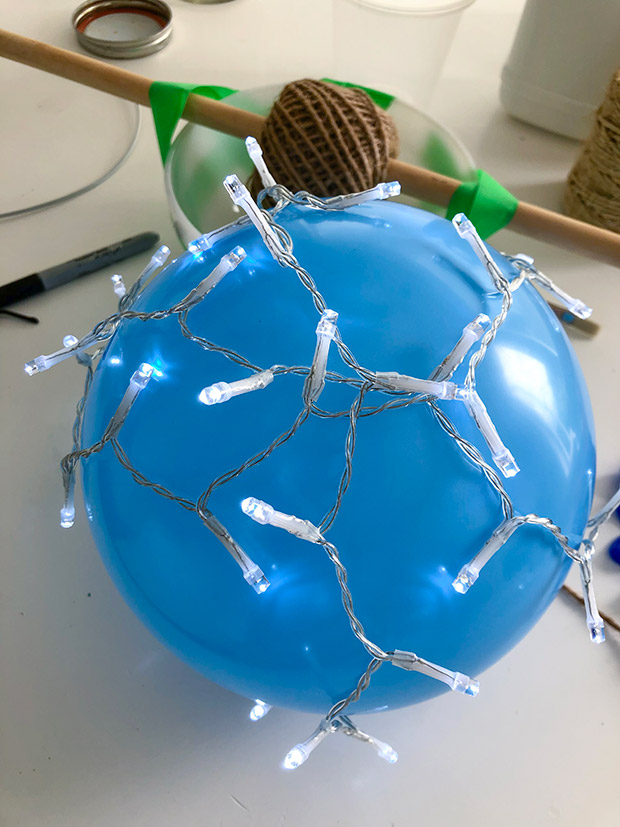
At this stage, test the length of your fairy-light string by briefly wrapping them around the balloon. If using solar-powered lights, remember to mark a circle and keep this area clear of twine (so your solar pack can fit through the dried orb). If using plastic cling wrap (see note below), wrap your balloon or ball now.
Step 2: Lay a plastic drop-cloth or protective paper over your work surface. Wrapping the balloon/ball with gluey twine can get messy, so I devised a cunning, minimal-mess technique using a bowl, tape and a wooden dowel/spoon that fits through the centre of the twine ball.
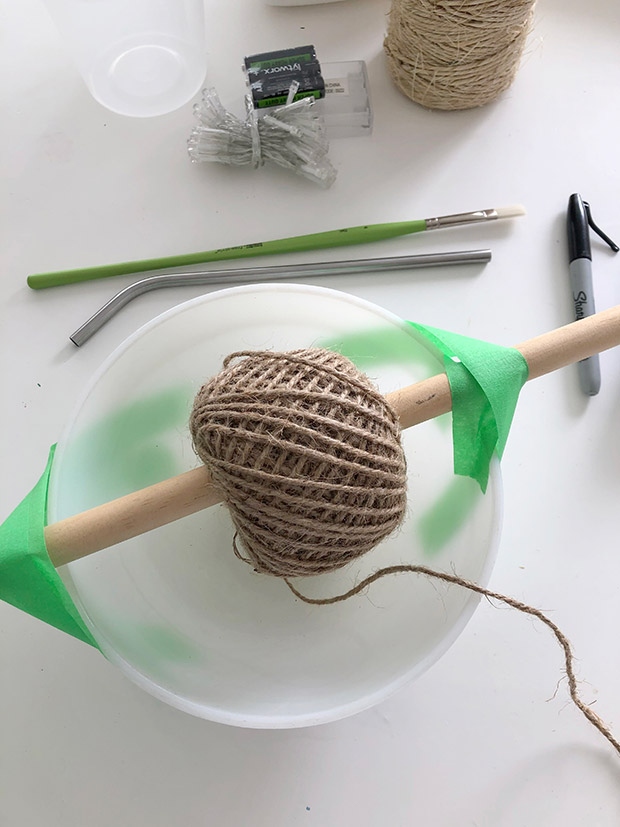
Needle the dowel through the hollow centre of the twine ball. Rest the dowel across a medium-sized bowl and attach both sides to the bowl with tape. Fill bowl with PVA glue so the bottom of the twine ball is dipped into the glue.
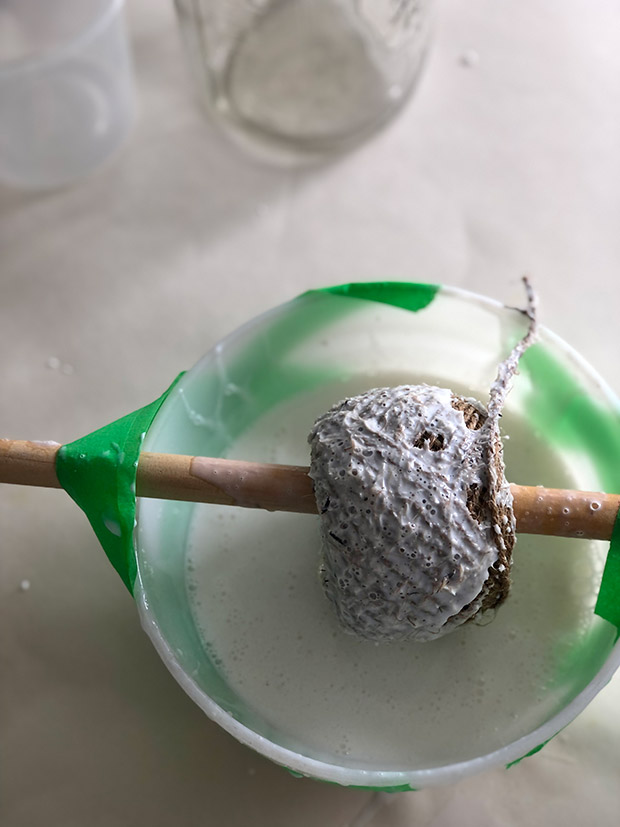
Step 3: Now for the messy part. Roll out about 60cm of twine, which should come out dipped in glue. Using a gloved hand, rub your thumb and forefinger in a downward motion towards the bowl and wipe the excess glue off the twine. The glue-to-twine ratio is important. The twine shouldn’t be dripping with glue, but also not too dry as it won’t make the twine stiff enough.
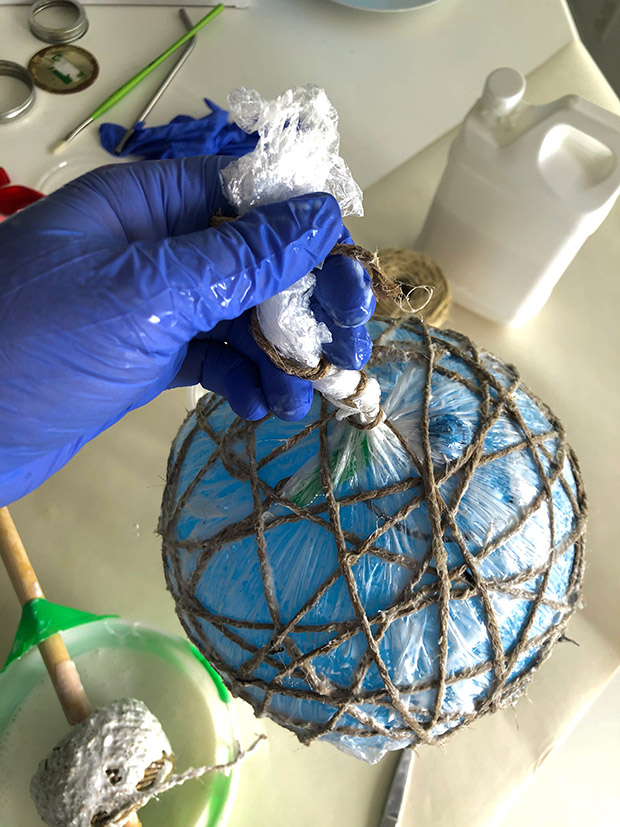
Step 4: Take a small bit of tape and glue one end of the twine to the balloon. Begin wrapping it around the balloon, wrapping vertically to a comfortable tightness, then horizontally. Once the balloon is wrapped to your liking, let it rest on a mason jar or plastic pot to dry.
Step 5: Allow orbs to dry for at least 24 hours. I left mine to dry for three days as the weather was very humid.
Step 6: Once completely dry, pop the balloons. They won’t deflate immediately; they take a few seconds to detach themselves from the inside of the orb and peel off in sections. Remove excess glue from the partitions. Some partitions had a thin layer, like a paper-thin gluey window within them.
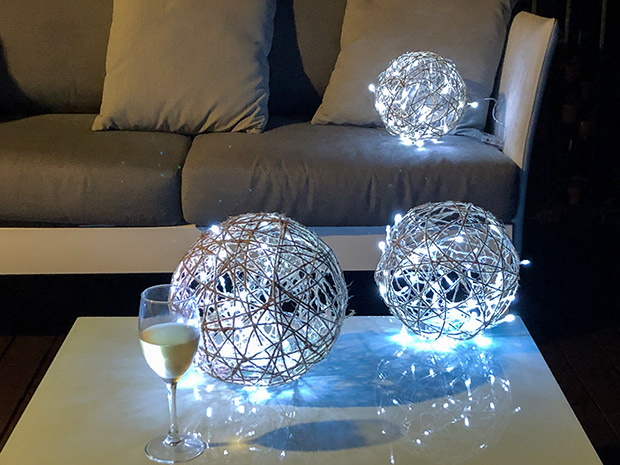
Step 7: Once cleaned of excess glue, gently weave fairy lights around the ball, sometimes going through the inside from one side to the other so the orb is also lit from within.
WHERE TO PLACE LIGHTS
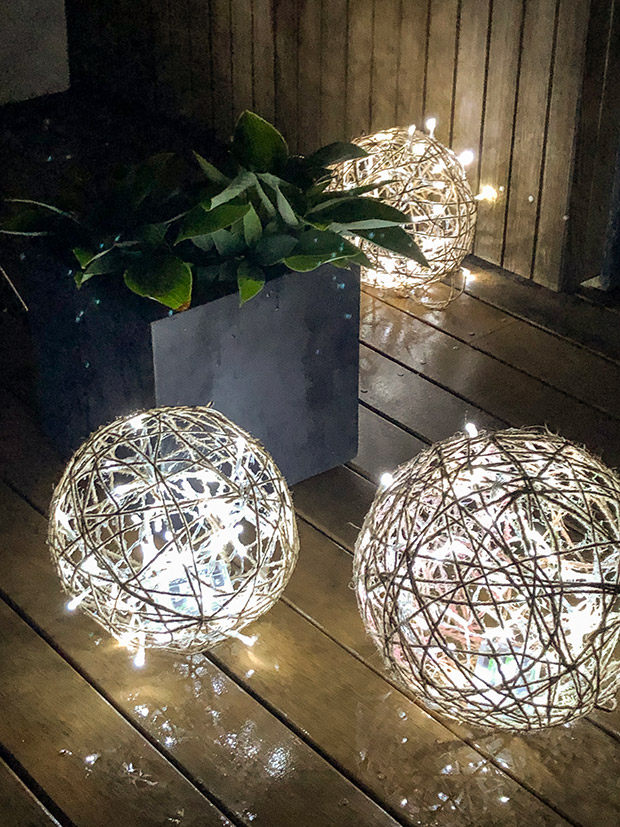
The beauty of making these magical orbs is that they can be customized to your backyard set-up. Make a few different sizes depending on where you plan to rest them - you can even size them so they fit perfectly in a bowl or pot.

I love the fact that they are completely portable with the battery pack - you could even bring them to an evening picnic on the beach.
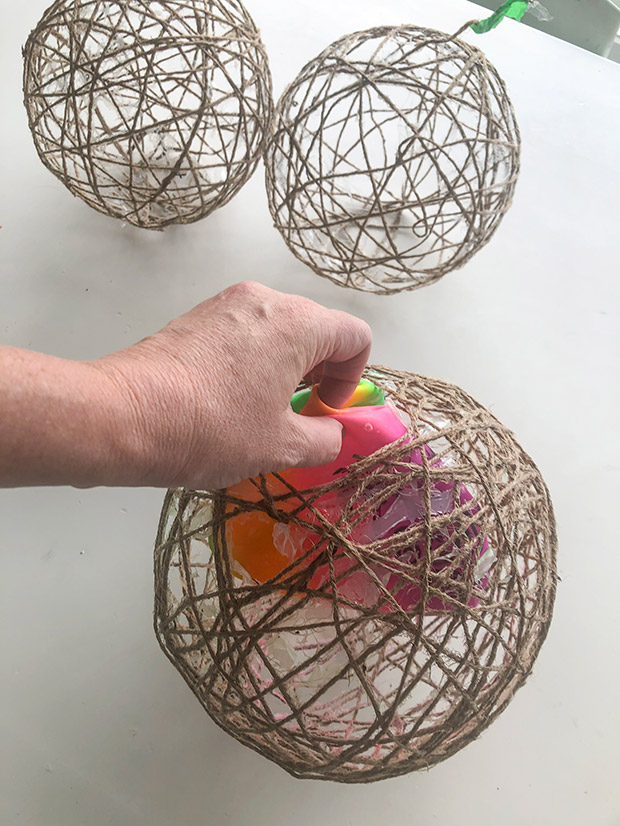
SHOULD I USE PLASTIC CLING WRAP?
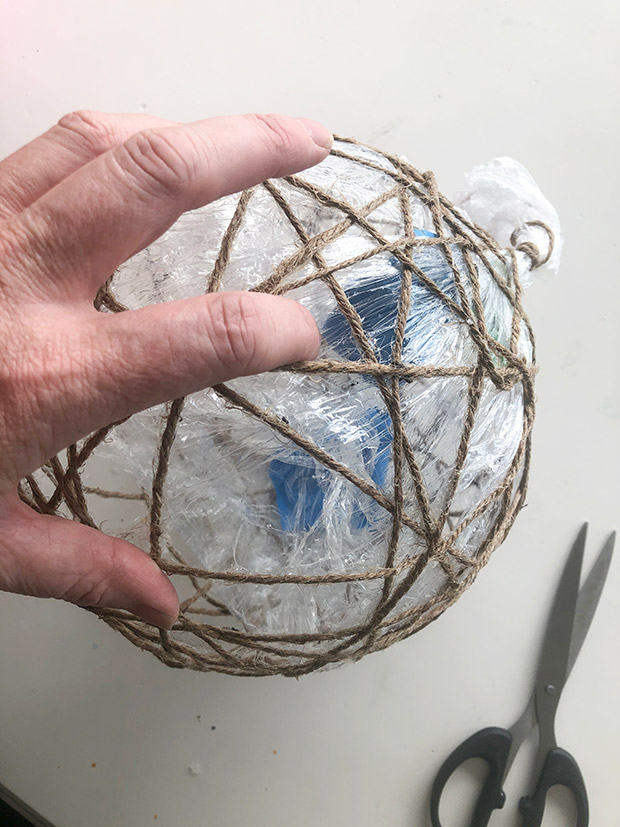
Some people use plastic cling wrap around the balloon to help with the removal of the balloon from the orb. I tried one balloon with and one without; for the latter I used extra twine to help with grip. The verdict? Both balloons were easy to remove from the dried orbs. Plastic cling wrap isn’t necessary, in my opinion.
THE MESSIER ALTERNATIVE TO WRAPPING
There are several ways to wrap the gluey twine around the balloons; some might opt to cut multiple lengths of twine, dipping each strand in glue and wrapping them around the balloon. I did a test run of this and wasn’t a big fan. You end up with multiple ends of string poking out at each junction. It was really messy, too, as you tended to over-glue the twine.
PATIENCE IS KEY
Don’t hurry the drying time of the glue as this could take longer due to factors such as heat or humidity.
