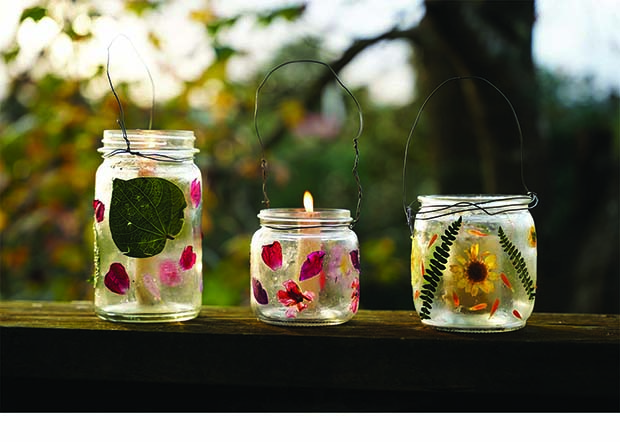
DIY: Pressed Flower Lantern

Candlelight and flowers — what could be prettier? These pressed-flower lanterns look so enchanting lighting up the night. Make them for a special occasion.
Words: Extracted from Play Wild: Nature Craft Projects for Tamariki by Rachel Clare. Photos by Jacob Leaf.
YOU WILL NEED
* Pressed flowers and leaves (see below)
* Glass jar (check in your recycling bin) with its label removed
* PVA glue or glue that dries clear
* Paintbrush
* Bendy wire or thick string (optional)
INSTRUCTIONS
1. Make sure your jar is dry and clean. Paste glue on the outside of the jar (you can either cover the whole jar first or just target the areas where you want to stick a flower), then press your flowers and leaves in place. Note that they need to be relatively light or they’ll slide off the jar. Gently brush more glue over the top of your flower or leaf. At first you’ll be able to see the white glue, but it will magically go clear in an hour or so.
2. Once you’ve finished decorating your jar, you might like to twist some bendy wire into a handle shape and attach it to the jar by wrapping the other end of the wire around the rim of the jar a few times or use thick string. An adult may come in handy for this part.
3. Place a tealight candle in your jar, or chop a candle down to size, and wait for the sun to set. Don’t leave your lantern unattended and if you’re using a larger candle, make sure it doesn’t tip over and the flame isn’t directly against the glass, or else the jar may crack. You could also put battery-powered fairy lights inside your jar instead.
Pressed Flowers
Pressing flowers and leaves is a lovely way to preserve a moment in time. You can use a traditional flower press or a good old-fashioned book, and if you’re ‘pressed’ for time, try the fast method using an iron.
YOU WILL NEED
* Single-petalled flowers with flat faces
* 2 sheets of paper or newspaper
* A few heavy books
TRADITIONAL METHOD
1. Pick your flowers on a dry day and make sure there is no dew on them or they’re not wilting in the midday sun.
2. Cut off the stems if you like. However, you may like to press the stems and leaves as well.
3. Open up a heavy book to the middle, lay a piece of paper on a page and put one of your flowers on top of that. Make sure the flower is nice and flat. Rearrange any petals and leaves and give it a gentle press with your hand if you need to.
4. Lay the other piece of paper on top of your flower and shut the book. You can also use one piece of paper and fold it in half.
5. Stack another couple of heavy books on top of that book and let the pressing begin. Your flower will take around two weeks to dry.
BEST PLANTS FOR PRESSING
Cosmos
Daisies
Delphinium petals
Hydrangea petals
Pansies
Polyanthus
Single-petalled roses
Leaves (especially
four-leaf clovers)
Ferns
Extracted from Play Wild: Nature Craft Projects for Tamariki by Rachel Clare, photos by Jacob Leaf, published by Bateman Books, RRP $29.99, Release Date April 2024.
