DIY project: How to build a pizza oven
Sharpen up your DIY skills and become the proud owner of your own pizza oven. This is a comprehensive step-by-step guide to building a pizza oven for your backyard. This is a complex build that will take several days - and the dome requires time to cure before use. Read the instructions and watch the video before starting construction.
Words and illustrations: Renée Davies
Photos: Sally Tagg and Alex Burton Video: Alex Burton

Materials
140 x fire bricks
Tinfoil
Sand (approximately 2 bags)
Vermiculite or perlite (and/or a ceramic fibre insulating blanket from refractory suppliers such as Certec)
Old tights or mesh fibre bags
Refractory mortar approximately 2 buckets – it comes pre-mixed, available from specialist refractory/kiln suppliers
Refractory cement 3-4 bags, available from specialist refractory/kiln suppliers
Plywood and/or polystyrene sheets
Flexibucket or cardboard box
Chicken wire
Plastic sheet
Plaster
Décor details such as pebbles, tiles and oxide colour
100mm-diameter stainless-steel flue and flue hat for the chimney, available from specialist fire suppliers
Door
Woodfired oven gasket rope
Timber for door panel (we used a decking off-cut)
2mm-thick aluminium sheet
Stainless steel screws
Insulating layer (ceramic insulation blanket or vermiculite or perlite and/or refractory cement)

Need to know
* Concrete Standard concrete won’t cope with the heat produced by the oven; source refractory concrete and mortar, which is available from companies that supply the kiln industry, such as Certec.
* Insulation: This prevents heat from escaping. Without proper insulation, heat will conduct through the oven hearth and enclosure, making the outside hot to touch. A poorly insulated oven won’t retain enough heat for efficient cooking. Use a thermal blanket or a mix of vermiculite or perlite and refractory concrete.
* Oven dome: This is the curved vault of the pizza oven. The shape allows for the efficient use of wood, and evenly reflects heat back down onto the oven floor – ideal for pizza and other dishes that require both top and bottom heat.
* Thermal layer: The thermal layer includes all of the material in the oven that absorbs and retains heat for cooking, or is exposed to fire and high temperatures. It includes the oven floor, dome, vent and door.
* Vent and flue: The vent and flue sits just in front and above the oven opening, and collects the smoke and hot air expelled from the top half of the opening. This part of the oven gets very hot, and should be built using true refractory material.
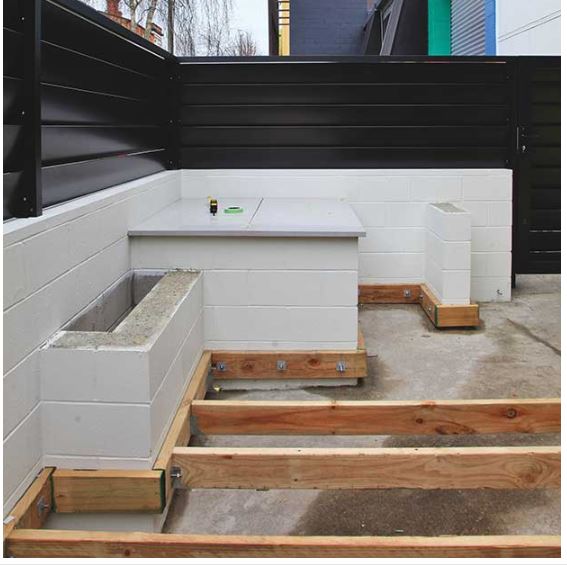
1. Pizza oven support
A strong, solid base is needed to support its weight. Concrete blocks are a good option, with stone and/or a concrete bench. The support should be about standard bench height to allow for a comfortable cooking set-up and to be at a practical height for heating the entertaining area.
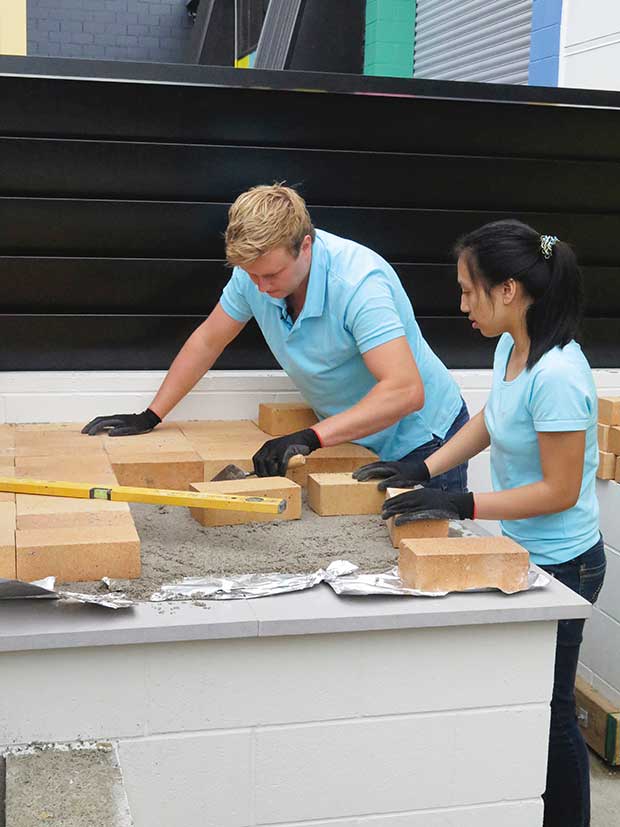
2. Insulated base and hearth
An insulated base is created over a non-flammable support, using a layer of tinfoil, 5mm-deep sand and fire bricks. The bricks are held in place by haunching the edges. This layer should be level as the final layer of bricks on top form the hearth where pizzas will cook. Increase the heat retention in the base by adding an optional additional layer of kiln tiles.
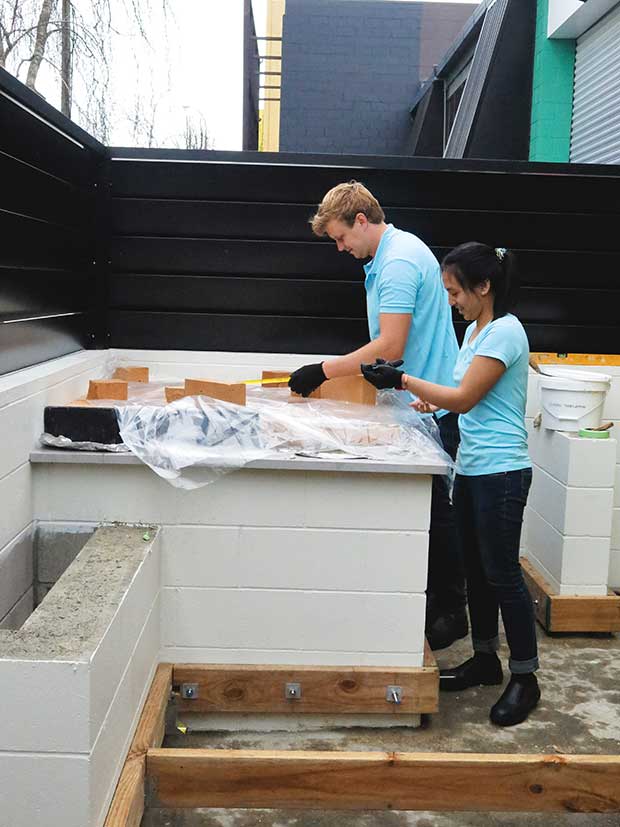
3. Building the dome
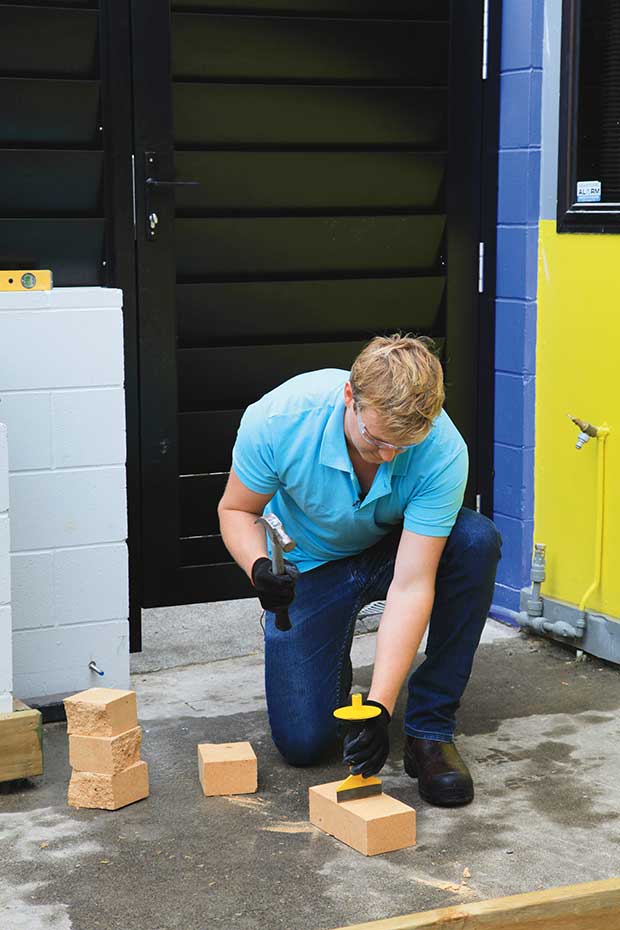
Cover the hearth in plastic to keep it clean. The dome is built with fire bricks that are cut in half using a masonry grinder and/or a hammer and bolster.
The internal diameter of the pizza oven should be 420mm. Place the bricks at the outer edge of this circumference, leaving a 530mm-wide gap for the entrance (see dimensions above). Using refractory mortar, put the bricks in place, working your way into the middle from the sides, stopping once they no longer easily sit in place and feel as if they may fall in (the dome is finished at Step 5).
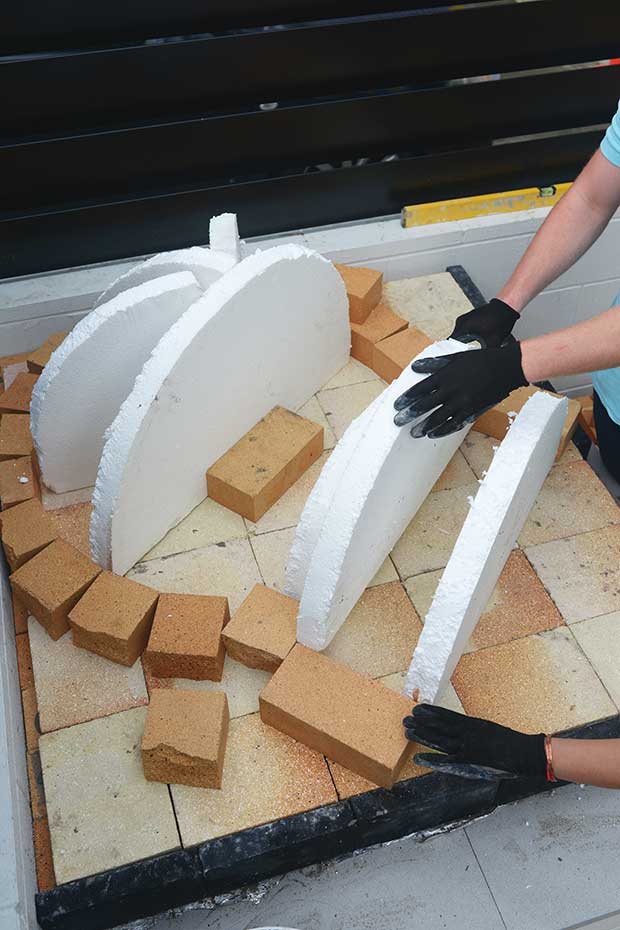
Wedge the mortar between the bricks so that they sit at the correct angle, fanning them towards the centre. Leave the bricks and mortar to set for a couple of days before finishing the dome. Need help? Watch our video.
Bricklaying tip
Polystyrene cut to the shape of the dome provides an excellent support during construction. When the mortar is dry, the polystyrene is easily broken up for removal.
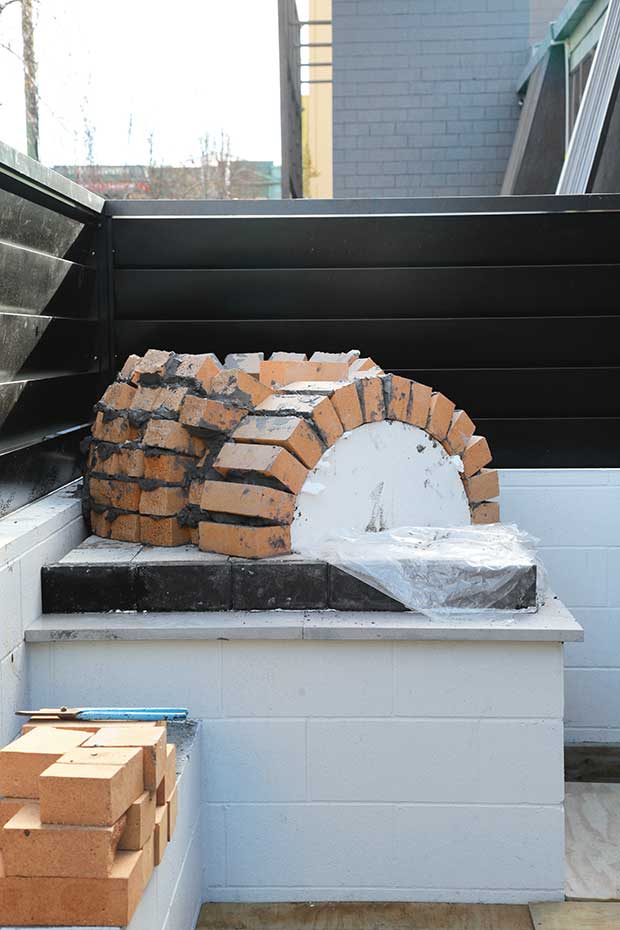
4. Installing the inner door arch
There are two parts to the door arch – the inner and outer. Create the inner arch first, to a width of 530mm using a thick piece of polystyrene cut into a semicircle with a 265mm radius. Use the halved fire bricks to build the arch, working inwards from both sides, placing the bricks in a fan shape.
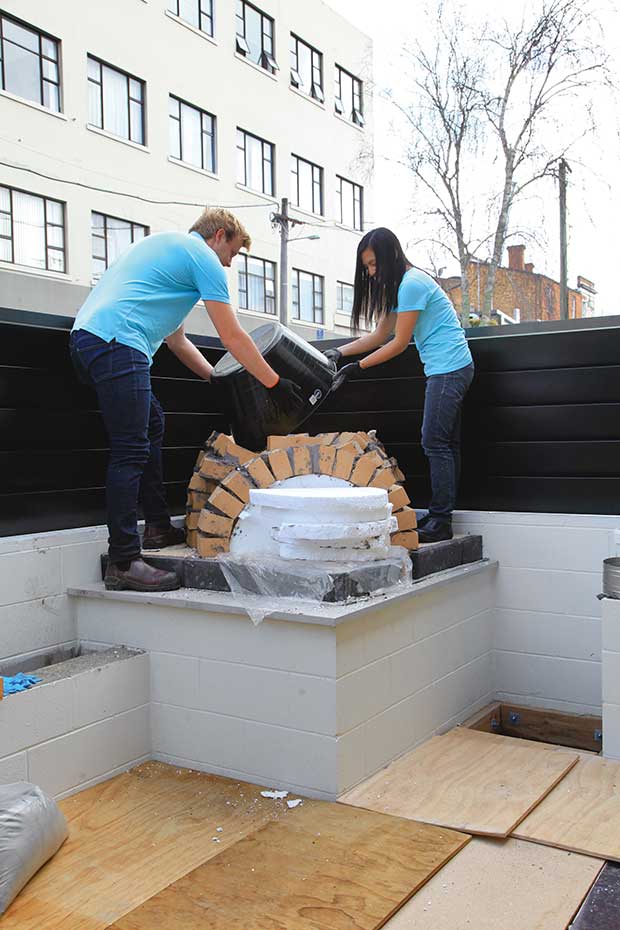
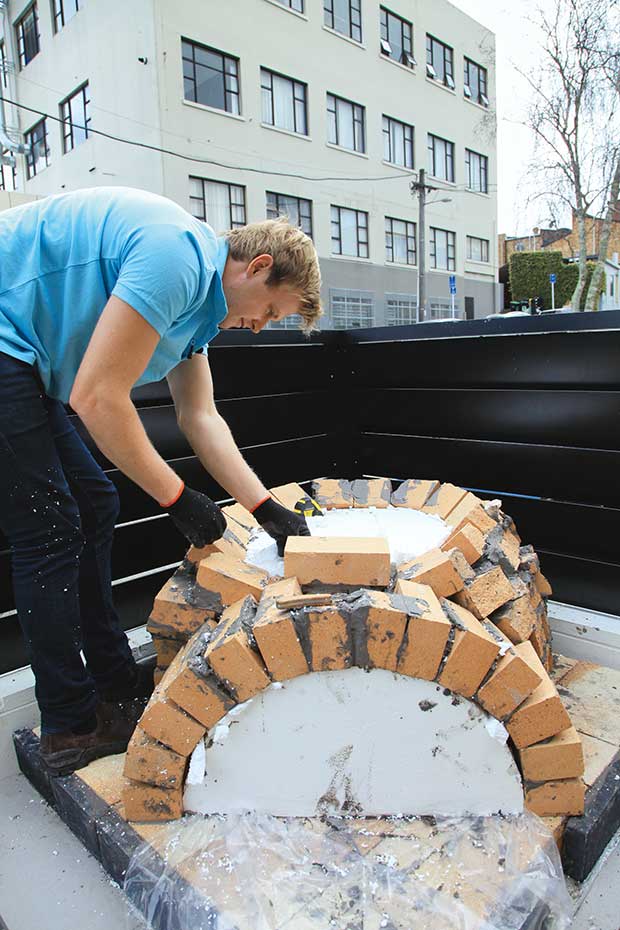
5. Finishing the dome
Place a strong cardboard box or flexi-bucket inside the oven to the height of the bricks, then place a sheet of polystyrene or cardboard on top of the box to support the dome-shaped layer of wet sand. Pack the sand into a dome shape, ready for the cement to be poured on top. Mix the cement and pack it on top of the sand (also use the cement to fill any gaps between the bricks). Shape the cement into a strong, smooth dome, then leave to set for a few days. Once set, you can cut up the box or flexi-bucket and remove it through the oven entrance. Sweep out the sandy debris. Need help? Watch our video above.
6. Installing the outer door arch
The outer arch is made with whole bricks chosen to suit your décor (optional). The outer door arch also incorporates the chimney (or you can use the flue as the vent). Ensure the outer door arch is wider than the internal one so you can seal the door. Make a polystyrene form with a 325mm radius. Leave a space for the vent or flue by using half bricks at the top of the outer dome, allowing a gap to insert the vent or flue to form a chimney. Make the vent using half bricks. Once the outer arch is complete, cover the back edges of the bricks with refractory cement to ensure it’s well connected to the inner arch and thoroughly sealed.
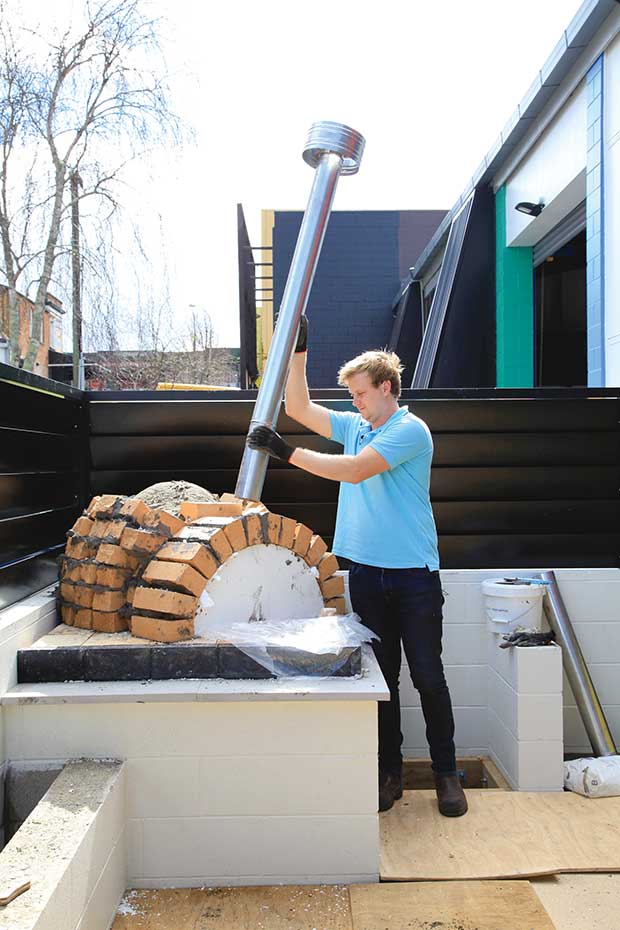
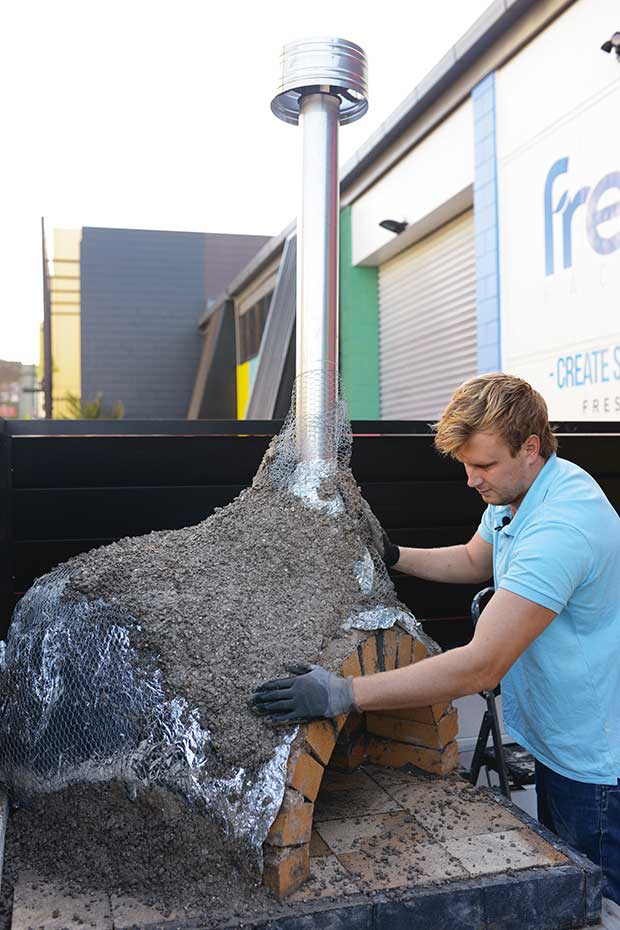
7. Installing the vent and chimney
If you’ve used a vent and not installed the flue into the top of the door arch, then you must install the flue before the insulation.
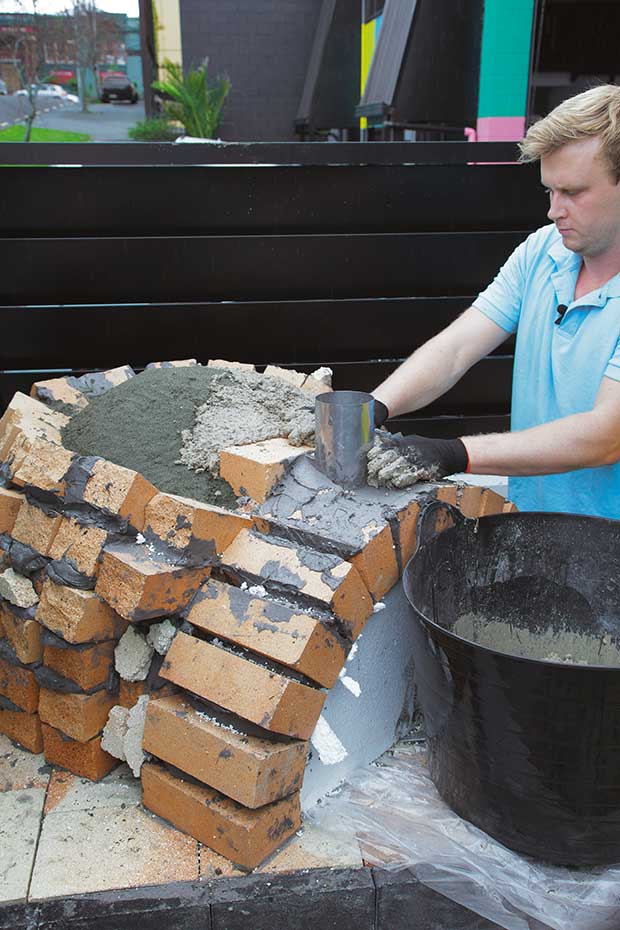
Integrate the chimney to the dome using chicken wire, broken bricks and refractory cement.
8. Insulating the dome and chimney
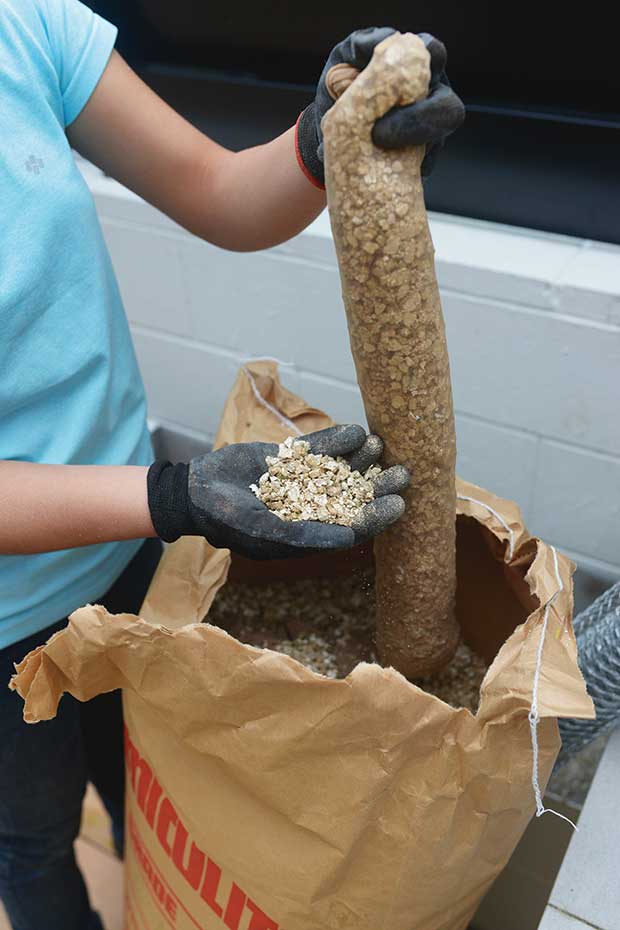
Create the first layer of insulation by filling old tights with vermiculite or perlite and wrapping them around the dome, or using a purchased ceramic fibre insulating blanket.
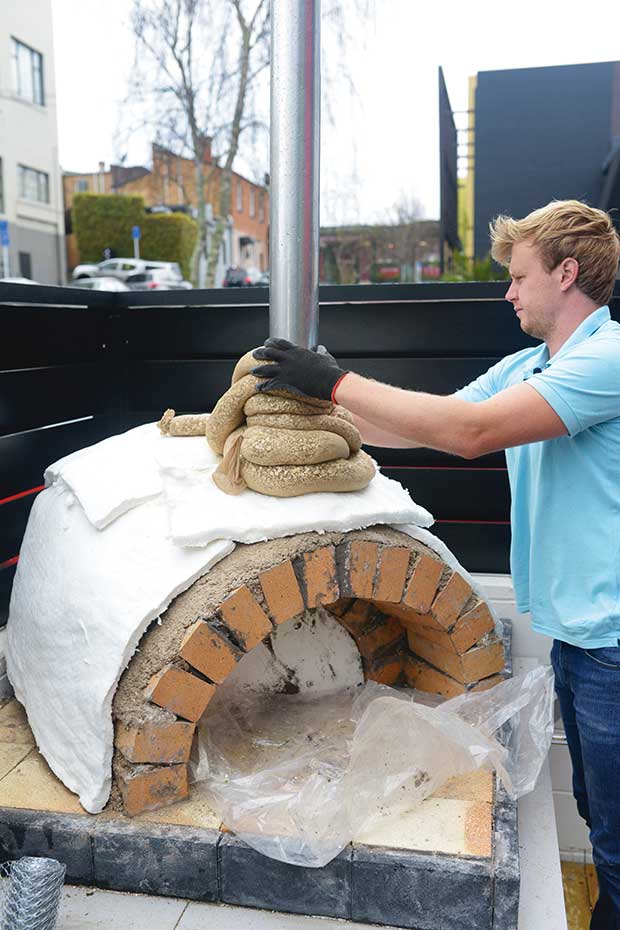
We used a ceramic fibre insulation blanket and then placed vermiculite-filled tights around the chimney. Put two layers of tin foil over the entire dome area and the edges of the door arches and use chicken wire to secure this layer in place. Push perlite or a mix of refractory cement and vermiculite into the chicken wire and cover the entire dome.
This is the stage to start shaping the outer final form of the oven. There’s no set depth for this layer, but work to a minimum of 50mm. Run this material up around the vent and chimney to the desired height (about 500mm). It’s best to leave this layer to set for a few days before continuing with the finishing layers.
9. Plastering the dome
A plaster finish can be used to create a smooth result – two coats will suffice. If desired, add the coloured oxide of your choice to the plaster or apply a paint finish. Add any decorative features, such as stones and mosaic tiles, that you want incorporated into the oven.
10. The door
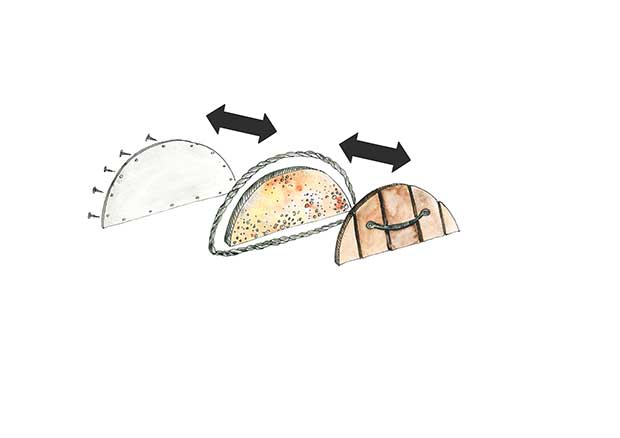
A door increases what the oven can cook, and allows the air intake to be regulated. You could use a sheet-metal door, an upcycled cast-iron door from an old woodfire, or an insulated timber door. If using timber, cut it to the shape of the inner door arch with an overlap of about 20mm; but not larger than the outer arch. Make the door of four components: a timber front panel shaped to fit the outer arch; a length of woodfired stove gasket rope glued to the front panel as a fire retardant and to contain the insulation; insulation of either a ceramic-fibre blanket, vermiculite or perlite/refractory concrete mix; and a back panel of 2mm-thick aluminium screwed to the front door panel with stainless steel screws.
11. Curing

Setting and slow-curing the oven is crucial. It needs to be left to set for a minimum of seven days then heat is slowly brought up inside to dry it thoroughly. If you don’t take these steps you run the risk of moisture turning to steam and bursting through the materials. After the setting period, light a series of seven small fires that become increasingly larger to slowly cure the materials and prevent excessive cracking (a few cracks are normal). Slowly increasing the heat allows the oven and insulation to dry at a safe rate. If you skip this step or don’t slowly raise the heat, the oven may become damaged during use.
Curing tips
*Bevan Upchurch of Certec says if you have an LPG burner, place it inside the oven and on a low flame for several hours. The flame can be slowly increased – the longer the heat the better the drying process.
* Alternatively, light a small kindling fire that gently warms the oven, slowly increasing the amount of wood.
* Cure the oven before insulating.
* The drying process should be done after winter or if your oven hasn’t been used for a while.
TOP TIPS
* Running out of wood during cooking is the equivalent social crime of running out of gas mid-barbecue. Avoid this by integrating a wood store into your design; a space below is ideal so you can easily do a visual stock-take of your supplies.
* Don’t be too worried about cracks in your finished oven; this is quite normal and won’t significantly affect its performance. Due to the temperatures reached, it’s difficult to prevent cracking.
* Consider designing a convenient location for your pizza-oven tools to be stored so you can have them in easy reach.
* If your oven is near a timber deck, it’s useful to ensure the area directly beneath the oven door is concreted or tiled so that if embers fall from the oven they won’t catch fire.
