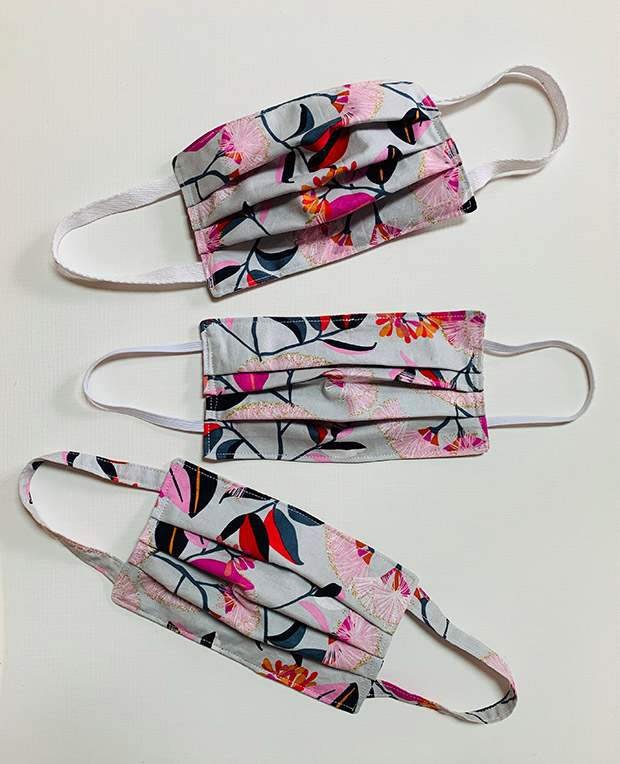
DIY: Two ways to make a fabric face mask at home

Use whatever fabric you have on hand to make these two personalised face masks.
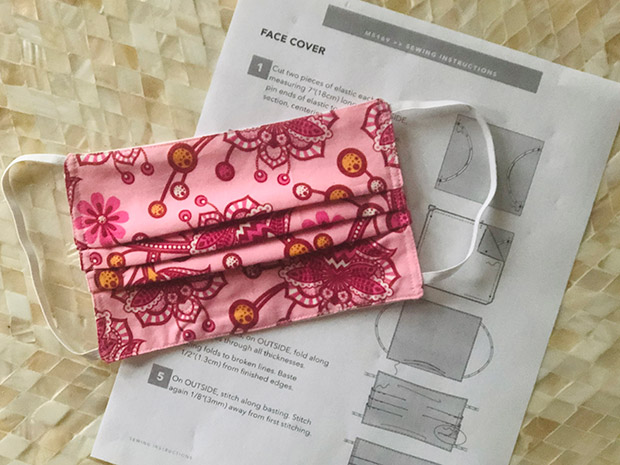
Option 1: Pleated Face Cover
Supplied by: Spotlight
MATERIALS
1/2 Yard (0.5m) of 1/8″(3mm) -1/4″(6mm) wide Elastic
2 pieces of fabric (19.5cm x 19cm)
INSTRUCTIONS
Step 1: Cut two pieces of elastic each measuring 7”(18cm) long. On the outside, pin ends of elastic to one face cover section, centering at large circles. Baste.
Step 2: Pin face cover sections together. Stitch outer edges in a 1/4″(6mm) seam, leaving an opening.
Step 3: Turn cover right side out, sew opening. Stitch close to finished edges.
Step 4: To make pleats, on outside, fold along solid lines through all thicknesses. Bring folds to broken lines. Baste 1/2″(1.3cm) from finished edges.
Step 5: On outside, stitch along basting. Stitch again 1/8″(3mm) away from first stitching.

Option 2: HELIX.iso™ Community Mask
Supplied by: Lanaco
Lanaco has partnered with sewing communities to make a mask which can be supplied in large volumes, provides good protection and is made locally. The HELIX.iso™ community mask initiative sees Lanaco joining with community sewing groups across New Zealand to supply an open source mask design that can be locally produced and then fitted with high-performance HELIX.iso™ filters for enhanced protection. This can also support communities with employment and the positive feelings of self-help.
https://www.instagram.com/p/CA6QLnvHuHm/
The mask uses a special filter called HELIX.iso™, which users can fit and replace as often as possible, but have an inexpensive, easy breathing mask body which can be re-used (must be washed regularly). All contaminated filter elements must be disposed of safely and should not be re-used. When correctly fitted, the mask with a HELIX.iso™ filter provides excellent protection and comfort to enable prolonged use.
Note: This is not an N95 mask. N95 refers to a safety standard for industrial use. These are also becoming available, but are typically more expensive, very uncomfortable for prolonged use and unsuitable for people with breathing difficulties, under exertion, or for children (N95 is an industrial standard for adults in the workplace).
Download the HELIX.iso™ mask body template here.
MATERIALS
fabric (a thicker fabric for the shell and softer fabric for the lining)
2 pieces of elastic (16 x 2cm)
aluminium nose piece (optional)
thread
INSTRUCTIONS
Step 1: Wash your hands with soap and water or use hand sanitiser before handling any materials used to make a HELIX.iso™ mask body.
Step 2: Print two copies of the template.

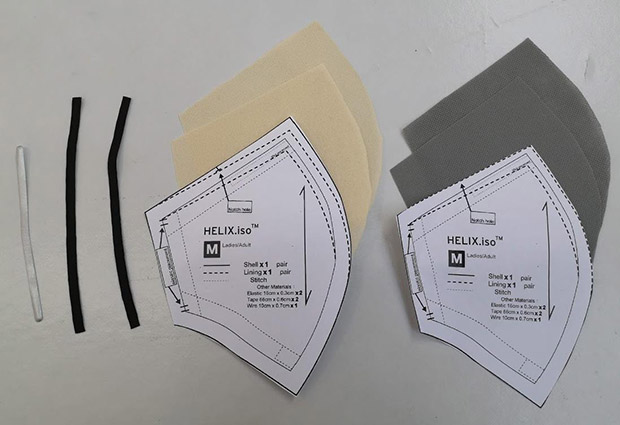
Mask body templates. Shell template (left) and lining template (right)
Step 2A: Cut one template following the “shell” outline and the other template following the “lining” outline.
Step 3: Prepare the individual components. This includes:
Step 3A: Cutting two fabric pieces following the “shell” template (this will be used as the outer fabric). It is recommended that a lightweight, non-stretch fabric is used.
Step 3B: Cutting two fabric pieces following the “lining” template (this will be used as the inner fabric). It is recommended that a lightweight, non-stretch fabric is used.
Step 3C: Cutting two pieces of elastic to a length of 16 cm. It is recommended that the elastic is 3 – 5 mm wide.
Step 3D: Take one aluminium nose piece that is provided.

All mask components. From left, aluminium nose piece, two pieces of elastic, two pieces of shell fabric, two pieces of lining fabric.
Step 4: Sew centre lines for the shell and lining fabric pairs. Stitch lines should be 1 cm from edge.
Figure 3: Shell fabric (left), lining fabric (right) sewn with centre lines
Step 5: Overlap and sew the top and bottom edges for the shell and lining fabrics. Be sure to include the aluminium nose piece under the fold on the top edge for the shell fabric.
- Shell fabric with aluminium nose piece inserted.
- Lining fabric.
Step 6: Sew the elastic ear straps onto the corners of the shell fabric.

Shell fabric with elastic ear straps attached.
Step 7: Sew the shell fabric and lining fabric together along the short edges.
- Shell and lining fabric sewn together along edges.
- The lining fabric.
Step 8: Invert the mask body so the shell fabric is positioned on the outside, and the lining fabric positioned on the inside.
- Mask body inverted.
Step 9: Sew the final stitches on the mask body. This includes:
Step 9A: Sewing either side of the aluminium nose piece only on the shell fabric to secure it in the channel.
Step 9B: Sewing the shell fabric to the lining fabric along the two short edges of the mask body.
Step 9C: Sewing the shell fabric to the lining fabric at the bottom of the mask so a filter can be inserted and secured. This should be approximately 3 cm long.
HOW TO FIT A HELIX™ FILTER ON MASK BODY
Step 1: Wash your hands with soap and water or use hand sanitiser.
Step 2: Take one HELIX.iso™ mask body and one Helix™ filter.
Step 3: Open the mask body and begin inserting the filter. The filter should be inserted so the filter “peak” is at the nose-band end of the mask body.
Step 4: Continue inserting the filter so the two bottom corners protrude out of either side at the bottom of the mask.
Step 5: Close the mask body and ensure the filter is still positioned correctly. This includes checking that:
Step 5A: The bottom corners of the filter are protruding out at the bottom of the mask body.
Step 5B: The top edge of the filter is just visible along the top edge of the mask body. This ensures a better seal along the nose bridge region.
Step 5C: The sides of the filter run along the sides of the mask body.

Learn more about the HELIX.iso™ Community Mask System here.


