Grow your own sweetener
To be truly self-sufficient, especially in colder climates, you may think you have to give up sugar, but that’s not the case.
Words: Nadene Hall
If you aren’t lucky enough to live in a warm, humid, rainforest-like area in New Zealand, you probably aren’t going to have much success making your own sugar from sugarcane, although many of you in Northland may be able to give it a shot.
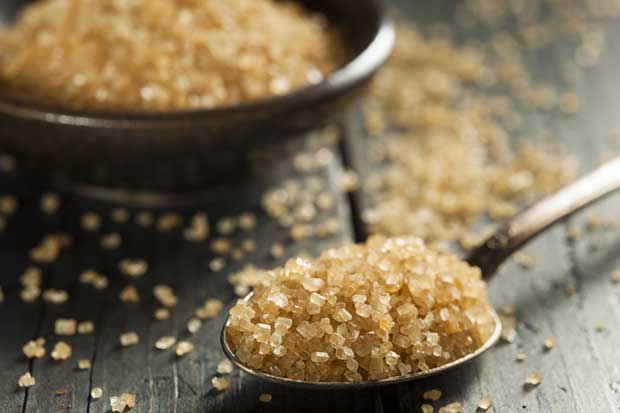
HOW TO MAKE SUGAR USING SUGAR CANE

Sugar leaves.
Live in a warm, humid climate with good summer rainfall?
1. Plant sugarcane (Saccharum officinarum), a type of giant grass that grows like bamboo, prefers a fertile soil in a warm, humid climate with high rainfall, will grow 2-3m high over a year, then can be cut in summer. The cut stems should re-grow and can be cut several times before needing to be replaced. Where most plant store the sugar they produce in their fruit, sugarcane store it in its canes, with each cane capable of producing around one litre of sugarcane juice. At this point, you can just cut off a piece of cane and chew on it for a sweet snack.
2. To make sugar, cut your canes and use the same day, or at least within 24 hours. Wash it to make sure it is free of dirt etc. It then needs to put under running water and crushed, preferably between rollers, to extract as much juice as possible. Commercial sugar-makers also shred it. The leftover fibre – called bagaco in Brazil where a large percentage of the world’s sugar is grown – can be then dried and used in the fireplace, or fed to animals.
3. The juice you are left with should then be filtered to get rid of any clumps of residue through a cloth, then boiled to get rid of the excess water. The boiling process needs to be done as quickly as possible in very clean conditions. Traditionally, the boiling is done in large pans over an open fire or in a furnace. As the juice-water boils, scum will rise to the top and must be removed, while sediment will fall to the bottom and must be dredged out.
From every 10kg of juice, if you’ve done everything perfectly and efficiently (and if you’re doing this yourself, that probably isn’t possible), then you’ll get about 2kg of ‘gur’, or sugar cane syrup. After 3-4 hours of boiling, you can remove small samples to see if they set solid when cooled and you should see crystals beginning to form – this is when it’s time to remove the heat source, and stir rapidly to cool, to incorporate air and to promote even crystallisation, before putting into a pot or mould to set.
4. The end result will be raw sugar that will be brown in colour. In this state it will change colour after a few weeks and begin to clump. To get “white” sugar involves chemical processing using sulphur dioxide and activated carbon and a lot of technology not available to the home sugar-marker.
HOW TO MAKE SUGAR USING SUGAR BEET
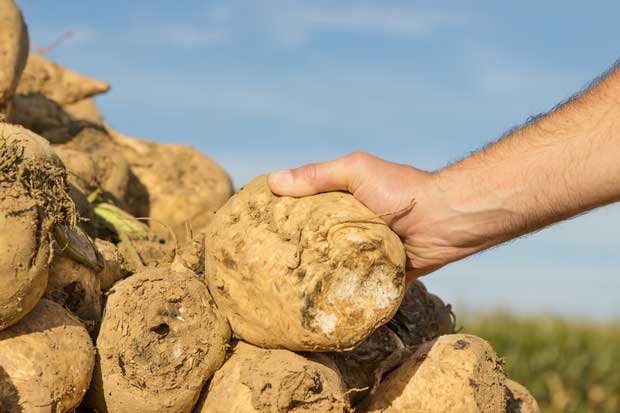
Sugar beet.
Live in a cool climate with little humidity? You can turn to the humble beet, and a much simpler cooking process.
You might have seen bags of sugar beet at your local rural supply store. Beets are dried, pelleted and make a great stock food. But traditionally that sugar beet pellet is actually a byproduct of making sugar, mostly in European countries where it’s too cold for plants like sugar cane but perfect for a root vegetable.
1. Make sure you are growing the right variety of beet – sugar beet, or Beta vulgaris var. altissima. It likes a sunny spot in a rich, well-drained soil, although if you have hot temperatures by late spring-early summer, then an area that gets afternoon shade is good. Plant in spring, for summer-winter production. They’re ready to pull when about 7cm or so in diameter.
2. Once harvested, clean your beets really well, then chop it up in pieces, or slice thinly. Put in a large pot, cover with water and bring to the boil. Cook until the beets are tender and juice is extracted; the beets will be soft, and lose their colour. Keep the water in the pot but remove the beets. Keep the beets to feed to your animals, although you either need to dry it out quickly, or feed it out quickly. Alternatively, you can freeze it and thaw as needed for your own cooking, or for feeding out.
3. Boil the juice down to one-third of its original volume, stirring constantly. It should turn into a thick syrup like honey or corn syrup. Leave it to cool overnight with a towel over the top. As it cools, you’ll be able to scrape out crystals. You can try bringing it to the boil and letting it cool again to extract as much of the sugar as possible.
This sugar won’t be white and you’ll have to grind it up a bit. It may taste a bit ‘beety’ too. It can be stored in a jar with a tight-fitting lid. Use in place of refined sugar at the same proportions in recipes.
OTHER SWEET OPTIONS
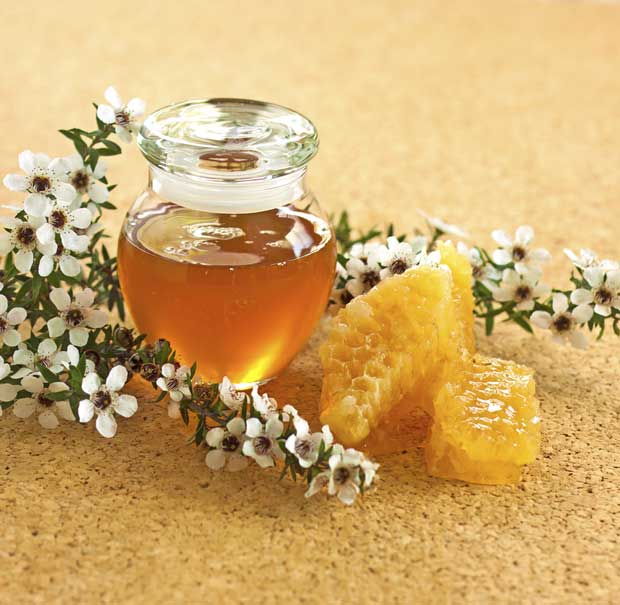
HONEY
Honey is relatively easy in comparison, if you are a beekeeper. It can be used as a substitute for sugar in a recipe - just halve the amount if using honey, but be aware it can change the consistency of some dishes.
DATE ‘SUGAR’
Not quite sugar as we know it, and it’s not quite as sweet as sugar, but can be used a sweet alternative in cooking. To make date sugar, cut dates into thin slices, place on a baking tray and cook for 10-15 minutes at 135ºC, or until dry and rock-hard. Grind in a food processor to make ‘sugar’.
STEVIA (Stevia rebaudi)
This interesting and somewhat controversial herb has no calories but its leaves have a potent sweet taste. It likes a rich, loam soil and will die back in winter, but leaves can be harvested in autumn. If you live in a hot, dry area, keep it watered and don’t over-do the nitrogen or you reduce the sweetness levels. Picking leaves in the morning and do it before flowering to get the sweetest tasting leaves.
Massey University research has pointed to stevia being a potential future cropping option for NZ, but at the moment the best you’ll be able to do is have your own plant. To dry, hang small bunches of stems in a well-ventilated, dry area out of direct sun. Dried leaves can be ground into powder for storage. Fresh leaves can be used to make a liquid sweetener by steeping one teaspoonful of dried leaves in one cup of boiling water for 5-10 minutes.
FRUIT JUICE CONCENTRATE
Fruit is sweet because plants store sugars in fruit and the result is a mix of sucrose and fructose. Apples, pears, and grapes make good concentrates.
There are two ways to make a concentrate:
1. Take fresh juice and reduce over a medium heat until it is a quarter of what it was (ie 4 cups fresh juice becomes 1 cup concentrate). It can then be frozen to store.
2. Alternatively, squeeze your fruit and put the juice into something like a cleaned-out milk container. Freeze. Don’t fill a container over the ¾ mark, to allow room for expansion.
Once frozen, place upside down over another container and allow the liquid to begin to thaw. What should come out first is the juice, leaving you with a jug of ice. Store and freeze.
You use about half a cup in place of one cup of white sugar, but depending on the recipe, you may end up with a different texture.
MAPLE SYRUP
Tapping the sap of the sugar maple tree (Acer saccharum) is a long-term project though. This tree produces the most amazing syrup, which can then be made into sugar.
It requires a tree of at least 250mm in diameter (not circumference), at a height of 140cm, for one spout. The more branches and leaves above, the better. A tree with a large crown that comes almost right down to the ground is the ideal tree to tap.
Trees are tapped during late winter-early spring, when the temperature is between 4-7ºC, which is when the most amount of sucrose is available in the sap. Too low a temperature and the sugar will be stored as starch in the sapwood. Too high and the enzymes required to convert the starch to sugar don’t work. You need the temperature to be increasing, as this is when pressure causes the sap to flow. If nights are freezing but daytime temperatures are 4-7ºC, you’ll be getting optimum flow.
1. Use a hand drill with a 10mm bit to bore the hole to a depth of 7.5cm. Drill ever so slightly upwards, at a height of about 140cm into unblemished bark.
2. Drive in a spout – this needs to be a tube, preferably made of steel or stiff plastic that is just a little bigger than 10mm, so it stays in the hole. Be careful not to split the tree when you bang it in. Once in, it should be very difficult to remove.
3. Hang a bucket or container under the spout, using wire wrapped around the tree, and cover it to prevent any debris/bugs from falling in. You can expect anywhere from 18-56 litres, or more, depending on the tree and conditions.
4. Boiling up sap needs to be done as soon as possible or the sap will spoil. Do this outside, as the amount of steam and spitting that is produced is more than any kitchen or venting unit will be able to handle safely. You will need to use clean pans and keep the level of sap at 4cm deep at least, to prevent scorching. Keep adding sap as the water evaporates off and be prepared to be there for a while. Use a hot fire/barbecue – a chimney is helpful, as it will keep smoke from discolouring the syrup. You’re going to end up with approximately 500ml of syrup from 15 litres of sap.
5. To get maple syrup, you need to get the temperature to 107ºC – a candy thermometer is a good measure. Test 2-3 cupfuls to make sure you have a constant temperature. Four litres of syrup will weigh around 5kg.
6. Cool for 12 hours or more to let the sediment settle, then pour off the clear syrup. Reheat to 82ºC (almost boiling), before pouring off for final storage in a clean glass jar. Store in a cool place, or in the freezer – properly prepared syrup won’t freeze.
