Secrets to growing great organic garlic
Growing garlic is a six month commitment of time, space, and work. Veteran garlic grower Nelson Lebo shares his tips for doing it organically.
Words: Nelson Lebo Photos: Nelson Lebo, Brad Hanson
High-quality, locally grown garlic is a crop with a lot of profit potential. It has many advantages over other crops in terms of production, storage, marketability, and creating value-added products.
Garlic has been my go-to crop over the last 20 years on two continents in two hemispheres. Although the growing conditions in New Hampshire (USA) are very different from those of
Whanganui, certain aspects of garlic production are universal.
BED PREPARATION
Garlic spends six months in the ground, so the beds must be ready to handle both wet and dry periods.
No-dig, raised beds fit the bill best. These provide drainage in the winter to prevent waterlogging, while their loose, friable soils also help retain soil moisture in summer, especially when covered with a thick layer of mulch.
We create beds that are:
• 1.2m wide;
• 10m long;
• 20cm high.
We have 30cm-wide paths in between each bed. Importantly, around the entire perimeter of each set of beds is a drain that helps with water management and weed control.
Dani and Verti planting the garlic crop
PREP & PLANTING
Managing water and weeds are the biggest challenges when growing garlic so planning for both is essential when laying out beds. We base our spacings on two fixed measurements:
• the width of a stirrup hoe (or your hoe of choice, ie torpedo, Dutch);
• one-third the width of a sheet of newspaper.
The magic number in both cases is 13cm. We then allow a margin of wiggle room, so each row is 15-20cm apart, giving us three rows per bed. Sometimes, depending on our needs, we plant only two.
The loose soil structure in our no-dig beds is essential for garlic. To plant, we create furrows along the length of the beds using a garden hoe or a cultivator, which has had the three prongs squeezed together. We make these furrows as deep as possible in one pass – usually about 8-10cm – and then fill them halfway with our homemade hot-process compost.
Peeling and dividing seed garlic is best completed after you do the bed prep. We like to light the fire and prepare the garlic in our cosy kitchen after dinner. We peel each bulb, then separate the individual cloves and group them by size. We plant the largest cloves and use the small ones for cooking or give them away to friends and neighbours.
The following day we head out into the garden and plant the cloves into the prepared furrows, pushing each one as deep as possible into the compost at 12-15cm spacings.
The last step is pulling soil over the cloves and patting it down with the palm of a hand.
Newspaper covered with straw helps prevent most weeds, and maintains soil moisture.
THE GROWING SEASON
Our method for growing garlic is a game of two halves, each lasting three months.
Most people in New Zealand plant their garlic on or near the shortest day of the year (the winter solstice), which usually falls on June 21. In my opinion, the actual window for planting is mid-May to the end of July. However, for our needs, we always aim for the first three weeks in June.
Watering isn’t an issue for the first three months, but weeds are. The best way to manage them is a fortnightly tickle with a stirrup hoe, lightly scratching the soil surface back and forth to uproot any tiny sprouts. This is best done on a day with plenty of sun and wind.
Do it consistently, and you’ll keep weeds to a minimum during the first half of the growing season.
Around the spring equinox in late September, we shift our strategy to accommodate the changing climate conditions and the height of the garlic plants. By this time, they’re usually about 15-20cm tall and growing in defined rows 15-20cm apart. We know it will be drier for the next three months, so we use mulch to suppress weeds and retain soil moisture.
This is why you need to know the width of the newspaper. We’ve found the most efficient way to mulch our garlic is to fold sheets of newspaper into thirds, lay them between the rows, then cover them with straw.
A generous overlap end-to-end is better than simply butting the newsprint together. It’s also easier if you soak the paper in water for an hour or two beforehand so it doesn’t blow around in the wind.
From this point until harvest day, around December 21, the garlic is virtually a no-maintenance crop.
Harvest day.
HARVEST
The days we harvest garlic are some of the most anticipated on Kaitiaki Farm. After tending the crop for six months, there’s a sense of anticipation that gives way to enormous satisfaction. It’s also an easy task, and you can involve the entire family, especially young children.
We harvest a few thousand bulbs, so ergonomics and efficiency are essential. Our technique is to push a garden hoe under the bulbs. You gently pry them, the hoe in one hand while pulling two or three stems at a time with the other.
Piles of fresh garlic quickly form as we work our way down the beds.
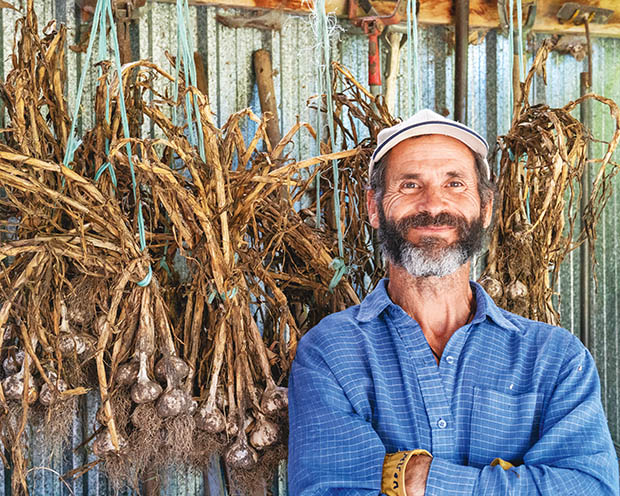
CURING & STORING
For ease of handling and inventory, we bundle the garlic into groups of 10 by size. We secure each bundle with a prusik knot at either end of a length of baling twine.
This means it’s easy to count up the crop. It’s also easy to hang them over lines in our potting shed, which is open on three sides so there’s plenty of air circulation.
The garlic hangs for 4-6 weeks until the leaves have fully dried out, around the beginning of February.
Finally, about eight months after preparing the beds for planting, we trim the leaves and roots and store the garlic on wire racks. It’s best to store it in a cool, dry place with plenty of air circulation.
We always save the largest bulbs for planting in June, keep the smallest bulbs to eat, and sell the medium-sized ones.
Stored properly, garlic can keep for 10 months or more, which brings us right back to prepping for the next harvest.
Garlic needs to be stored in a cool, dry place with good airflow.
SOFTNECK VS HARDNECK GARLIC
There are two types of garlic – softneck varieties and hardneck varieties.
Hardnecks
• grow a ‘hard’ central false flowering stem (called a scape).
• most are heirloom types, not commercially bred.
• are hardy plants that do well in cold climates.
• grow larger, fatter cloves that tend to have a strong flavour.
• store for 3-4 months, or longer if cured.
Softnecks
• don’t grow a scape.
• grow long, soft stems that can be easily braided for storage.
• do best in warmer climates.
• grow lots of small cloves, which tend to have a mild flavour (most commercial varieties are softneck types).
• store well for up to 12 months.
THE GARLIC THAT ISN’T GARLIC
It might look like garlic, and taste mildly garlicky, but elephant garlic (Allium ampeloprasum) is more closely related to leeks than garlic. What confuses people is the edible part of elephant garlic forms 4-6 cloves, rather than the tightly compact layers of the leek.
NELSON’S TIP: how we make a profit selling garlic (it’s not what you think)
When we first moved to Whanganui in 2010, we sold garlic at the Saturday morning market. Today, we’ve found it takes less effort and is more profitable to sell organic seed garlic online. We advertise through TradeMe and Facebook and sell out every year.
