20+ tried-and-tested tips for your best tomato crop
This gardener uses family-tested tomato growing techniques in an effort to rival her late mother’s unforgettable crop.
Words: Kristina Jensen
I hail from committed growers on both sides of my family tree. My father’s father, Knud Jensen, supplied his neighbours in rural Denmark with flower and vegetable seedlings each spring. He also grew vegetables to feed the family and traded with other gardeners, as was the norm in the Danish countryside in the1940s. I’m pretty sure this is why, every spring, I get the urge to plant seeds of all varieties and, inevitably, why I plant way more than I need.
From my mother Nancy came the motivation to grow food — tomatoes in particular. Nancy journeyed some years ago to the great abundant garden for departed souls, even so I am still trying to match her average 150-gram weight per tomato. It is, I admit, a kind of ‘post mortem’ competition on my part.
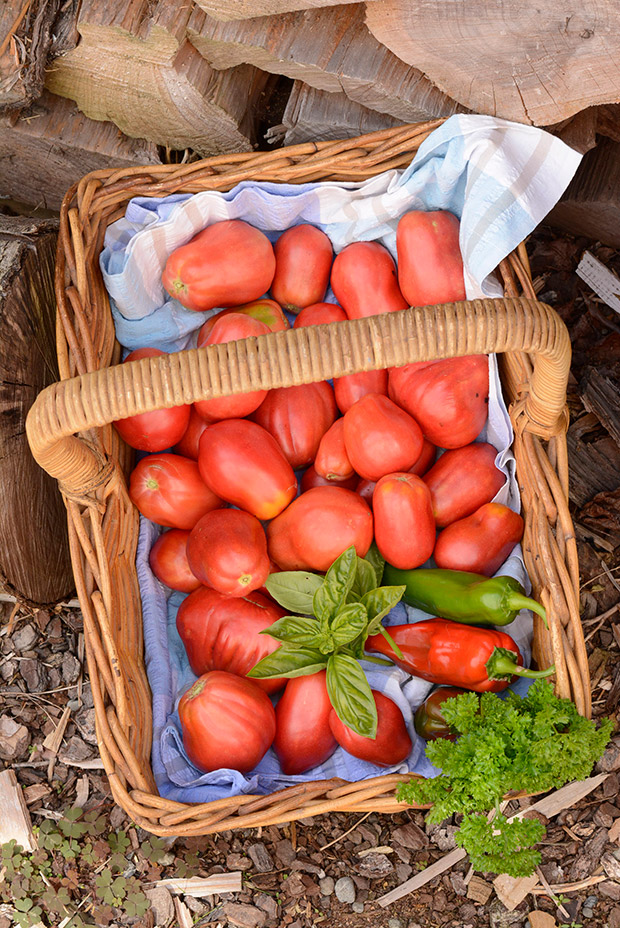
Mum grew the bulk of our vegetable needs almost single-handedly with tomatoes taking up a considerable portion of her garden. Every year she made enough tomato sauce to supply all the local scout and tramping club barbecues, bottled whole peeled tomatoes for soups and stews and perfected the art of freezer pasta sauce which I still make today. It involves a heavenly concoction of tomatoes, apples, zucchini, celery, capsicums, chillies and spices boiled together.
Mum’s growing secret was her ‘tomato powder’. This reached a near-legendary status among her gardening friends and while it certainly wasn’t her idea originally, it is still known as Nancy’s Tomato Booster in our family circle. Feeding tomatoes was a regular sacrament for her and to this day, my boys and I dutifully collect eggshells and roast them for grinding in honour of the tradition (recipe below).
Unfortunately my gardening practice is to follow some procedures with consistency and commitment, while completely ignoring or forgetting others. Without remembering to record and label what tomato varieties did well and which didn’t do well, means I start from scratch each year. This is in spite of my best intentions, each year, to mark plants and record pertinent observations in order to avoid disasters. Fortunately, tomatoes can be a forgiving crop.
If plants are left to their own devices, they will grow into untidy bushes. This is great for the plant as it hids their fruitful treasures from greedy creatures. But not so good for those of us looking to beat our mother’s harvest.
Years ago, while living in the Wilderland community near Whitianga, I asked founder Dan Hansen for his tomato-growing advice. He advised me to leave the tomato plants to their own devices, essentially allowing them to grow naturally. I dutifully followed his instructions, laying down a lovely cushion of straw under each ‘Red Russian’ so that the tomatoes were raised off the ground and wouldn’t rot. It turned out to be one of the wettest summers ever in the Coromandel — the method didn’t work.
As much as I want to allow plants to grow naturally, I will get zero fruit unless I pinch out the laterals and bottom shoots. Now I employ a little of both tactics; judiciously pruning to encourage an upward expression while leaving enough greenery so that the plant doesn’t feel completely naked.
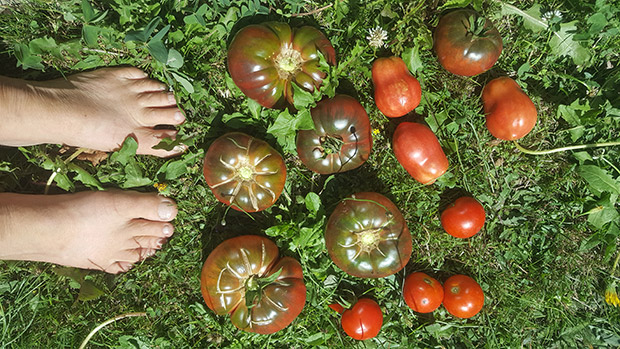
Last year was my best tomato-growing effort ever. I went for simplicity over excess. This is a change from a woman who has been known to plant up to 12 different varieties. I planted only two varieties, ‘Beefsteak’ and ‘Black Krim’, two varieties that had grown well in my tomato-bed location before. After dutifully pruning and feeding my babies, I was rewarded with a bumper harvest of enormous tomatoes, rivaling those of my dearly departed mother.
5 tried-and-tested tips for large, juicy tomatoes
There are five main ingredients for success when it comes to growing tomatoes, especially for growing many tomatoes in a fairly small garden like mine.
1. Give them lots of sun
Tomatoes are sun worshippers; six hours full sun is best and eight is better. Choose the sunniest, most sheltered place in the garden. If planting into containers and there’s a north-facing wall handy, position the containers to take advantage of the passive radiation of all that stored heat (see note about container planting below).
2. Feed the soil
Tomatoes are heavy feeders. My approach has always been to follow Mum and Dad’s method. Prep the soil about two weeks before planting seedlings by digging in a good helping of sheep manure and mature compost into the tomato bed.
At planting time, I pop a handful of Mum’s magical powder (recipe below) into each hole with each tomato seedling. This is the ultimate recipe for boosting tomato growth and helping to prevent tomato blight and blossom rot, and providing calcium, sulphur and magnesium.
3. Support: The ups and the downs
THE DOWNS FIRST
Plant the seedlings deeply from the start to establish a deep root structure. Why? Tomatoes develop roots from the stem so plant almost all of the stem in the earth, leaving just the top set of leaves poking out. Remove some of the leaves on the stem to do this. This makes the gripping system of the tomato plant stronger and creates more root-feeding surface area for consuming nutrients.
THEN THE UPS
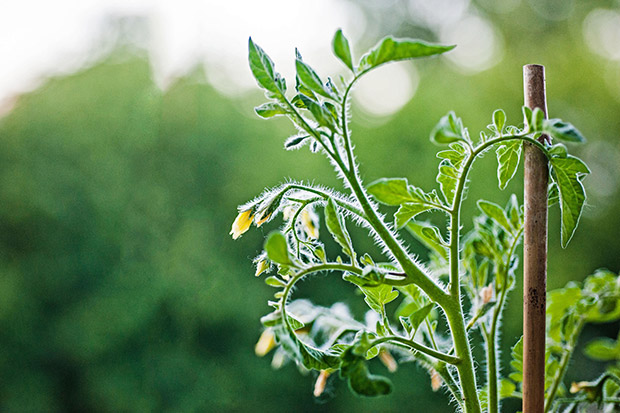
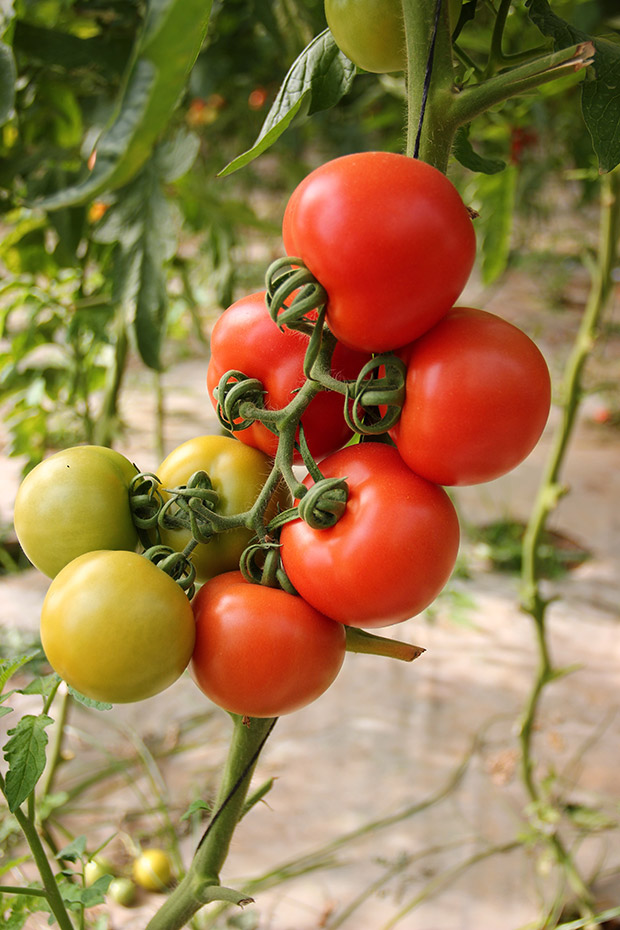
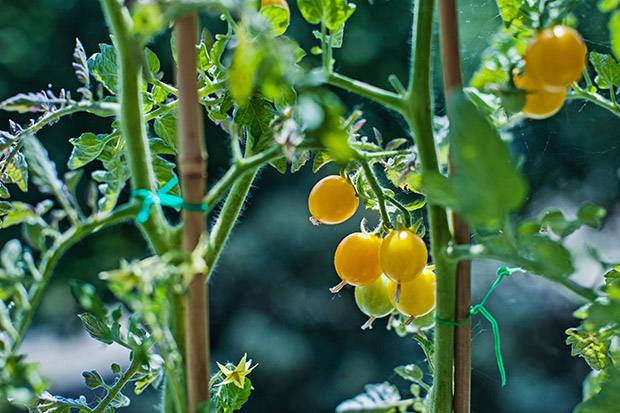
Provide tomato plants with a sturdy support structure. Why? A strong support structure allows for a generous air flow and keeps fruit off the ground. Use bamboo, plastic or timber stakes, wire netting cages or tie the plant to a fence. Tomatoes grow outward by way of lateral shoots - found in between the stem and the branches.
By gently removing these shoots, you increase the plant’s upward growth and the number of flowers (and therefore fruit) it will produce. Use soft string or material to tie the plant onto its anchor (old panty hose or strips of an old t-shirt work well).
4. Water the soil, not the plants
The key to successful watering is to keep the soil moist but not soggy. Too much water and the roots will rot; not enough and the plants will get weak and therefore be susceptible to fungus, insect predation and blossom rot.
There are many different theories as to when is the best time to water tomatoes but Mum’s wisdom seemed to produce results so I get up early and do as she did. Whenever possible I hand-water with a hose or watering can in the morning. In the height of summer, when the temperatures are high and the wind is drying, it might be necessary to water morning and night to maintain consistent moisture levels.
But, and here’s the key, don’t water every day unless the plants appear parched. The rule of thumb is to water more often when the weather is hot and/or windy, less often if cloudy or cool. I water every three to four days and give them a good soak around the roots only. And whatever you do, don’t use an overhead sprinkler for tomato plants. I learned this the hard way.
5. Pruning: Thinning out the suckers (or laterals)
Once tomato plants are about 70-100cm tall, thin them by gently removing any suckers. These are the thin, diagonal growing stems that pop up between the main stem and the branches or down low near the roots. I also remove any leafy branches that don’t have flowers or tomatoes growing on them. Aim to create lots of good air flow around the branches, flowers and fruit. Thinning also encourages the tomato plants to be more efficient with their available nutrients, directing them towards the fruit instead of leaves.
WHEN TO PLANT
According to Nancy, it’s important to wait until you’ve spent your first whole day outside in a t-shirt and have even possibly gotten just a little bit sunburnt. Her reasoning was that there will be enough heat in the sun plus ample sun hours to help them grow quickly.
GROWING TOMATOES IN CONTAINERS
Mum grew lots of tomatoes in big buckets around the back door of our house, especially the small cocktail, or cherry, varieties. Harvesting is easy and quick when the plants are close to the kitchen.
Black PCB bags, recycled vegetable oil containers, buckets and even sacks can be used to grow tomatoes. If you have paths, small gardens or retaining walls along the sunny side of your house, these are perfect spots for cherry or cocktail tomato plants. Walls or fences facing the full sun are great so utilize the existing support as the plant grows upwards. One advantage of keeping tomatoes in containers is the ability to regulate the amount of moisture and input of nutrients.

Be aware that tomato plants like lots of room for their roots so 10 and 20-litre containers are best for each plant. Containers need to have 8-10 drainage holes in the bottom and a layer of gravel to prevent the roots getting water-logged.
Use all-purpose (preferably organic) potting mix with a slow-release fertilizer, or a tomato-specific mix to plant tomato seedlings into. If mature compost is available, sprinkle a layer on top to enrich the soil, retain moisture and protect from the elements.
WHAT IS BLOSSOM END ROT?
If tomatoes develop black or brown bottoms, this is probably blossom end rot, so named after the rotten spots that appear on the blossom end of the tomato (rather than the stem end).
Nancy’s Tomato Booster

INGREDIENTS
1 cup milk powder
1 cup Epsom salts
1 cup of roasted ground eggshells (see method below)
2 tbsp baking soda
METHOD
Sprinkle a handful into each planting hole and sprinkle 2 tbsp on the soil every few weeks throughout the growing season.
To prepare eggshells: Keep an ice-cream container handy on the bench for collecting eggshells. When it’s full, pour them out into a shallow dish on top of a piece of baking paper (the remnants of egg bake on like glue and are very hard to remove).
Bake at 200 Celcius for 40 minutes. Now, I will warn that they smell kinda icky, like the house is burning down, so as soon as the 40 minutes is up, take the dish outside and let it cool down so that the house doesn’t smell like burnt dinner. Once cool, grind the shells into miniscule pieces (not a powder though) in a food processor or pop them in a sturdy sack and bash them up with a hammer into little pieces (this is a great job for kids!).
Store in an airtight container until ready to mix them with the other ingredients. (Slugs and snails are not fond of ground eggshells so this can be used as a deterrent around young seedlings).
Kristina’s ‘Weed Feed’
While tomatoes are not fond of their foliage being watered, they do love a regular foliar feed of a liquid emulsion. Seaweed and manure can be highly beneficial for making liquid love for your tomatoes, but there’s also a very quick and simple recipe that uses discarded green waste from your own garden.
METHOD
Every couple of weeks, fill a bucket with handfuls of fresh healthy grass and weeds such as chickweed, plantain, comfrey, dock leaves and puha. Cover with water. Let sit for four days and then strain the liquid out. I do this by pouring the liquid through a sack into another bucket. Pop the leftover mush into the compost bin. Water tomatoes (or any vegetable in the garden) with the liquid, watered down to a ratio of 1 part Weed Feed and 4 parts water.
Coffee grounds
A regular, light sprinkling of used coffee grounds can enrich tomato plants. As well as utilizing a product that would otherwise go to waste, coffee grounds add organic matter to the soil and assist with aeration. Don’t overdo it as the grounds can form a mat that prevents water getting into the soil and can sometimes make the soil too acidic.
