How to grow microgreens (it’s easier than you think)
Easy to grow and nutritious, microgreens are a winter garden goer.
Words: Jenny Somervell
Growing microgreens is a quick, rewarding activity for kids and parents: all you need is the seed, media, and recycled containers.
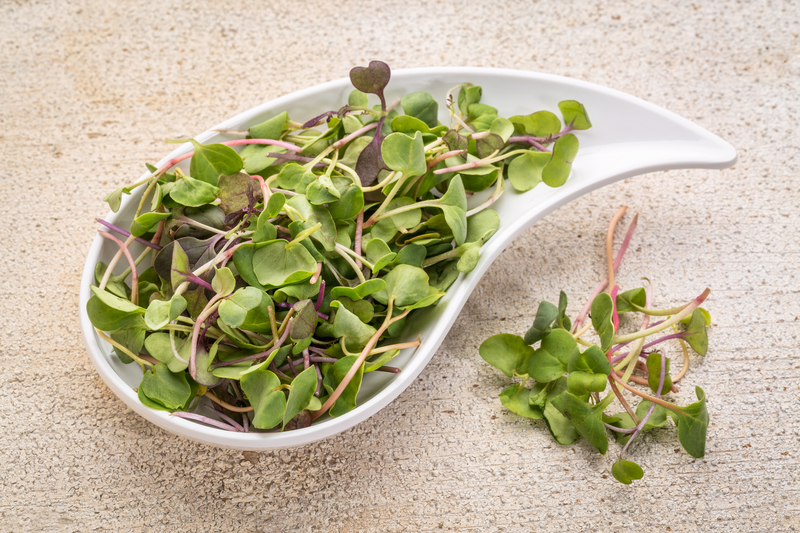
Microgreens are tiny vegetable or herb greens grown for their visual appearance and complex flavours and textures. They are larger than sprouts but smaller than baby salad greens, typically a central stem, cotyledon or seed leaves and the first young two true leaves.
Unlike sprouts, microgreens are grown in the light in a soil or soil substitute, and the root is not harvested. When they are ready, the stem is cut, leaving the root behind. Because they are grown in the light, both the flavour and the nutritional content is greater than sprouts.
WHY GROW MICROGREENS?
When your salad greens are covered in winter frost (or worse), microgreens add home-grown colour, texture, flavour, crunch, and class to salads, soups, sandwiches, stir-fries, pizzas, pies and dips. They are also very healthy, containing on average five times the level of vitamins and carotenoids than their mature plant counterparts.
The bonus: microgreens are cheap and easy to grow, take little space, and are usually ready in 1-2 weeks from sowing.
You might be wondering why not just buy them pre-packaged from the supermarket? The answer is you can’t: microgreens have a short shelf life - they wilt within minutes once cut - and their nutritional value starts to deteriorate from the moment they are picked. Homegrown microgreens can be harvested just before serving, so they keep their superior nutritional and medicinal value.
4 REASONS WHY MICROGREENS ARE HEALTH HEROES
1. A study by the US Department of Agriculture of 25 microgreens found levels of vitamins and carotenoids were five times higher than in mature plants.
2. A pilot study at the John Hopkins University School of Medicine concluded that regular consumption of microgreens might help people with gastric problems and even assist in preventing stomach cancer.
3. Brassicas in particular (broccoli, cabbage, mustard, rocket, and kale) were linked to cancer prevention. Highest ranking was radish, daikon (Japanese white radish) and broccoli.
4. The more intensely-coloured the green, the more nutritious it is.
22 TIPS FOR GROWING MICROGREENS
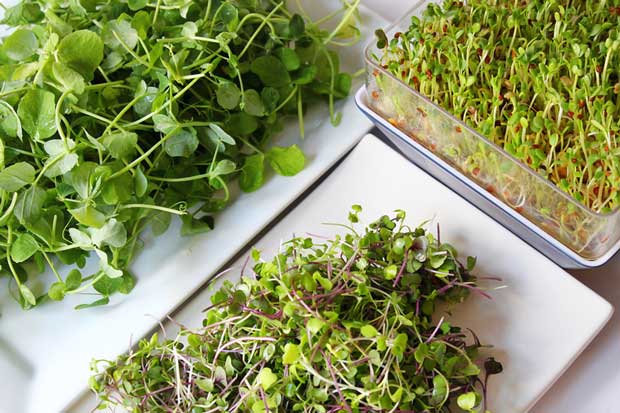
Microgreens can be grown at any time of year provided soil temperatures are high enough to germinate seeds and you have good light. They need soil or a soil-like media, good air circulation, water and full-to partial sunlight. They can be grown in containers indoors or out, in the greenhouse, or in cloches or beds outdoors.
Choose containers that are shallow, lightweight and portable: plastic food trays, margarine containers, baskets lined with polyethylene or custom-made seed trays all work. Wide, shallow containers which maximise growing surface are best. Drainage is necessary so punch holes if needed.
For larger quantities, polystyrene mushroom trays are ideal and well insulated. Terracotta requires too much watering unless lined with plastic.
If they are inside or on a balcony, choose containers you will enjoy tending to and looking at.
For container growing, choose a quality potting mix or seed-raising mix; pumice is very porous and clean for indoor use, but does need liquid feeding as plants develop.
All seed should be untreated - watch out for brightly coloured seeds which may have a chemical coating. If you are mixing seed, choose seeds that require similar conditions and germinate in a similar time frame (commercial mixes don’t always do this), eg mixed lettuces, kale, broccoli and red cabbage. If you’re a beginner, go with easy, quick growing species like kale, red cabbage, mizuna, rocket, cress, mustard, and radish. Large seeds like peas and corn can be pre-soaked to speed germination.
HOW TO PLANT
1. Level out growing media, firming at the corners. A depth of 4cm is sufficient for most seedlings.
2. Firm gently — do not over compact — and either water at this stage to avoid flooding seeds, or after sowing.
3. Sprinkle seeds evenly over the surface (like grinding pepper on a meal) and firm again. If you want a larger ‘true leaf’ stage, sow more sparsely.
4. Cover with a fine layer of sifted soil to the depth of the seed. A coarse sieve works well but a kitchen sieve will do. Larger seeds such as pea and beet do not need sieved soil.
5. Water thoroughly (until water comes through drainage holes) using a fine rose.
6. Cover seeds with wet cloth, paper towels or newsprint to maintain even moisture around the seed.
7. Seal in moisture with clear plastic, glass, or a food cover or shower cap for smaller containers.
8. Place seeds in a warm place out of direct sunlight, eg a hot water cupboard, and check frequently. Once they have germinated, remove coverings and move into the light.
9. Developing seedlings will need water but don’t over water or leave pots standing in water.
10. As they develop leaves, plants will need nutrients — if they are in a nonsoil media, water with a dilute nutrient solution such as seaweed.
TROUBLE-SHOOTING YOUR MICROGREENS
Problem #1: Poor strike rate, seeds fail to germinate or come up unevenly:
• Were the seeds past their expiry date?
• Have seeds been exposed to water or excess heat?
• Did you use a quality media?
• Was the media evenly moist throughout?
• Were the temperatures adequate for germination?
Problem #2: Seeds germinate, then wilt and die:
This is probably ‘damping off,’ the main enemy of seedlings, caused by a collection of soil-borne fungi diseases (Pythium, Rhizoctonia and others) which thrive in warm, wet, humid conditions. Seaweed increases resistance to plant pathogens - it can be added to the media as kelp, or watered in as a dilute solution.
Other issues to consider:
• Is the media good quality?
• Were containers cleaned thoroughly?
• Was seed sown too thickly?
• Were the temperatures adequate for germination?
• Are you over-watering?
• Is there enough air circulation around plants?
Problem #3: Scorched leaves:
• Is the light too strong?
• Did you water in the heat of the day?
• Did plants dry out (usually worse around the edges)?
Problem #4: Pale, spindly plants:
• How much light are plants getting?
Seedlings grown in low light (as in a garden shed) will have weak, drawn up stems. Note that plants may have a shorter life, but they are still quite edible.
4 TIPS FOR GROWING MICROGREENS IN THE GROUND
1. Growing in the ground requires less attention to watering but the greens are not quite so easy to cut off at ground level.
2. Raised beds are easier to work.
3. Prepare the soil as you would an outdoor seedbed, incorporating generous helpings of well-rotted compost. Work soil to a fine tilth and level.
4. A good idea is to lay a grid pattern with bamboo or doweling and plant different seeds in the squares at different time intervals. As one batch is germinating, sow another, bearing in mind time to harvest can be anything from 8-10 days (radish) to several weeks (dill, chervil, basil), depending on the time of year.
MICROGREENS FOR KIDS
Children like colourful, fun containers such as tin cans, colourful pottery cups or shallow bowls, but see-through containers are also fun as they can watch the root growth. The top of a plastic drink bottle can be cut off and placed over the base to produce a mini-greenhouse.
Choose vigorous seeds that germinate and grow quickly like radish, peas, and brassicas. Radishes are super-fast but may be a bit spicy for younger palettes.
4 TIPS FOR HARVEST
1. Plants are ready to harvest 7-21 days from sowing when showing their first true leaves. Most plants will be 2-5cm high.
2. Harvest just before you want to use them or early in the day or evening when the greens are cool to prolong shelf life. If they are cut above the growing point, a recut is often possible, provided feeding and watering are continued.
3. Use long-bladed sharp scissors (think hair cut!), and wash leaves in cool water immediately.
4. Shelf life is short, but if sealed (lockable plastic bags are ideal) and refrigerated, they will last 3-4 days and up to a week.
7 MICROGREENS YOU CAN GROW IN WINTER
For winter germination, choose greens that germinate in cooler temperatures: kale, mustard, peas, rocket, broccoli, mizuna, and radish. Summer microgreens like basil and amaranth require temperatures above 15°C to germinate.
