How to have success in hatching chicks
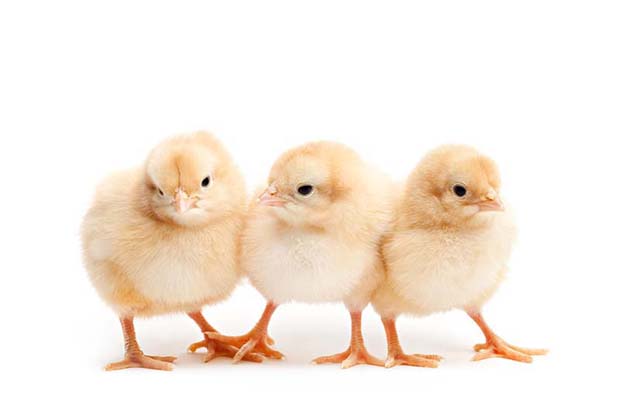
Part of the fun of owning a small flock is hatching eggs, whether by natural means or with a little mechanical intervention.
By Sue Clarke
When it comes to hatching live chicks, you have two options. The first sounds cute; let nature takes its course and allow a broody hen to hatch a clutch of eggs.
The second, using an incubator, isn’t quite as romantic but still delivers good results.
Hatching au natural
Advantages: as nature intended, with very little input from you.
Disadvantages: timing is difficult if your hens don’t go broody when you need them, there is a limit to the number of eggs you can hatch at one time, humidity and temperature issues.
If you want to hatch chicks from your own flock, then the very first thing you need to consider getting is one or two (or more) of the best mother hens in the world – bantams. What they lack in size, they make up for in dedication and love for their eggs (or anyone’s eggs) and the resulting chicks, whether they be bantam or not. Love is most definitely blind when it comes to the bantam. Genetics also dictate the bantams are far more likely to go broody than any other breed, so having a couple around is very handy.
If the only potential mothers you have are of a commercial variety, you’ll almost certainly never see them go broody. Broodiness is a trait that is not needed in the commercial poultry industry (in fact, it’s a huge economic disadvantage), so the drive to go broody has been bred out of them over thousands of generations.
However, any hen will lay fertile eggs if the timing (and the rooster) is right, so having a couple of broody bantams on-call can be useful. The problem is, you can’t make a hen go broody, so hatching chicks as nature intended always tends to be a bit of a hit and miss affair. A broody hen will show definite symptoms – she will ruffle her feathers and squawk (sort of a “bwaaaarrrrk” sound as opposed to short “book, book, book” sound of contentment) if disturbed. She may even peck at anyone interfering with her nest and will choose a dark, secluded spot (hopefully your chicken house) to sit and not leave it.
If it’s not your chicken house she’s chosen, and she’s settled somewhere inconvenient or insecure, you may need to move her. It’s best to do this at night but you will run the risk that when she’s moved, she will stop being broody.
A good nest box needs to be dark, and at least 400mm square, with an open front. Ideally, it should have a bottom open to the ground, or one with a grassy sod in it so soil moisture can assist the hen during incubation. You don’t want a dry nest-box or it will be difficult for the correct humidity levels to develop. Lots of fresh grass in the bottom is a useful substitute.
While you are waiting for sufficient fertile eggs to set under a broody hen, place some artificial eggs in the nest to encourage her to stay that way. If you don’t have any artificial eggs (available through rural supply stores), a couple of golf balls or even a couple of lemons will do the trick. You want to control the start of incubation so the resulting chicks hatch at about the same time.
As you collect your potentially fertile eggs, write the date on them in pencil. Don’t wash them with water, as this can allow bacteria to enter through the pores of the egg. However, don’t use dirty eggs either. Try scuffing off any dirt or manure with a dry paper towel but if an egg is pretty much coated, don’t risk spreading bacteria by incubating it.
For peak hatchability, collect eggs over 6-8 days and store them in a cupboard or somewhere with a constant temperature between 10-18°C (ideally 15-16°C). Don’t put them in the fridge. Use an egg tray to keep them upright and at least once every 24 hours turn them onto the opposite point. A hen can only incubate the eggs her body will cover, so obviously a bantam can’t hatch as many eggs as a larger hen – a good bantam should be able to sit on 6-8 full-size hen eggs. If you’re not sure, less is always more. If a hen has too many eggs, the ones on the outside won’t get to a high enough temperature.
Once she is sitting, make sure she has plenty of good quality feed and fresh water close by and leave her to it. You can try letting her out once a day for a walk around on dewy grass – this gets feathers on her underside wet, so the eggs receive a little moisture to keep the humidity at a good level. A hen will quickly get used to a routine, meaning there is less chance of her fouling her nest and dusk is a good time, so she gets a chance to walk in dewy grass.
A sitting hen is a sitting duck for an attack of lice. Make sure a sitting hen has been drenched or use a lice powder to protect her and the nest. A bad attack of lice may be enough to force a hen out of her nest and off her eggs for good.
After approximately 21 days, you should see a positive result. You can candle eggs during the incubation process (ie use a bright light to see if a chick has formed), however you want to do this quickly and there’s always the risk of upsetting the hen too much.
Once eggs have hatched (this may take 1-3 days), keep the hen and her chicks in a safe place for a couple of weeks – an old rabbit hutch that can be moved is ideal, as it keeps mother hen and chicks secure but allows them to be outside and on fresh grass.
Make sure chicks are getting a good quality chick starter feed. Their mum can eat that too as the extra protein will help build up her strength from three weeks of restricted feeding and inactivity.
Chicks are prone to drowning in water dishes, so place a very shallow dish in the run and fill it with clean stones or marbles. Clean it out regularly as the chicks will foul it as they stand on it. At six weeks of age, chicks can be separated from their mother and should be started on a grower ration.
WHICH EGGS ARE BEST?
Assuming your rooster/roosters are doing their job properly, the next factor for a successful hatchability rate is choosing the best eggs.
Don’t pick very large, very small, or misshapen eggs. Large eggs have a very low hatchability rate, small eggs produce small chicks, a huge disadvantage and misshapen eggs tend to produce birds with deformities or chicks that will eventually lay similar eggs with deformed shells, if they produce any live chicks at all.
Don’t use eggs that are cracked or have thin shells. Bacteria will be able to penetrate, and they will rarely hatch. Use only clean eggs for hatching, and don’t wash a dirty egg or wipe one with a damp cloth. An egg-shell is porous and you will force bacteria through by using water or by rubbing an egg.
DIY incubation
Advantages: No need to wait for a broody hen, large batches of eggs can be hatched in one go, eggs can be easily checked, situation controlled to allow for optimum hatching rate.
Disadvantages: Can be very labour-intensive, expensive to buy an incubator, cost of power usage, after-care.
When choosing to use an incubator, you still have to bear in mind certain things, like collecting eggs often (three times a day if you can), not washing them, and storing them in a coolish area, just as you would for eggs about to go under a hen. Again, make sure eggs are carefully marked with the date of lay on them in pencil. This will help you work out your hatchability rate and if your storage of the eggs was good (or not). Before placing any eggs in your incubator, turn it on, get it up to temperature and have it there for at least twelve hours before placing any eggs in it.
An incubator should come with a built-in thermometer but many enthusiasts have a second one to place in the machine so you can be certain of accuracy. Running a slightly lower-than-optimum temperature for a few hours will not do too much damage to a chick (other than slow its metabolic rate). However too high, even for a few minutes and you may get birth defects or worse, deaths.
Keep the incubator in a draft-free room, out of direct sunlight. It will take about two days for the eggs to get up to the required temperature, so don’t adjust the temperature during that time.
Do you have a back-up plan in case the power goes off? If you are using a small incubator, wrap it in wool blankets, or better yet cover it with pillows, then wrap the whole thing up in wool blankets. Think about the amount of clothing (or blankets) it takes to keep you at a warm temperature, then add or take away coverings as you think are appropriate. Don’t be tempted to use candles or a heater or cups of steaming water in an incubator – this will cause hot and cold spots.
If there is a power cut for a few hours, it will be 4-6 days before you can candle the eggs and know if chicks have survived. Eggs that suffer a loss in temperature while being incubated may have their hatching date delayed by 2-3 days, so bear this in mind.
While temperature is the most critical aspect of incubation, humidity/moisture (or lack thereof) is just as important as it is for the egg sitting out under the bantam. During incubation, you don’t more than a 12-14% moisture loss from the egg. To determine this, weigh the eggs when you put them in, then check them again during incubation. Weigh the eggs (or a sample of eggs) quickly, as you don’t want them to get chilled.
A good incubator will come with detailed instructions on how to maintain humidity and what should be done when (humidity levels will need to change during the incubation cycle). It can have a huge effect on your hatchability rate and whether a bird is healthy or not, so follow them carefully.
Depending on your incubator you may need to manually turn the eggs, at least three times per day. More sophisticated machines will do this automatically. Mark one side of each egg with an “X” and then write up a checklist so you keep track of when you turned them last – it’s very easy to forget. For the last three days of incubation, you won’t need to turn the eggs, to help keep humidity levels high.
Once you get to hatching day, don’t help any chick get out of its shell, no matter how tempted you are. A chick that doesn’t hatch on its own will always have problems, either from infection or physical damage.
Humidity levels are extra important at this time and by lifting the lid all the time, you allow humidity to escape. Chicks can take up to a day to finally break free of their shells, so don’t panic if it seems to take ages.
Oxygen is vital throughout the whole incubation process, do not cover the incubator so much that air cannot circulate. Once chicks are hatched, leave them in the incubator for at least 6-12 hours, to give them time to dry out. Chicks can survive with no food for up to 48 hours, so they will be alright to dry out over this time.
Once the incubator is empty, it will need to be disinfected, then disinfected again just before use. Clean everything you can – hatching trays, water pans, the floor of the incubator, and even the room it sits in.
USING AN INCUBATOR
Whatever the machine, follow the instructions carefully. Some of the more basic incubators may require you to monitor and control the air temperature in the room where the machine is sitting, others may need you to manually turn eggs.
