Make hay the old-fashioned way with this homemade hay baler (built for under $150)
During the week Jason Price is a management consultant and efficiency expert. At the weekend he has an odd fascination with doing things by hand, like baling hay.
Words: Jason Price
Images: Jason Price, Andrew Ward
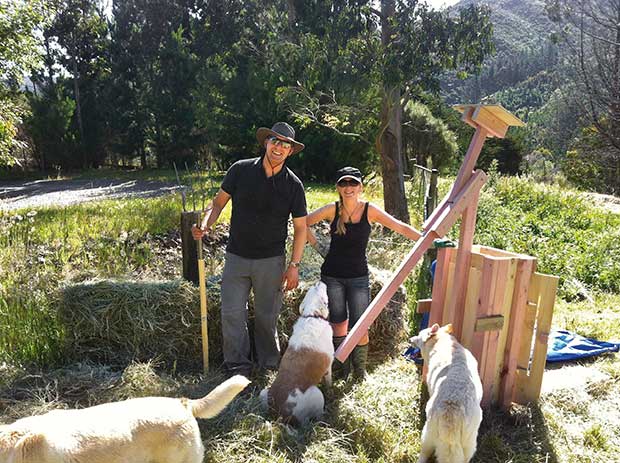
Who: Jason Price & Bella the Corporate Dog Akatarawa Valley, 40km north-east of Wellington
What: 1.2ha
Twitter: @Corporate_Dog, @Jason_E_Price
Web: Check out Jason’s other passion, Norwegian round wood stacks
It’s important to know what you’re getting into when it comes to managing your first-ever lifestyle block. Alternatively, you can say to yourself “oooh, that’s a lovely spot” and just move to your dream property. That’s what I did.
One of my first problems was what to do with the fast-growing spring pasture on my hilly paradise. I did get some helpful advice from block-owning friends.
“Seriously, you haven’t got sheep yet?”
That began my journey into land management and sheep. A few weeks later, three enthusiastic lambs arrived and promptly disappeared into the long grass. The stunned expression on their woolly little faces matched my own.
My first thought was to make hay. The sun was shining. Machine mowing the steep gradient of my block makes that too dangerous. A small budget meant hiring a contractor wasn’t a viable option either.
Hay has been cut, dried and baled by hand since medieval times. How hard could the old-fashioned way of doing things be? Project DIY Hay Baler began. Google provided a range of articles. I quickly clicked past the one entitled “don’t buy a lifestyle block until you’ve done your homework” and moved on to the traditional haymaking results.
The basic method of making hay is cut, rake, turn, dry, bale.
The North Carolina Forestry Service’s leaflet on how to build a simple box baler got me enthused about what they called: “A low-cost, simple-to-operate-and-build solution that is ideal for small-scale/start-up operations.” I ignored the drawbacks column with its pessimistic talk:
• cumbersome
• labour-intensive
• limited production
And the most pertinent to someone in my profession:
• inefficient
DOWNLOAD THE NCFS BOX BALER BUILD INSTRUCTIONS
STEP ONE: CUT AND RAKE YOUR GRASS (THE HARD WAY)
I did make one concession to modernity and common-sense. I admire the many people on YouTube who show such enthusiasm for cutting grass with a traditional scythe. But learning to scythe on a hilly section of the Akatarawa Valley would be more likely to result in a trip to the hospital. Scythes are also surprisingly expensive to buy and require a high level of skill to use efficiently. A petrol brushcutter with a grass cutting blade would do the job.
The grass was knee-height, the weather forecast was for a week of sun, and I had time off work. Manually cutting a hillside field of grass is as labour-intensive, cumbersome, and inefficient as you’d imagine. Once cut, the grass needed to be raked up into windrows. These long lines help the piled-up grass to dry out. Work methodically across the field, raking the cut grass up into mounded rows.
This is a nice way to spend a sunny day but it’s easier if you can find others to help you. My helpers were bull terrier-cross Beanie and white German Shepherd Kujo. Their definition of ‘help’ was to repeatedly crash through the neatly-raked rows. Occasionally they would wee on it.
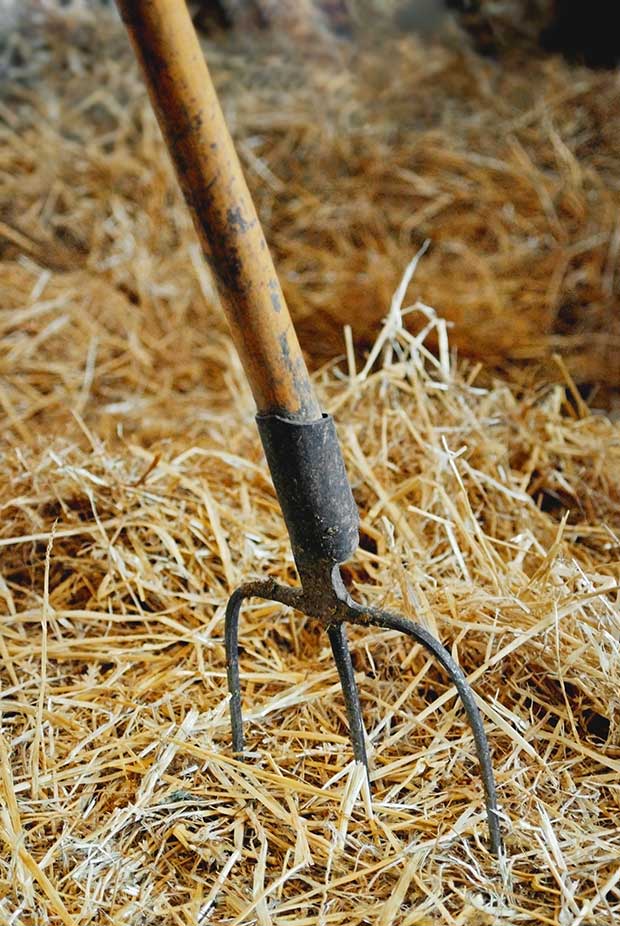
One essential investment is a decent pitchfork. You need to turn each windrow twice a day, about lunchtime and again in the late afternoon-early evening, to dry the hay. You want to turn and spread it out to expose any hidden green grass to ensure it is evenly sun-baked. Too green and wet and your hay will go mouldy, or worse, get so hot it starts a fire in your barn.
JASON’S TIPS FOR MAKING A HAY RAKE
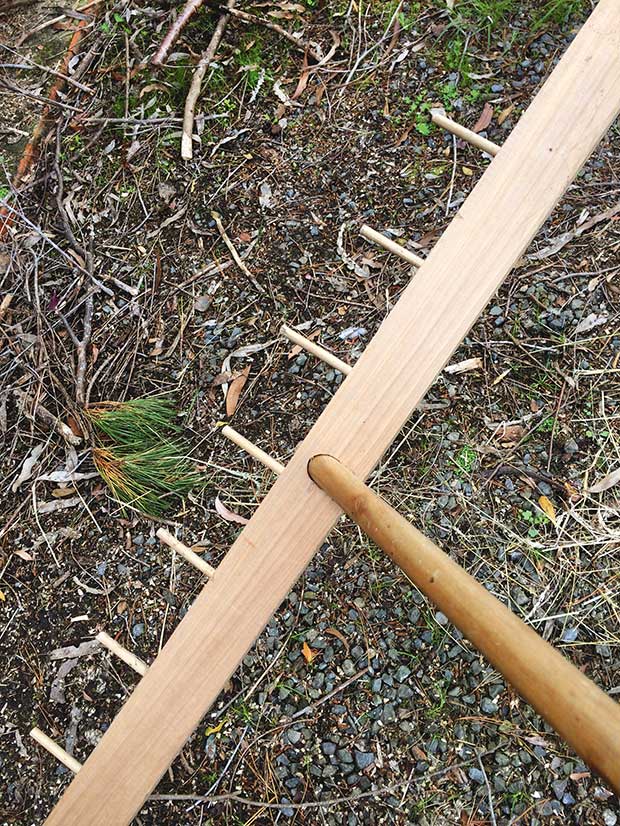
I didn’t have a suitable hay rake, so I made one out of a broom handle, a length of scrap timber and some 8mm dowelling. This was a lot cheaper than those for sale online. Miraculously, it also works well. Don’t glue the dowel ‘teeth’ in place. It’s a lot easier to pull them out and replace them when they break. If you want to be efficient, cut yourself some spare dowels and take them with you when you’re raking.
STEP TWO: BUILD A BOX BALER
You will need to print the instructions to make this baler. The following is my commentary on my project as I followed (and sometimes didn’t follow) those instructions.
I bought the timber, plywood, coach bolts, screws, door hinges, and eye hooks from Mitre 10 for under $110.
1.
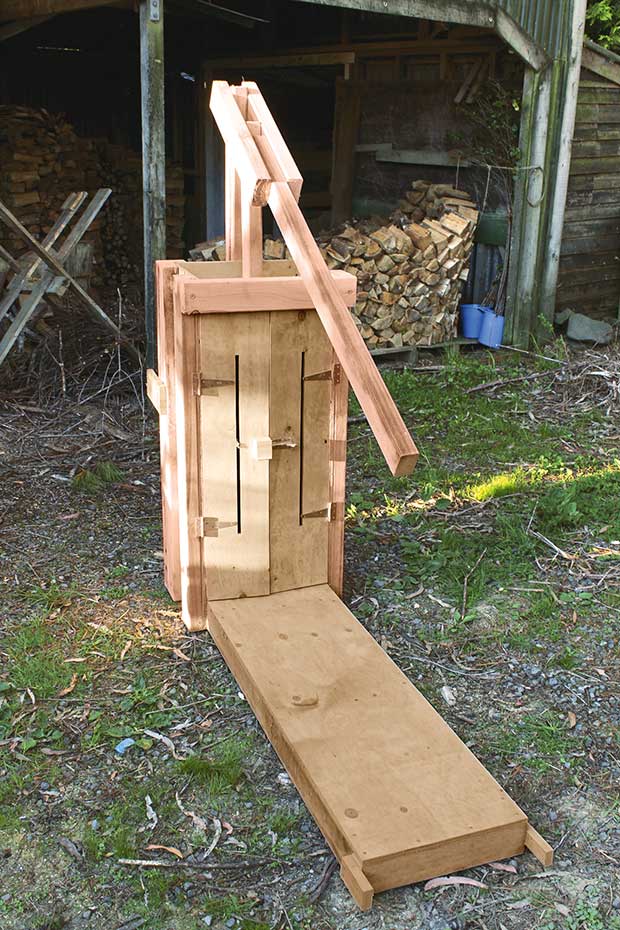
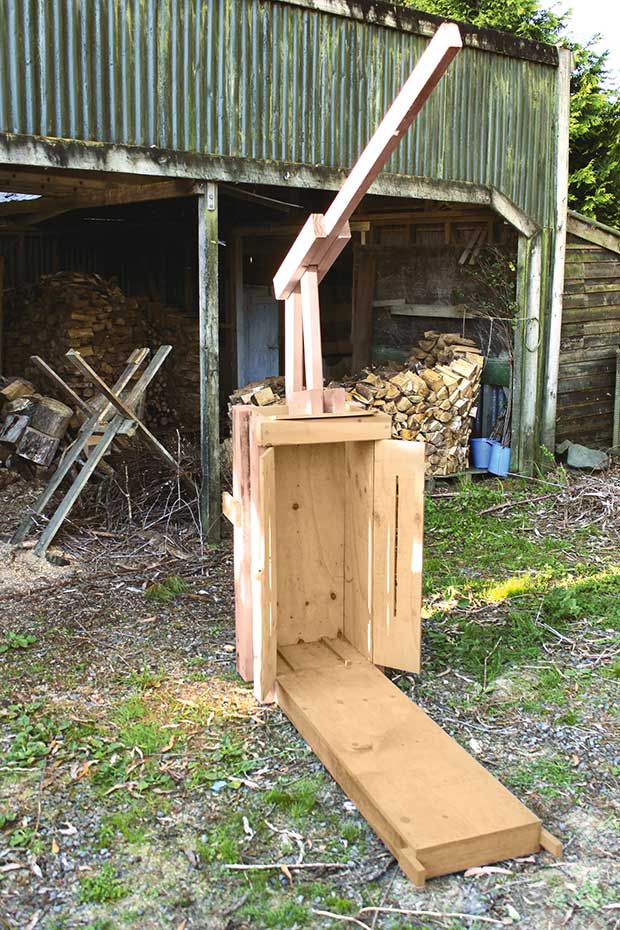
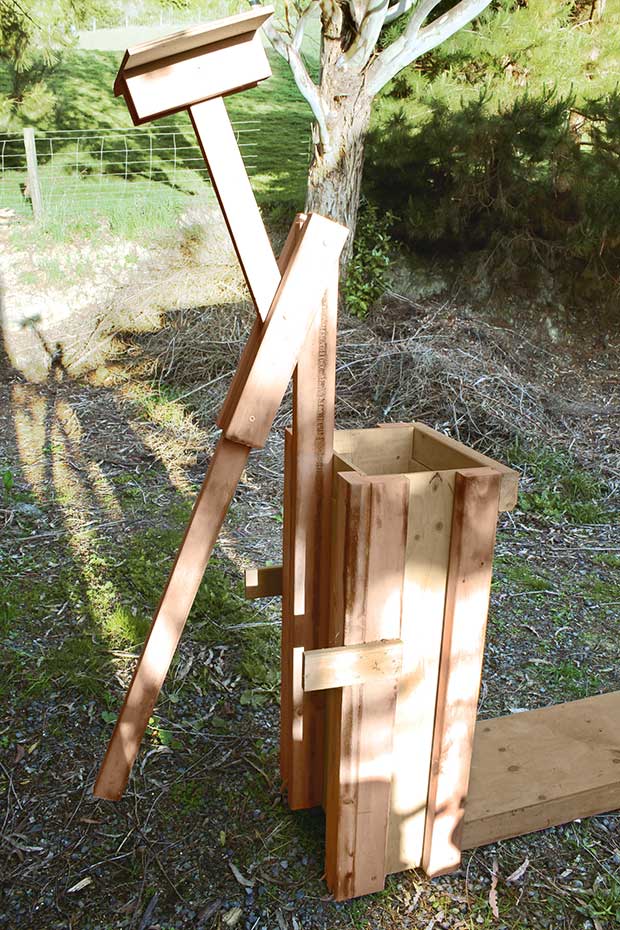
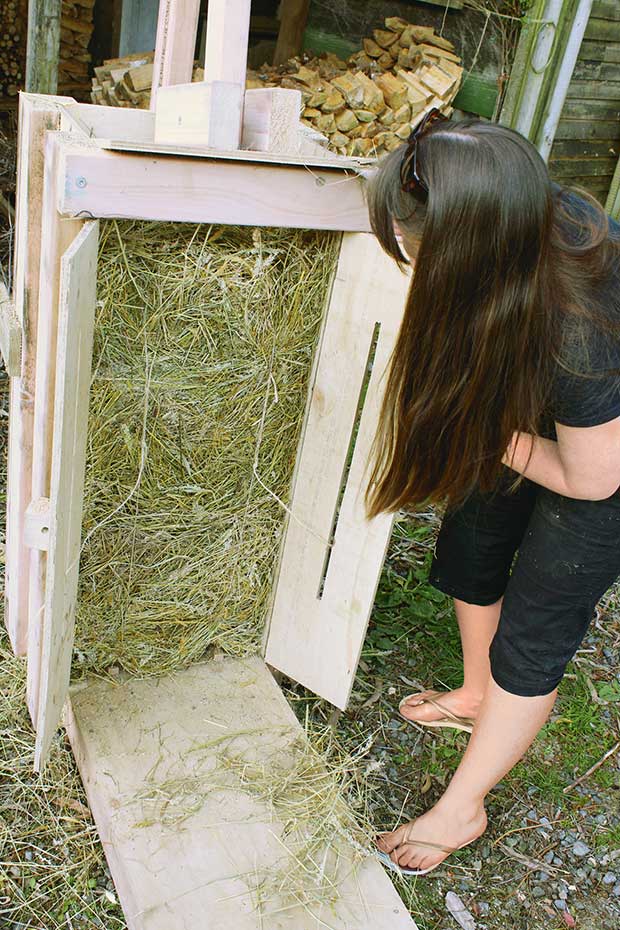
1. The box baler is a square loading box with a lever system to compress the hay. It’s attached to a loading platform, providing stability to balance the lever arm. The loading platform frame and the loading box are constructed from 4×2 timber, with sheets of plywood in between. Start by constructing the base platform from two long and one short length of 4×2”.
2.
2. The rear corners of the loading box are two pieces of 4×2” timber attached to one another at right angles and fixed to the base platform. Screw a sheet of plywood between these and fix the central 4×2” length to the centre to hold the lever arm.
3.
3. Fix another piece of 4×2” to the base to form the front of the loading box. Connect across the top with a shorter length of 4×2”, holding the side plywood sheeting. On the front, below the cross beam, cut a plywood piece for the door.
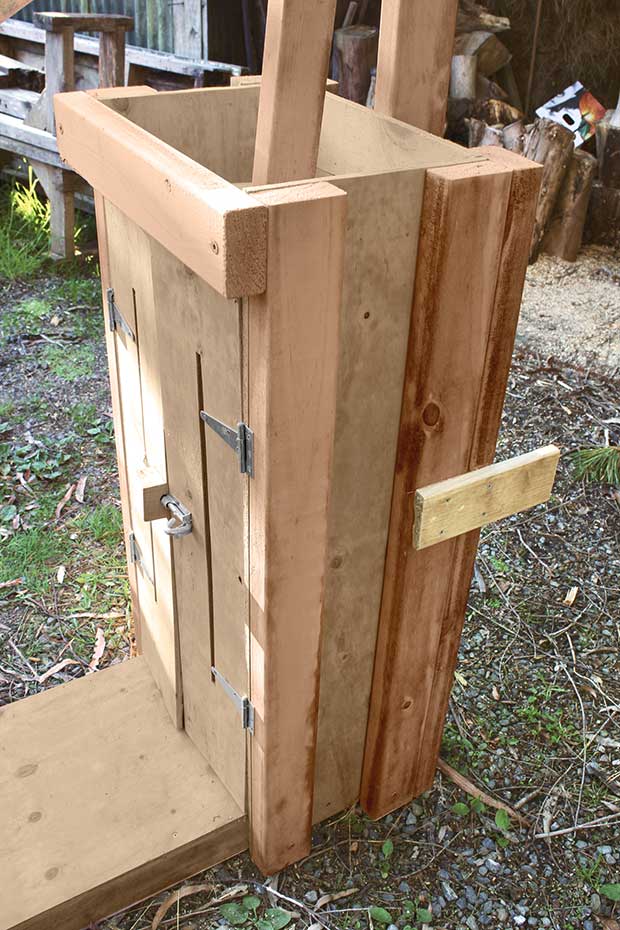
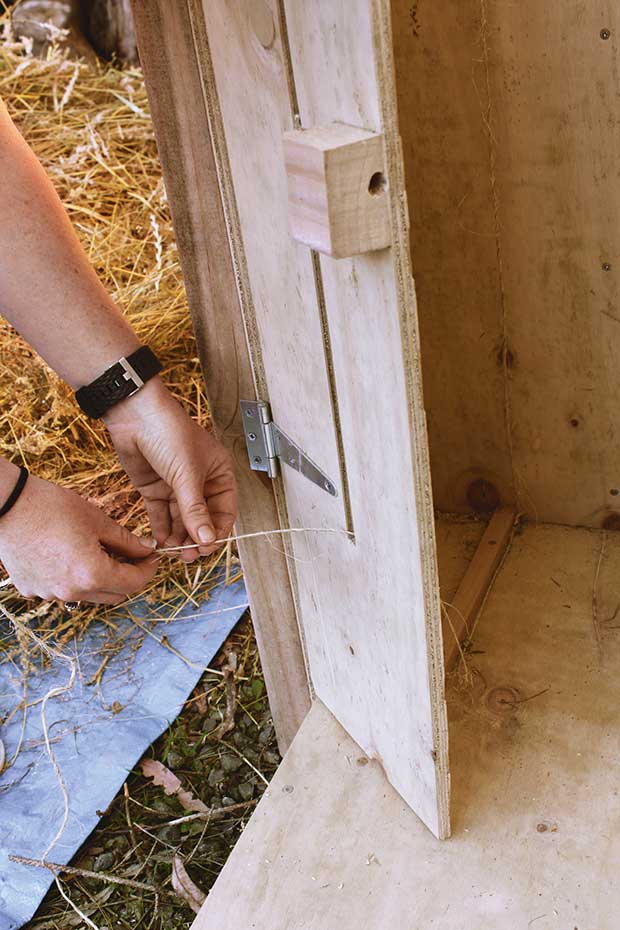
You’ll notice I went for a two-door front-opening model as opposed to the single door version in the reference plans. There was no strategy behind this; I cut a bit of plywood in the wrong place and had to adapt it to get the baler finished in a day. It works fine, but in practice, I think the single door model would be more robust during the baling process. Fix the door to the side upright with hinge or hinges and add a secure closing mechanism (either a bolt or a hook on the far side).
4.
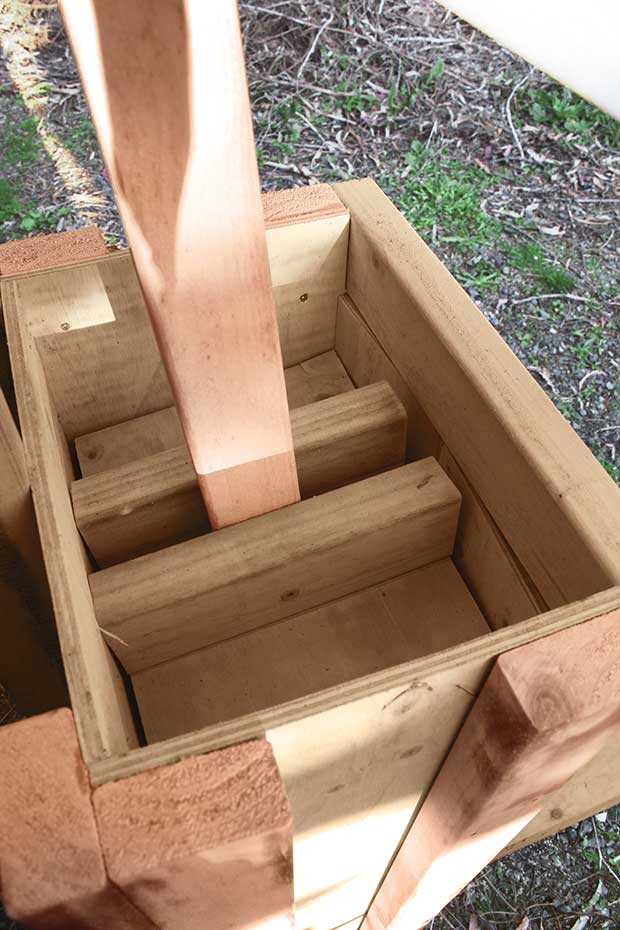
4. Make the lever arm and compression platform. The lever arm is made up of two shorter lengths of 4×2” and a long central length. Use coach bolts to secure these at the top of the central pillar on the back. In the centre of the space between the two shorter lengths, use a coach bolt to fix the vertical 4×2” that holds the compression platform (the bit that goes into the box baler top). The compression platform itself is a square of plywood, the same dimensions as your box, attached by two pieces of 4×2 (in photo 4 you can see it where it inserts into the loading box). When the arm is lowered, this compresses your hay inside the box.
5.
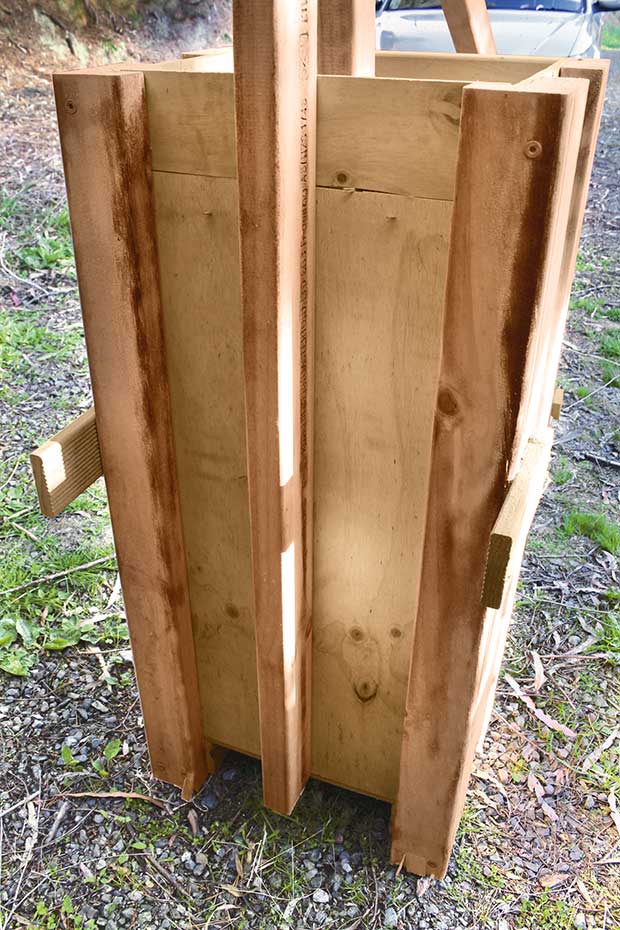
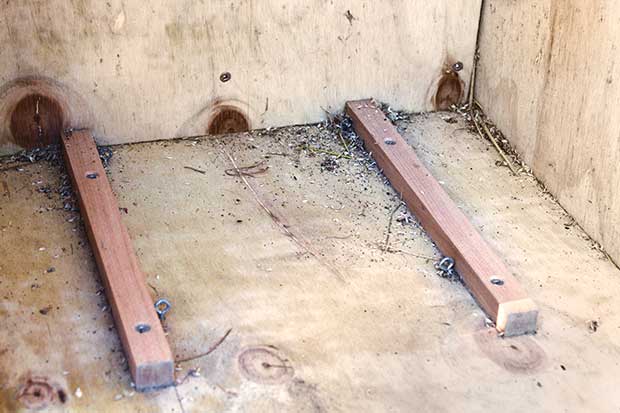
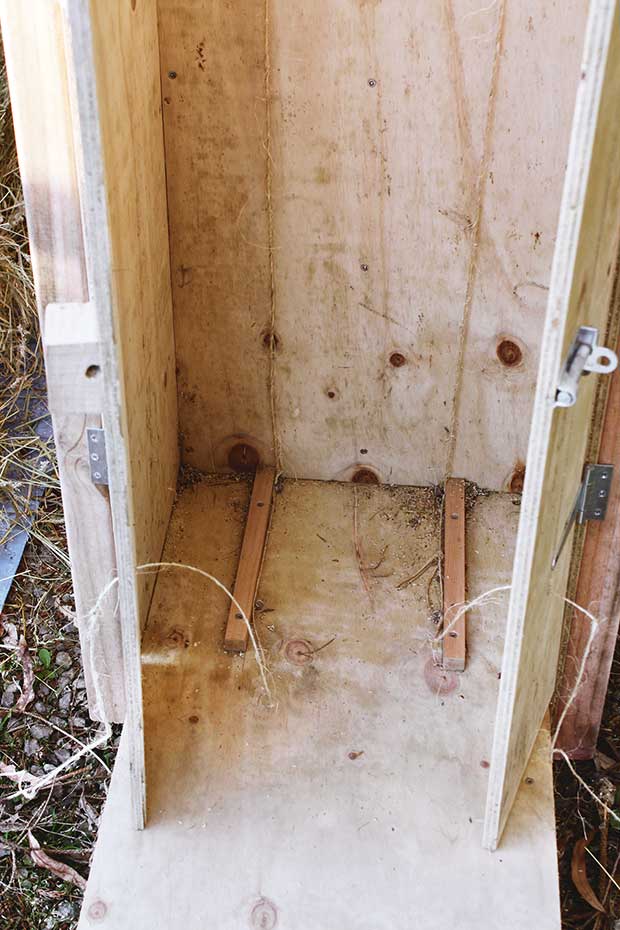
5. The floor of the loading box has two pieces of wood fixed to it, with eye hooks sitting next to them. These are the runners that hold your baling twine in place. Fix these into the floor of your baler and screw in the eye hooks so the side of the eye is touching the wood.
5a.
5a. Fix two eye hooks to the outside back of the baler. Position a little way down from the top, and keep them in line with the floor runners. These hold the baler twine ends during loading.
6.
6. You’ll notice the doors have slits cut into them. These should be at the same distance as the floor runners. The slits allow you to tie the baler twine.
I discovered two things from this experience:
• human beings can improvise if they need to;
• the woodworking adage of ‘measure twice, cut once’ is correct and it’s better to pay attention the first time around.
STEP THREE: GATHER AND BALE YOUR HAY
At this point, you will definitely need help from others. This is also when you learn why the original article had the word ‘cumbersome’ in its list of disadvantages. Carrying the baler down to the field is a two-person job.
You also discover an oversight in the plans. Robust carrying handles would be a good addition.
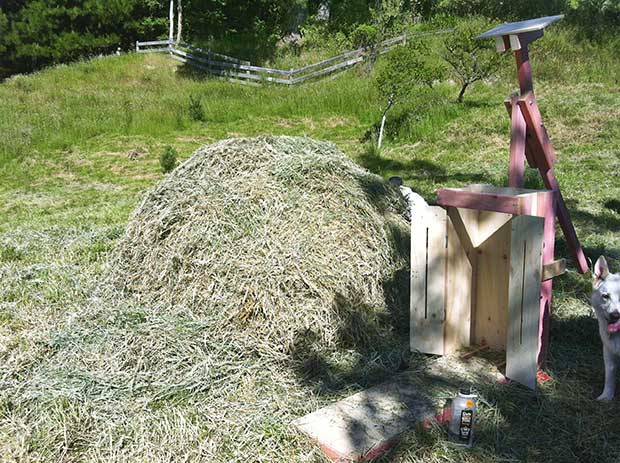
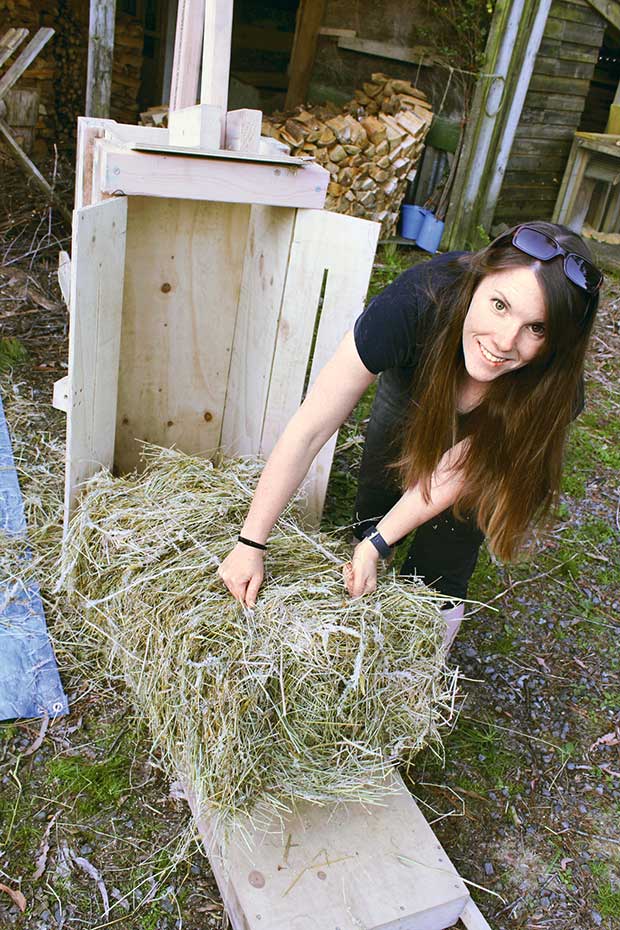
Gathering the hay was relatively straightforward. We used a large blue tarpaulin. One person was on pitchfork duties and two more people dragged the tarpaulin. We also had three dogs to disrupt the process and liberally scatter hay. It’s a great team-building exercise. You’ll quickly find yourself with a large haystack on a tarpaulin that you can slide easily around your field. Move the hay to sit beside the baler.
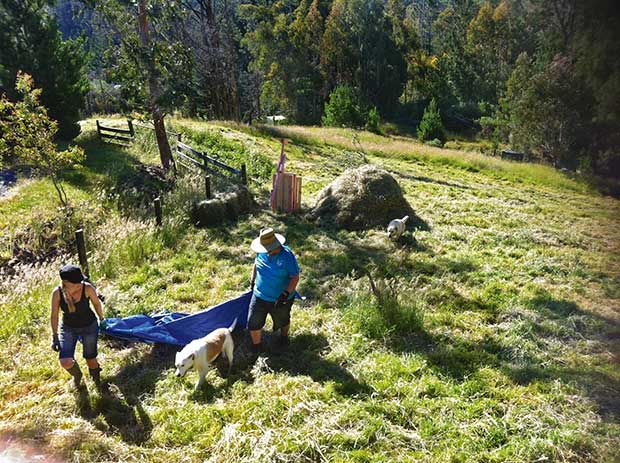
Katie-Jane Bowen, Beanie, Andrew Ward and Jack heading out to pick up more hay.
HOW TO USE THE BALER
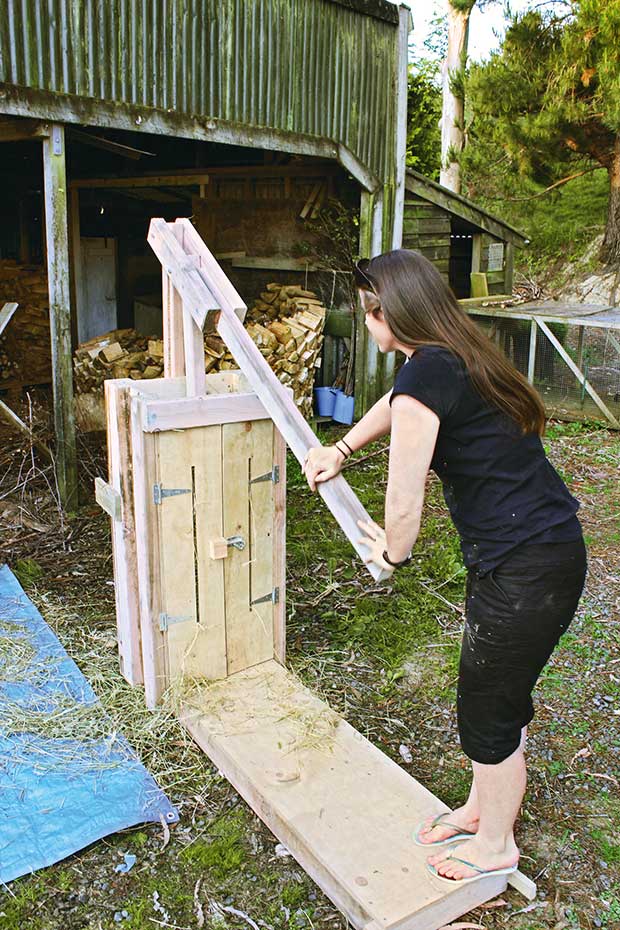
This is an important health and safety message. If you take the easy option of resting the compression platform on top of the loading box frame, it can slip off and you’ll get a nasty bump on the head.
The moving parts can trap a finger, so be careful when you’re using it. We worked out that folding the level arm right back (as seen in the image below) after making each bale was worth the few seconds to avoid it falling and causing injuries.

1
1. Set up the hay baler with twine, ready for loading. Put a loop of twine over the eye hook on the back of the baler and run it down the inside of the loading box. Run it under the gap between the eye hooks and wooden strip on the baler floor. Don’t put it through the eye hooks - it needs to go between them and the wooden strip (see 1A, below).

1a.
This allows the twine to slip out once you’ve tightened it. If you run it through the eye hook, you’ll just fix your finished bale to the floor of the box and have to start again.
2.
2. Bring the end of the twine through the slot in the front door, leaving enough length to tie it off later.
3.
3. Repeat these steps on the other side so you have two lines of twine set up.
4.
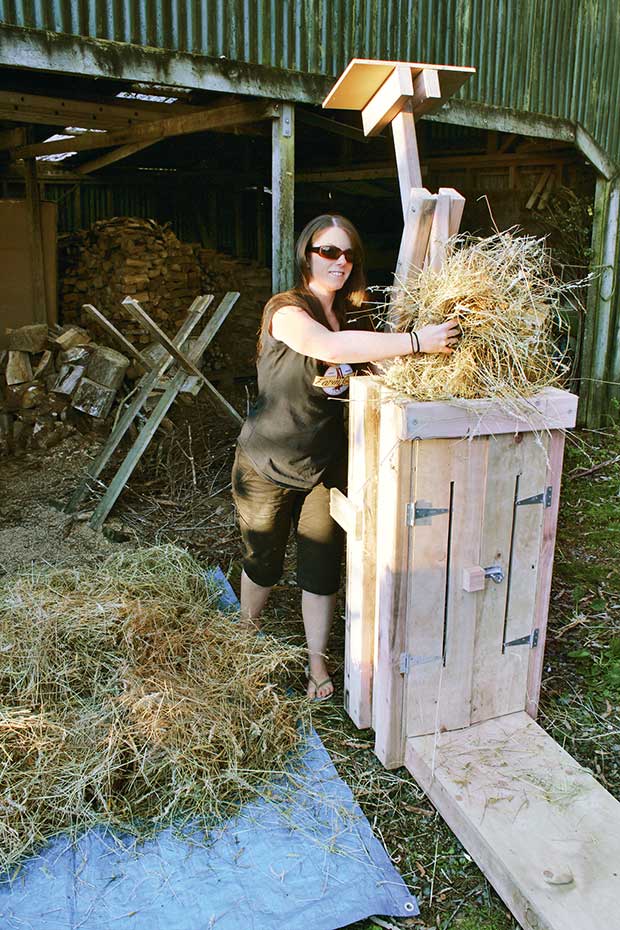
4. Close and bolt the door, then fill the baler with hay from your haystack. Press it down by hand after each addition of hay. Keep loading until the hay sits level with the top of the baler box.
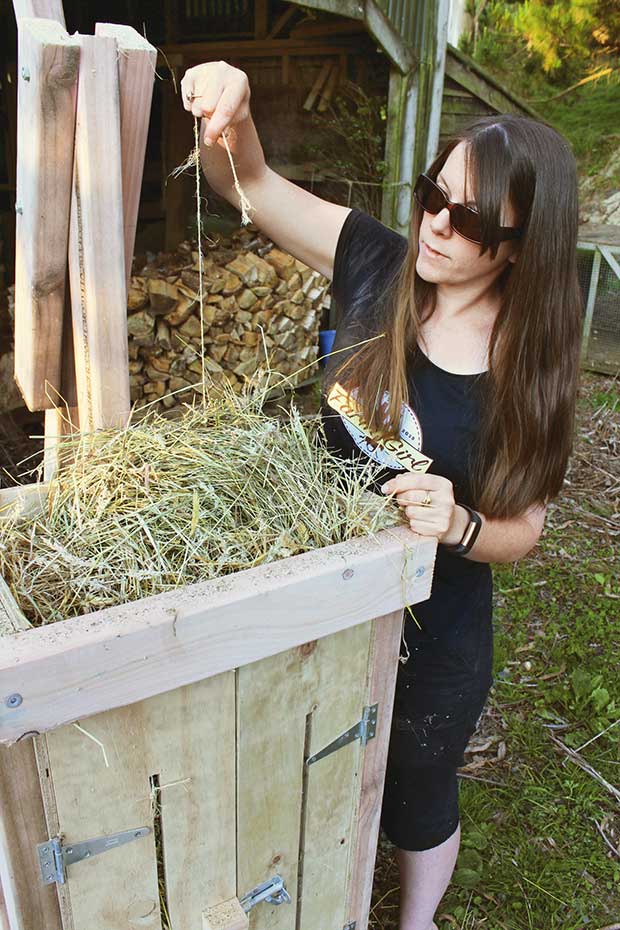
5.
5. Take your bailer twine off the eye hook at the back. Bring it over the top of the hay in the baler.

5a.
Find the top of the slit in the front door and bring the twine through, ready for tying off in a moment (see 5A).
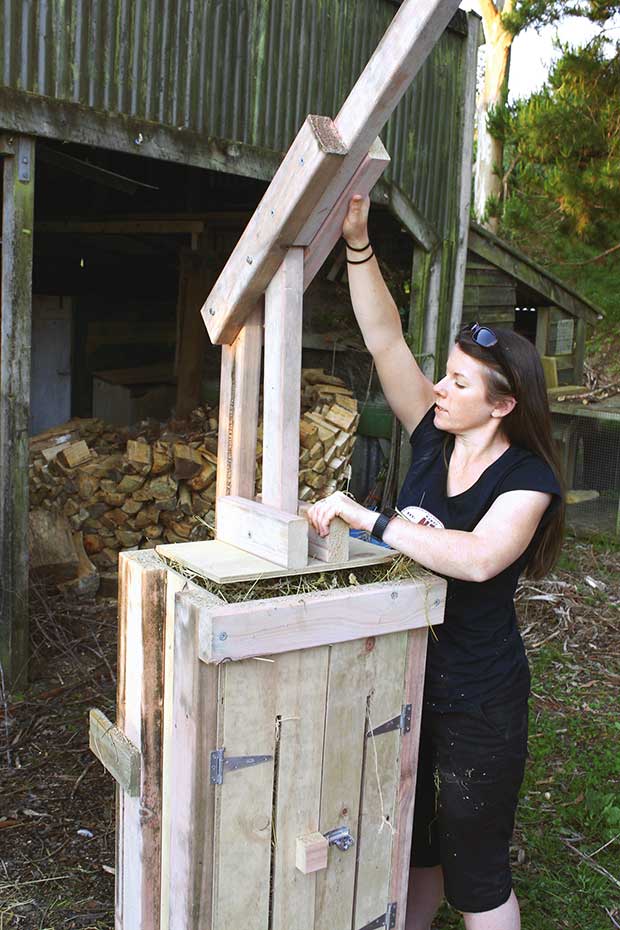
6.
6. Carefully bring the baler arm over and insert the flat plate into the top space of the baler.
7.
7. Pull down on the arm to compress the hay inside into a tight bale. If, like me, you opt for the two-door model, you might need to put your foot in front of the door to stop it bursting open. This is a good reminder to accurately follow the plans next time.

8.
8. Once the hay is compressed, take the ends of the baler twine from the top and bottom of each slot and tie them up tightly together. This holds your compressed bale together when you open the door. If you break the twine, you’ll have to unload the baler, re-set it and start again.
9.
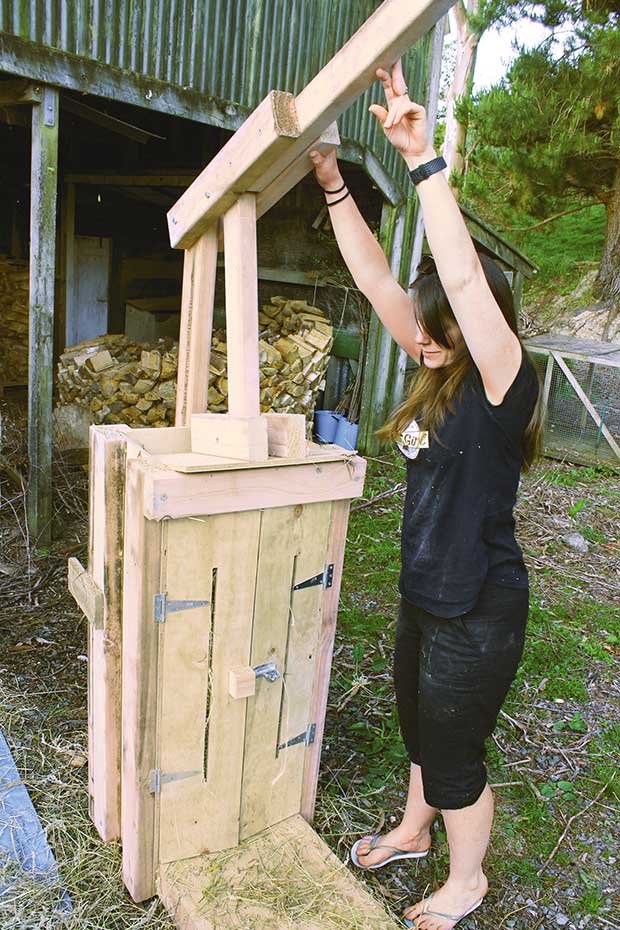
9. Lift up the compression arm so it’s clear of the baler. You can rest it on the top, but it’s better to put it back in the ‘safe’ position ready to start again.
10.
10. Open the front door to reveal your compressed hay bale.
11.
11. Give the twine a tug and pull forward your compressed bale onto the loading platform. Practice makes perfect. Our processing time for the first bale was 12 minutes. We got to a final production-line-efficiency time of under five minutes to re-set, fill, tie, compress, unload and stack a neatly-packed bale.
We’re not going to win any awards for farm efficiency compared to machine baling, but it does have some advantages:
• it’s an oddly entertaining way to spend a day with friends in a field;
• it’s low-cost if you live on a block that is too small to warrant investment in machinery or a contractor, or not accessible for a tractor;
• it gives you a satisfying sense of achievement as you innovate new ways to speed up your production line process;
• I got a lot fitter.
Our productivity could have been increased further by not having dogs barrelling through the haystack. However, that would have cut back on a lot of the fun. My knee-length grass problem was turned into around 40 bales of hay. You do need to factor in the cost of beers and a barbecue to thank the raking, moving and baling team. Hay baling by hand is an experience to remember.
