Recipe: Ruth Pretty’s Honey & Whiskey-Glazed Ham on the Bone
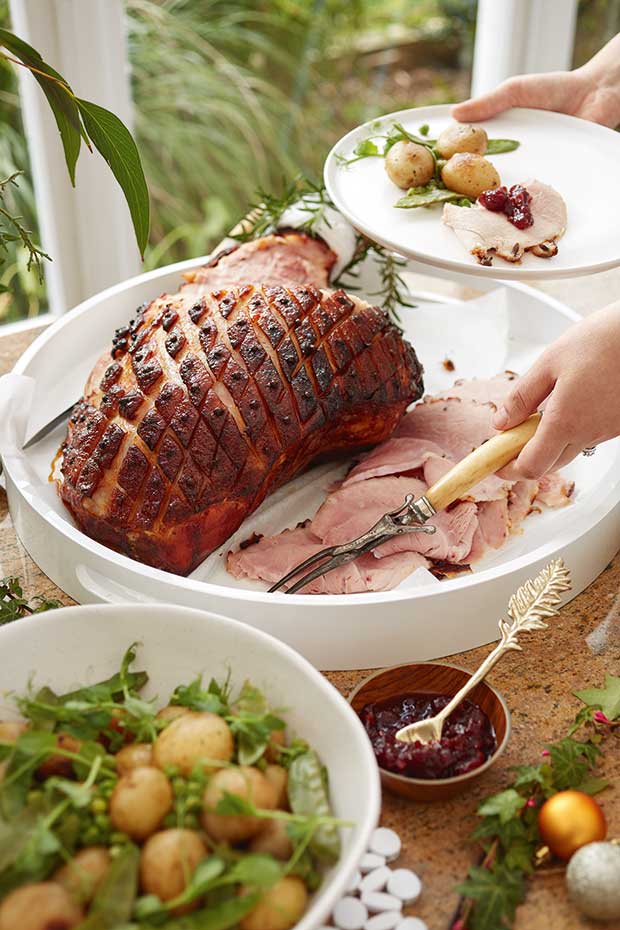
Be merry with this show-stopping ham designed to delight (and satiate) family and friends.
Words & recipe: Ruth Pretty Styling & photos: Carolyn Robertson
Serves 30 to 50
INGREDIENTS
1 large ham on the bone
50-60 whole cloves
For the glaze:
100g honey
50g dijon mustard
100g muscovado sugar
25ml whiskey
METHOD
Heat the oven to 150°C. Line base and sides of a roasting tray with foil, then lightly grease with baking spray.
To remove the skin from the ham, make an incision in the skin and place one hand between skin and fat. Wiggle your hand around to loosen and remove the skin, leaving the fat on the ham.
Cut diagonal lines (less than 1cm deep) in the fat at 3cm intervals and insert whole cloves into the intersecting “diamonds”. Set the ham on the prepared tray and wrap the exposed shank bone in lightly greased foil.
Stir the glaze ingredients together over low heat until dissolved. Brush generously over the ham, retaining some for basting. Bake for two hours, basting every 30 minutes until the ham is hot all the way through (60°C on a thermometer).
If the glaze starts to look very dark during cooking, loosely cover the top of the ham with lightly greased foil.
Once done, remove ham from the heat, cover loosely and rest. To serve, remove foil from shank and set ham on a large platter before carving.
Tip: Ham can be chopped or sliced and frozen for cold-weather pasta and soup dishes. The ham bone also can be frozen, then used for stock or pea and ham soup.
COOK’S TIP
To carve your ham elegantly, begin at the shank end of the leg and slice ham vertically down to the ham bone using a long, sharp and sturdy knife. This way, each slice will have some glaze on it. When complete, turn ham over and continue vertical slicing.
Wrap the ham on the bone in a ham bag (or a few soft tea towels) and keep in the fridge for up to 2 to 3 weeks. For more extended storage, soak fabric in salted water, wring and then wrap.
