DIY upcycling project: A fast and fancy facelift for old furniture using adhesive transfers
You don’t need any artistic skill to upcycle homewares with chalk paint and decorative adhesive transfers, as Lynda Hallinan discovers.
Project by Lynda Hallinan Photos: Sally Tagg and Lynda Hallinan
I’m well-known for my growing, harvesting and preserving skills, so people often assume that I must also be a domestic goddess in the arts and crafts department. Sadly, they are mistaken: I can’t knit, stitch, sketch or paint anything that even vaguely resembles a still-life. Luckily, you don’t need to channel your inner Monet or Picasso to get creative with self-adhesive decor transfers.
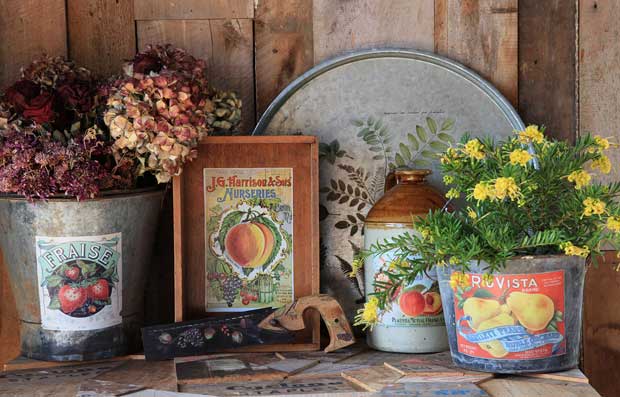
Unlike fiddly decoupage, intricate stencils or hand-carved potato prints (mine always turn out like psychologist’s ink splots), modern decor transfers offer instant gratification for interiors addicts hoping to pretty things up on the homefront. During the lockdown, I’ve been keeping myself busy adding these decorative flourishes to everything from my seed storage boxes to metal buckets and even an old denim jacket.
I was introduced to decor transfers at a workshop run by my go-getting neighbour Alyson Wilcock, who runs Zelda’s Daughter Painting Studio from a large converted barn on her lifestyle block. Like so many small business owners, 2020 has turned into an absolute annus horribilis for Alyson. She’s a travel agent who, until the covid-19 pandemic struck, specialised in bespoke tours to India, where she sourced exotic furniture and homewares for her other side-hustle, Pushkar Trading Company. But with all her tours and shopping trips to India cancelled for the foreseeable future, she’s pivoted to sharing her creative passion for giving new life to old furniture using Annie Sloan chalk paints, antique waxes, metallic foils and Redesign decor transfers.
These rub-on transfers are easy to apply - just snip, stick, peel and seal - and come in dozens of designs to suit contemporary and vintage objects. Check out Alyson’s range here. For this DIY project, I used the Redesign transfer design ‘Sunflower Farms’ to upcycle a retro magazine rack that I found at South Auckland’s mecca for magpies, the Zero Waste recycling depot at Waiuku Junktion (“where old goods get respect”).
Perhaps you have a sentimental attachment to a piece of hand-me-down furniture that no longer suits your interior style, a tarnished silver tray that’s just gathering dust in a side cupboard or a rusty saw or spade in your garden shed that could be painted and repurposed as a piece of garden art. Trust me, applying transfers is easy and addictive. Just like the Pringles jingle, once you pop, you can’t stop.
![]()
MATERIALS
You will need:
* An orbital sander and 80-grit sanding discs, or an 80-grit sanding block
* Annie Sloan Chalk Paint
* Paintbrushes
* Redesign Decor Transfers
* Scissors
* furniture wax, lacquer or non-yellowing varnish
Preparation:
Redesign Decor Transfers can be applied to any clean, flat, dust-free surface, including metal, glass and wood. It’s a good idea to prepare the surface by lightly sanding it first. If applying transfers to a rough surface, you might like to spray or paint it with a clear coat of polyurethane prior to applying the transfer, so it sticks down and stays in place without lifting back off.
![]()
Step 1: Paint
Apply a base coat of chalk paint. I used Annie Sloan in pale brown ‘Coco’. When the base coat is dry, apply a second top coat and set aside to fully dry overnight. When dry, roughly sand the outer edges of your chosen object to create a distressed or shabby chic effect.
![]()
Step 2: Apply transfer
Decor transfers are sold in large sheets or sections that can be rubbed on as a single design, layered over themselves or cut into individual pieces. The transfers are sandwiched between a clear acetate sheet (on top) and a non-stick protective sheet (underneath). When you are ready to apply the transfers, remove the non-stick sheet and press the design out flat. Starting at the edges of the design, rub firmly with a plastic or wooden transfer tool (such as an ice cream stick) while gently peeling off the acetate sheet.
![]()
Step 3: Seal
To protect the decorative transfer from scratches and scrapes, apply a coat of wax, lacquer or non-yellowing varnish. I used Annie Sloan Chalk Paint Lacquer or an aerosol polyurethane, such as Rust-oleum Painter’s Touch Clear Satin from hardware stores.
![]()
MORE UPCYCLING IDEAS
From junk to treasure: Foxton’s DIY queen Mel Cowan turns heads with her elegant upcycled creations
