How to set up an irrigation system in your garden PLUS how to use olla terracotta pots
Sick of losing plants because you forgot to water them? Make life easier by installing irrigation.
Words and images: Jane Wrigglesworth
Tired of lugging the hose around the garden each day? Consider installing an irrigation system. Whether it’s a basic setup or a sophisticated network of tubes and emitters, once installed, it’s simply a matter of turning on the tap, and the task of watering your garden is done.
Alternatively, set up a timer, and you need to do nothing at all. It doesn’t have to cost a fortune, either. There is something to suit every budget, and every situation – pots, vertical gardens, garden beds and lawns.
Ready-made starter kits, available at DIY and garden stores, are suitable for small jobs, but these typically have a few fittings only, so additions may be required. The different tubes, emitters and other accessories can be confusing but get a handle on what each is for and it’s quite simple.
WATER PRESSURE
First work out your water pressure. You must know this to determine how many emitters your system can handle. It’s easy. Grab a standard nine-litre bucket and a stopwatch (use your smartphone), hold the bucket under the garden tap (where you want to set up your irrigation system) and time how long it takes to fill the bucket (make sure the tap is on full). This will allow you to work out litres per minute (LPM) to calculate the flow rate.
The simple equation to work out the flow rate is: 60 ÷ (seconds it takes to fill the bucket) x (bucket size in litres) = flow rate.
When I did this myself, my bucket filled in 17 seconds. So my equation was 60 ÷ 17 x 9 = 31.7. More on this later.
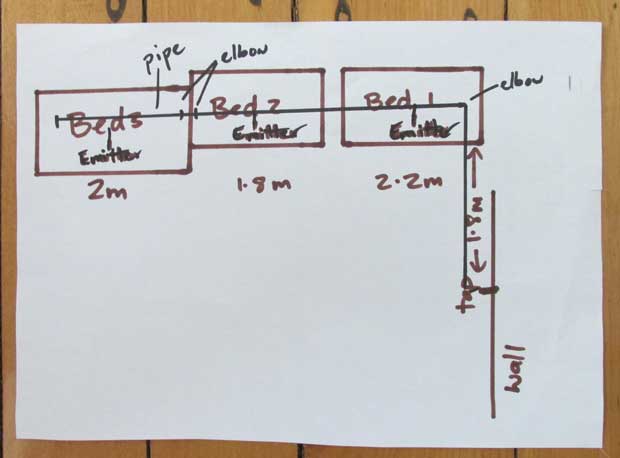
DRAW A SIMPLE DIAGRAM
Make a rough sketch of the area you want to irrigate. Write the measurements of the garden beds or garden area that need irrigating. Include shrubs, trees, vegetables and so on to work out how many emitters are needed. Make a note on the diagram where your tap is situated.
Now work out how much tubing is needed, and how many emitters, based on your sketch. Aim for the least number of emitters as possible – just enough to cover the area you need (and to save money if you’re on a budget).
To know your pipes: 13mm pipe is ideal for garden beds; 4mm pipe feeds off the main pipe and runs water to specific plants or pots; 19mm piping is suitable for lawns.
Next, add up the flow rate of all your emitters (drippers, pop-ups, micro-sprayers and so on) and check to see that your LPM water source (remember, mine is 31.7) can handle them all. The back of the pack will state the LPM.
I’ve used three micro-sprayers, which have a 360-degree spray and a 2.2-metre radius. Each micro spray has an LPM of 0.06. That equals 0.18LPM, so it’s way under the 31.7LMP. Later, I can add onto the system, if desired.
How to install your system
MATERIALS
A 2-, 3- or 4-way tap adaptor.
Tap-to-pipe connector for 13mm pipe.
13mm pipe.
Utility knife (to cut the pipe).
13mm ratchet clamps (one for each joint).
90-degree elbow connectors (how many depends on your design – your design may need a T-bar instead).
13mm saddle clamp with nails (if running pipe along deck or wall).
13mm ridged pipe stakes.
13mm end plug.
Irrigation multi-tool (for pricking holes in a pipe).
360-degree micro sprayers.
INSTRUCTIONS
Depending on how many directions your irrigation piping is going, attach a 2-, 3- or 4-way adaptor to your tap. My irrigation project is small and goes in one direction only, so I need a 2-way adaptor – one outlet for my irrigation and one for other uses, like filling a bucket or attaching a garden hose.
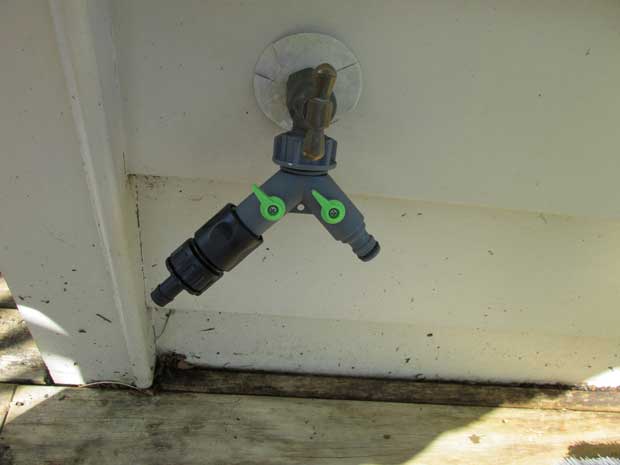
Step 1. Fit the tap-to-pipe connector to your tap.

Step 2. If your tap is a reasonable distance from the ground, measure the distance from the tap to the ground and cut a length of pipe to this measurement. Thread a 13mm ratchet clamp onto one end, then attach the pipe to the connector. Slide up the clamp and tighten it. If you find the pipe is difficult to attach, dip it in warm water to soften it.
As my tap is fairly close to the decking and the pipe is going in only one direction, I did not need to cut mine here (to add a 90-degree elbow connector). If you did cut yours (for most projects you will probably need to), you will need a 90-degree elbow connector (or a T-bar) at ground level to prevent kinks. If you have two beds side by side with a gap in between, you may need to use a T-bar instead.
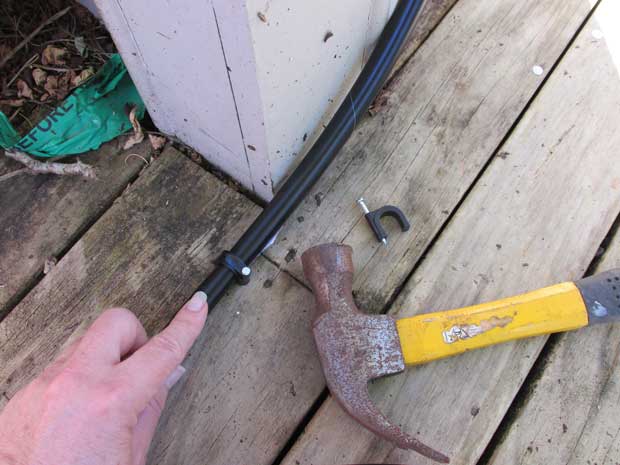
Step 3. If running along a deck, use 13mm saddle clamps with nails to fix the tube to the deck.

Step 4. If you cut your pipe, attach the next length of pipe to the elbow, inserting another ratchet clamp first, and tighten the clamp.
Where my tube comes off the deck onto my first garden bed, I inserted my first 90-degree elbow here (with clamps on each side).
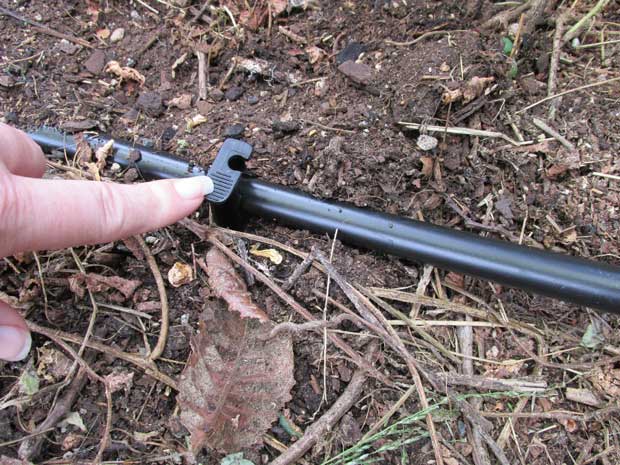
Step 5. Run your pipe along the bed and use 13mm ridged pipe stakes as you go to keep the pipe in place. (photo: step5)
Step 6. Run water through the pipe before you attach any emitters to ensure there are no blockages.
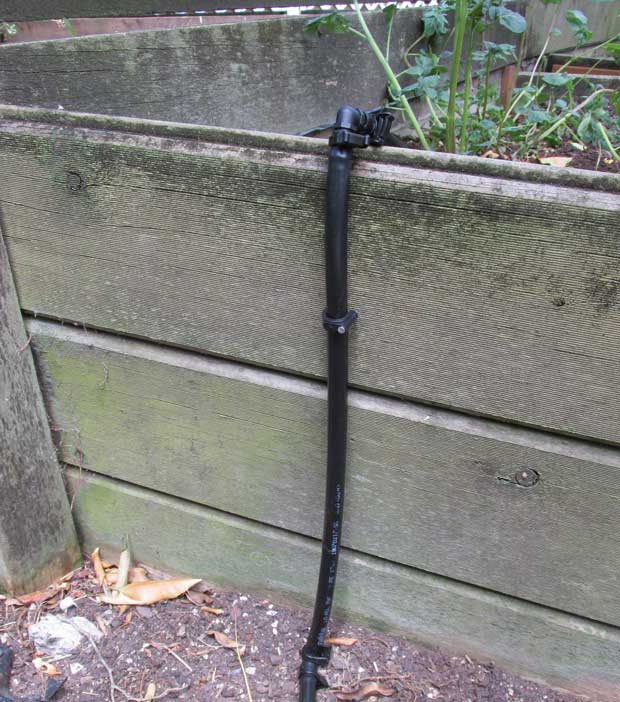
Step 7. As there is a drop to my second garden bed from my first garden bed, I attached a 90-degree elbow connector, with clamps, and nailed a saddle clamp to the side of the first bed. I used a 90-degree elbow connector at the base as well.

Step 8. When you come to the end of your irrigation tube, thread a 13mm ratchet clamp onto the end of the pipe, tighten it, then insert the end plug.
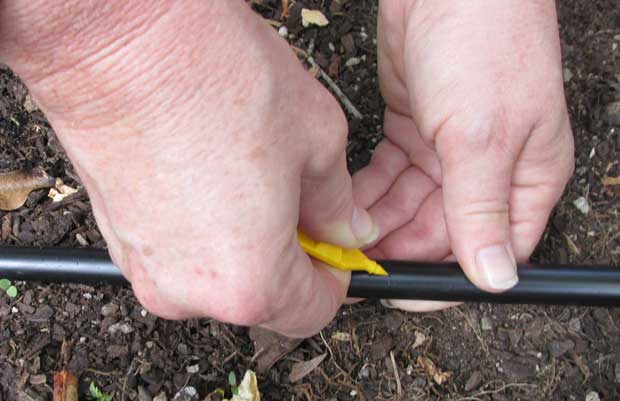
Step 9. When the pipe is set up, use an irrigation multi-tool to prick holes where you want your emitters to be.
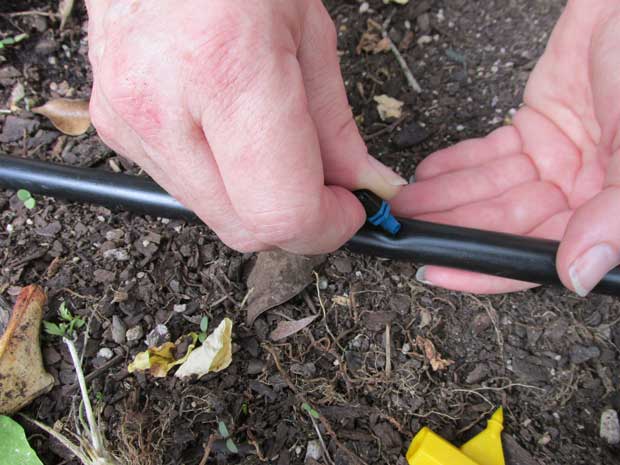
Step 10. Insert emitters tightly. (It’s easiest to insert them as though you are screwing them in.) I’m using 360-degree micro sprayers. There are different types – such as 180-degree or 90-degree micro sprayers. Drippers are also available.
A BEGINNER’S GUIDE TO OLLA POTS
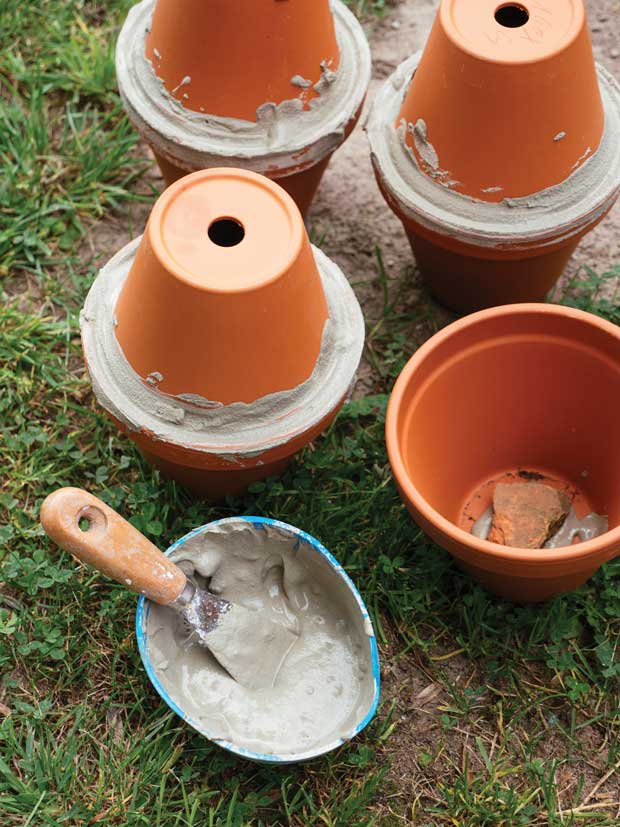
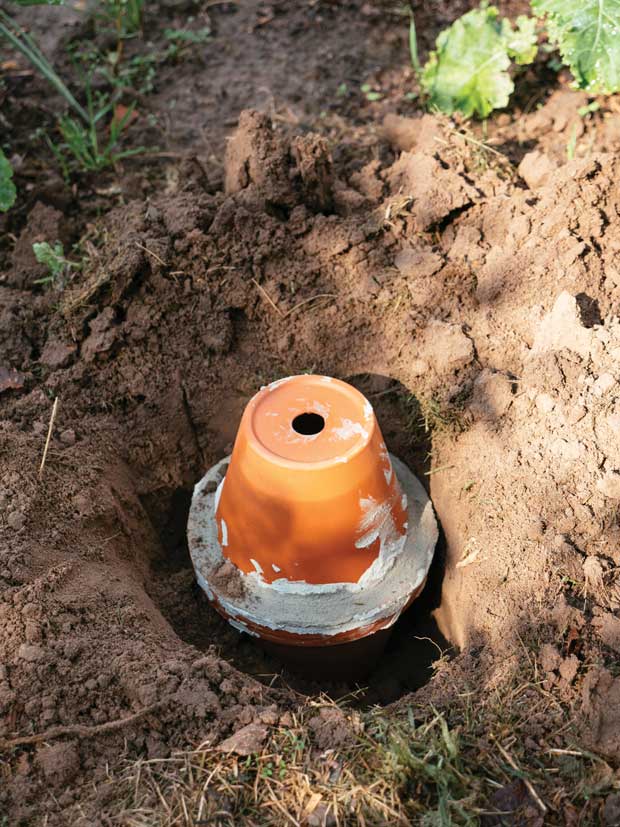
Ollas are an ancient method of irrigating and can be adapted to your plot. Ollas (pronounced “oy-yahs”) are unglazed clay pots with a fat bottom and narrow neck, much like a large decanter. They are submerged in the soil, with only their necks exposed. Each olla is filled with water, which gradually seeps into the surrounding soil to the benefit of nearby plant roots.
mediasculp/Alamy Stock Photo
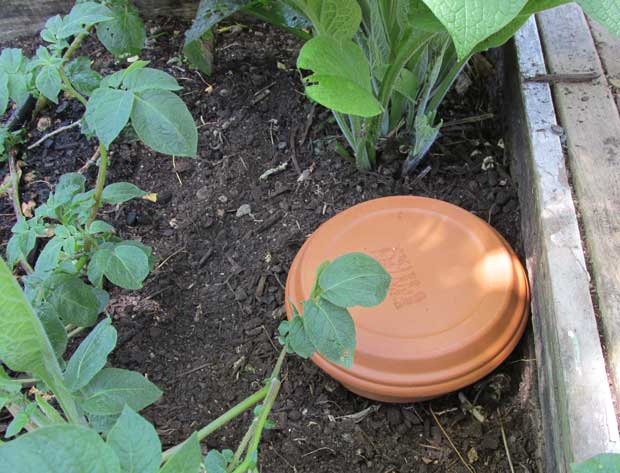
You can make a version of the olla pot with an unglazed terracotta pot. Plug up the hole at the base of the planter with a rubber bung, or use sticky tack. Bury the pot in the soil, leaving the rim slightly above the soil surface.
mediasculp/Alamy Stock Photo
Fill with water, then place a pot saucer on top. Done. Top up with water as needed.
MORE HERE
How to set up a rainwater collection system in a small garden
Water conservation 101: How rainwater and greywater systems work
