The many pros of supporting the local grain economy
Why purchasing from other local growers will help your community food systems become as sufficient and diverse as possible.
Words and photos: Angela Clifford
Despite the magazine category I’ve found myself in, I must admit we’re not fully committed to self-sufficiency on The Food Farm. We consume plenty of food that we don’t, or can’t grow here. I can’t imagine a life without coffee and chocolate, yet I don’t see us producing them in North Canterbury any time soon. I’m not sure my children would have made it this far without store-bought avocados and bananas, and our “fast food” here is dahl, made from split red lentils which we don’t grow. We also have a taste for hummus, and complete self-sufficiency would mean restricting ourselves to a cupful just a few times a year made from my meagre chickpea crop – without the tahini from the sesame seeds of course. I’m not sure if it’s even hummus without the tahini.
As global supply chains get more strained and complicated this spring, we’re faced with the possibility that we may not have the unfettered access to imported grains and seeds as we did previously.
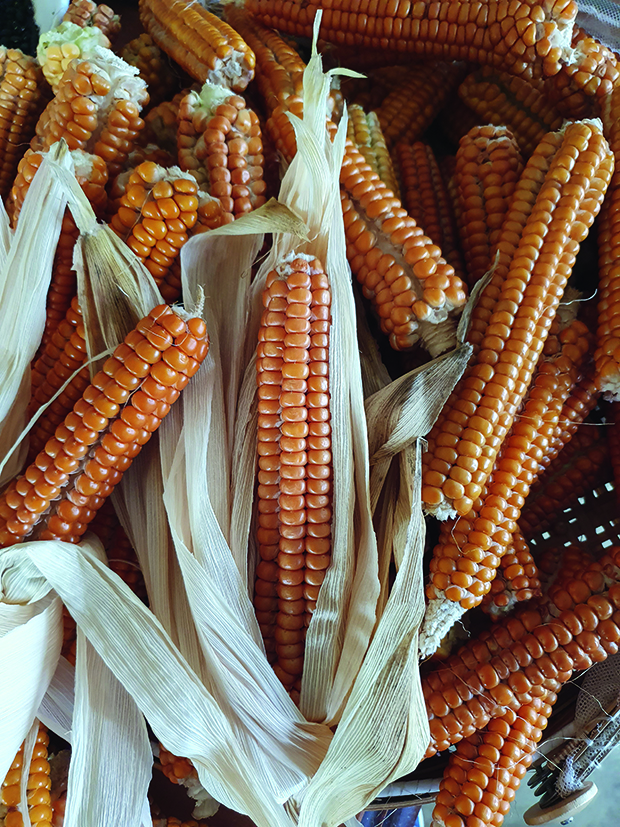
8 row flint corn grown on The Food Farm.
And yes, we import most of our grains and our eating seeds here in Aotearoa. While some farmers grow these crops domestically, seed and grain production depends on vast and machine-intensive arable systems, virtually impossible for a small farm like mine to replicate.
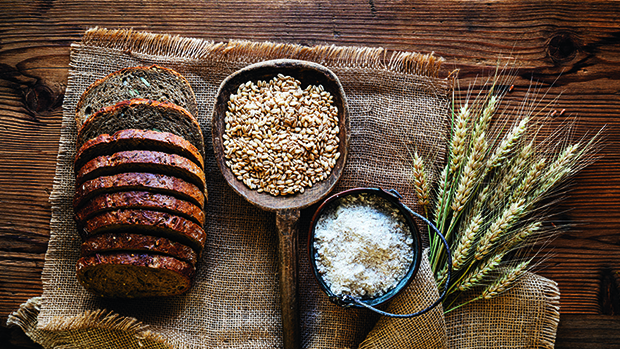
So what’s the solution? As my permaculture practice has developed over the years, I’ve come to appreciate community sufficiency, rather than self-sufficiency. While self-sufficiency is empowering, it implies someone is growing for themselves with little help or interaction with others. Community sufficiency, on the other hand, is about community members growing food to sustain one another. It results in a much more abundant and delicious diversity of offerings, and makes our land seem a more integrated part of the natural world. Fortunately for us, community sufficiency in Canterbury involves plenty of grains. It’s the biggest grain and seed growing region in New Zealand and we have some incredibly innovative farmers growing everything from lentils to buckwheat, quinoa, hemp, wheat, barley, oats, rye and spelt. As part of my work with Eat New Zealand, we’re working on a local grain economy for Aotearoa.
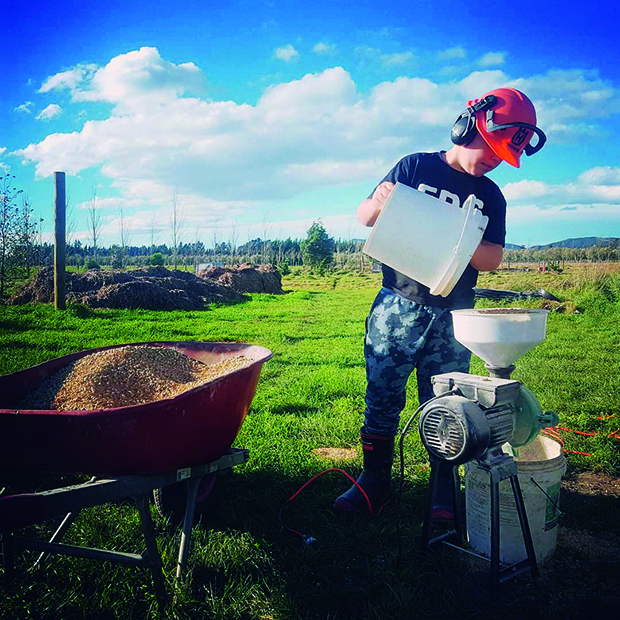
My son Flynn grinding grains in the feed mill.
We aim to help connect local customers with local growers, which will contribute significantly to your community sufficiency no matter where you are in the country.
At The Food Farm, I’ve always felt blessed to have biodynamic growers and millers, Milmore Downs, just up the road from our place in Scargill. We order our flour directly from them in 10kg bags, which allows us to contribute to our community sufficiency. There’s also Minchins Milling in Sheffield, which supplies many New Zealand bakers with flour from locally-grown grains.
However, we’re still keen to try and produce some grains on our farm, and maize or dried corn is our best bet. We can hand-harvest it and it stores well.
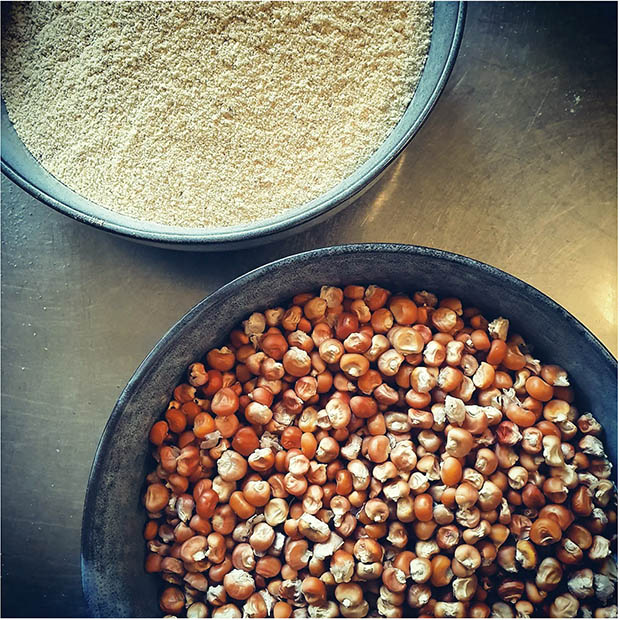
As discussed in my previous column for NZ Lifestyle Block, we use Kaanga Ma or white maize to make masa flour for tortillas, but we also grow eight row flint corn. This corn is ground and used for polenta. We grind it in the feed grinder, sieve it and use the cornmeal in all sorts of dishes. But recently we’ve been adding it to the Milmore Downs flour to make a sourdough Portuguese bread called Broa. It’s lovely, chewy and doesn’t taste too “corny”.
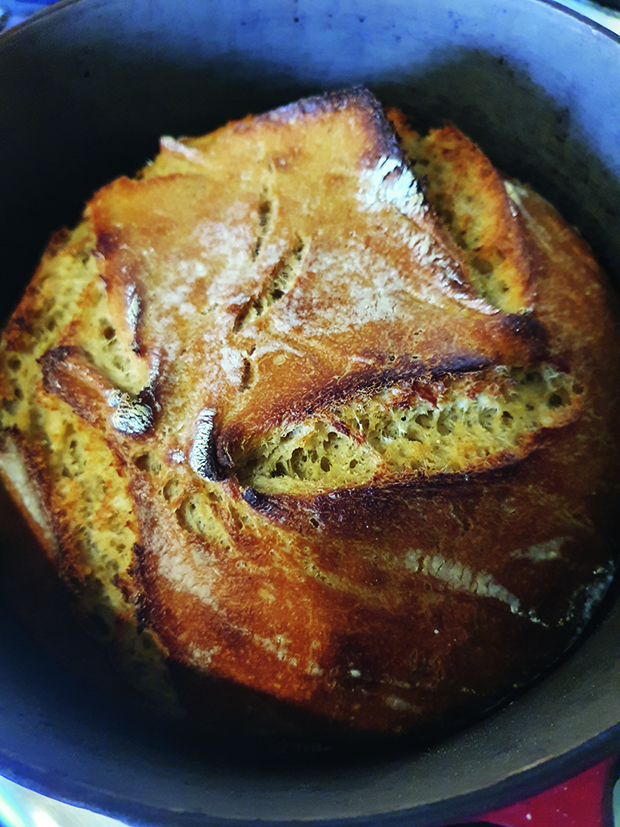
The Food Farm Broa
This recipe is adapted to be a sourdough bread from the original recipe in A Kitchen in Burgundy by Anne Willan.
INGREDIENTS
175g cornmeal or polenta
25g table salt
750ml boiling water
100g active sourdough starter
2 tbsp of sunflower oil
700g white flour (we use Milmore Downs’ white flour with a touch of Bran)
A cast iron camp oven or Le Creuset type pot with lid to cook the bread in
Corn or rice flour for dusting
METHOD
Put the cornmeal in a bowl, stir in the salt, add the boiling water and whisk vigorously to remove any lumps. Leave to cool. When at 37°C or below, fold in the starter and oil. In the mixing bowl of a stand mixer, measure the flour and then add the wet ingredients. Mix with a dough hook for five minutes. If you don’t use a stand mixer, bring it together with a spoon and then knead by hand for five to ten minutes.
Select a large bowl that can accommodate the dough at least doubling in size. Oil the bowl and the underside of a plate well to stop the dough sticking. Tip the dough into the bowl and then tip the ball of dough upside down so it is now covered in oil. Fold into a tidy shape and cover the bowl with the oiled plate. Put in a warm room for 18 to 24 hrs until it’s doubled in size.
The next stage is made easier with a bread proofing basket, but I use a piece of cotton sheet. Select a bowl for the final proofing that is smaller than the cast iron pot you’re going to bake the bread in. Line the clean bowl with the cloth and then dust liberally with corn or rice flour to prevent sticking. Gently tip the ball of dough into the centre of the bowl lined with the floured cloth. The dough should plop into the base of the bowl more or less in shape. A dough scraper is handy to help release the dough neatly.
Put the camp oven in your electric oven and turn to full heat and allow approximately an hour for everything to get really hot. Putting the bowl of dough on top of the stove will assist the final rise. Spread a cloth over the top of the dough to prevent drying out.
To finish, carefully remove the pot from the hot oven with mitts and take off the lid. Do everything on a heat proof surface as it will be extremely hot! Take the bowl of dough and pin the floured-cloth onto the edges of the bowl with your fingers and tip the dough into the centre of the camp oven. It will start smoking as soon as it hits and the flour will burn – that’s OK. Slash the top of the bread with a very sharp knife to assist the rise.
Cover with the lid and bake in the oven at full heat for 30 minutes, then drop to 200°C and remove the lid for another 30 minutes. Remove the bread and check the bake – it should be well coloured and sound hollow when tapped on the bottom. Leave to cool well on a rack.
